Let's Build A Bouzouki (Page 4b)
Mandolin Type Neck Attachment
Last Modified - December 2017 (©Alan Dunwell 2009)
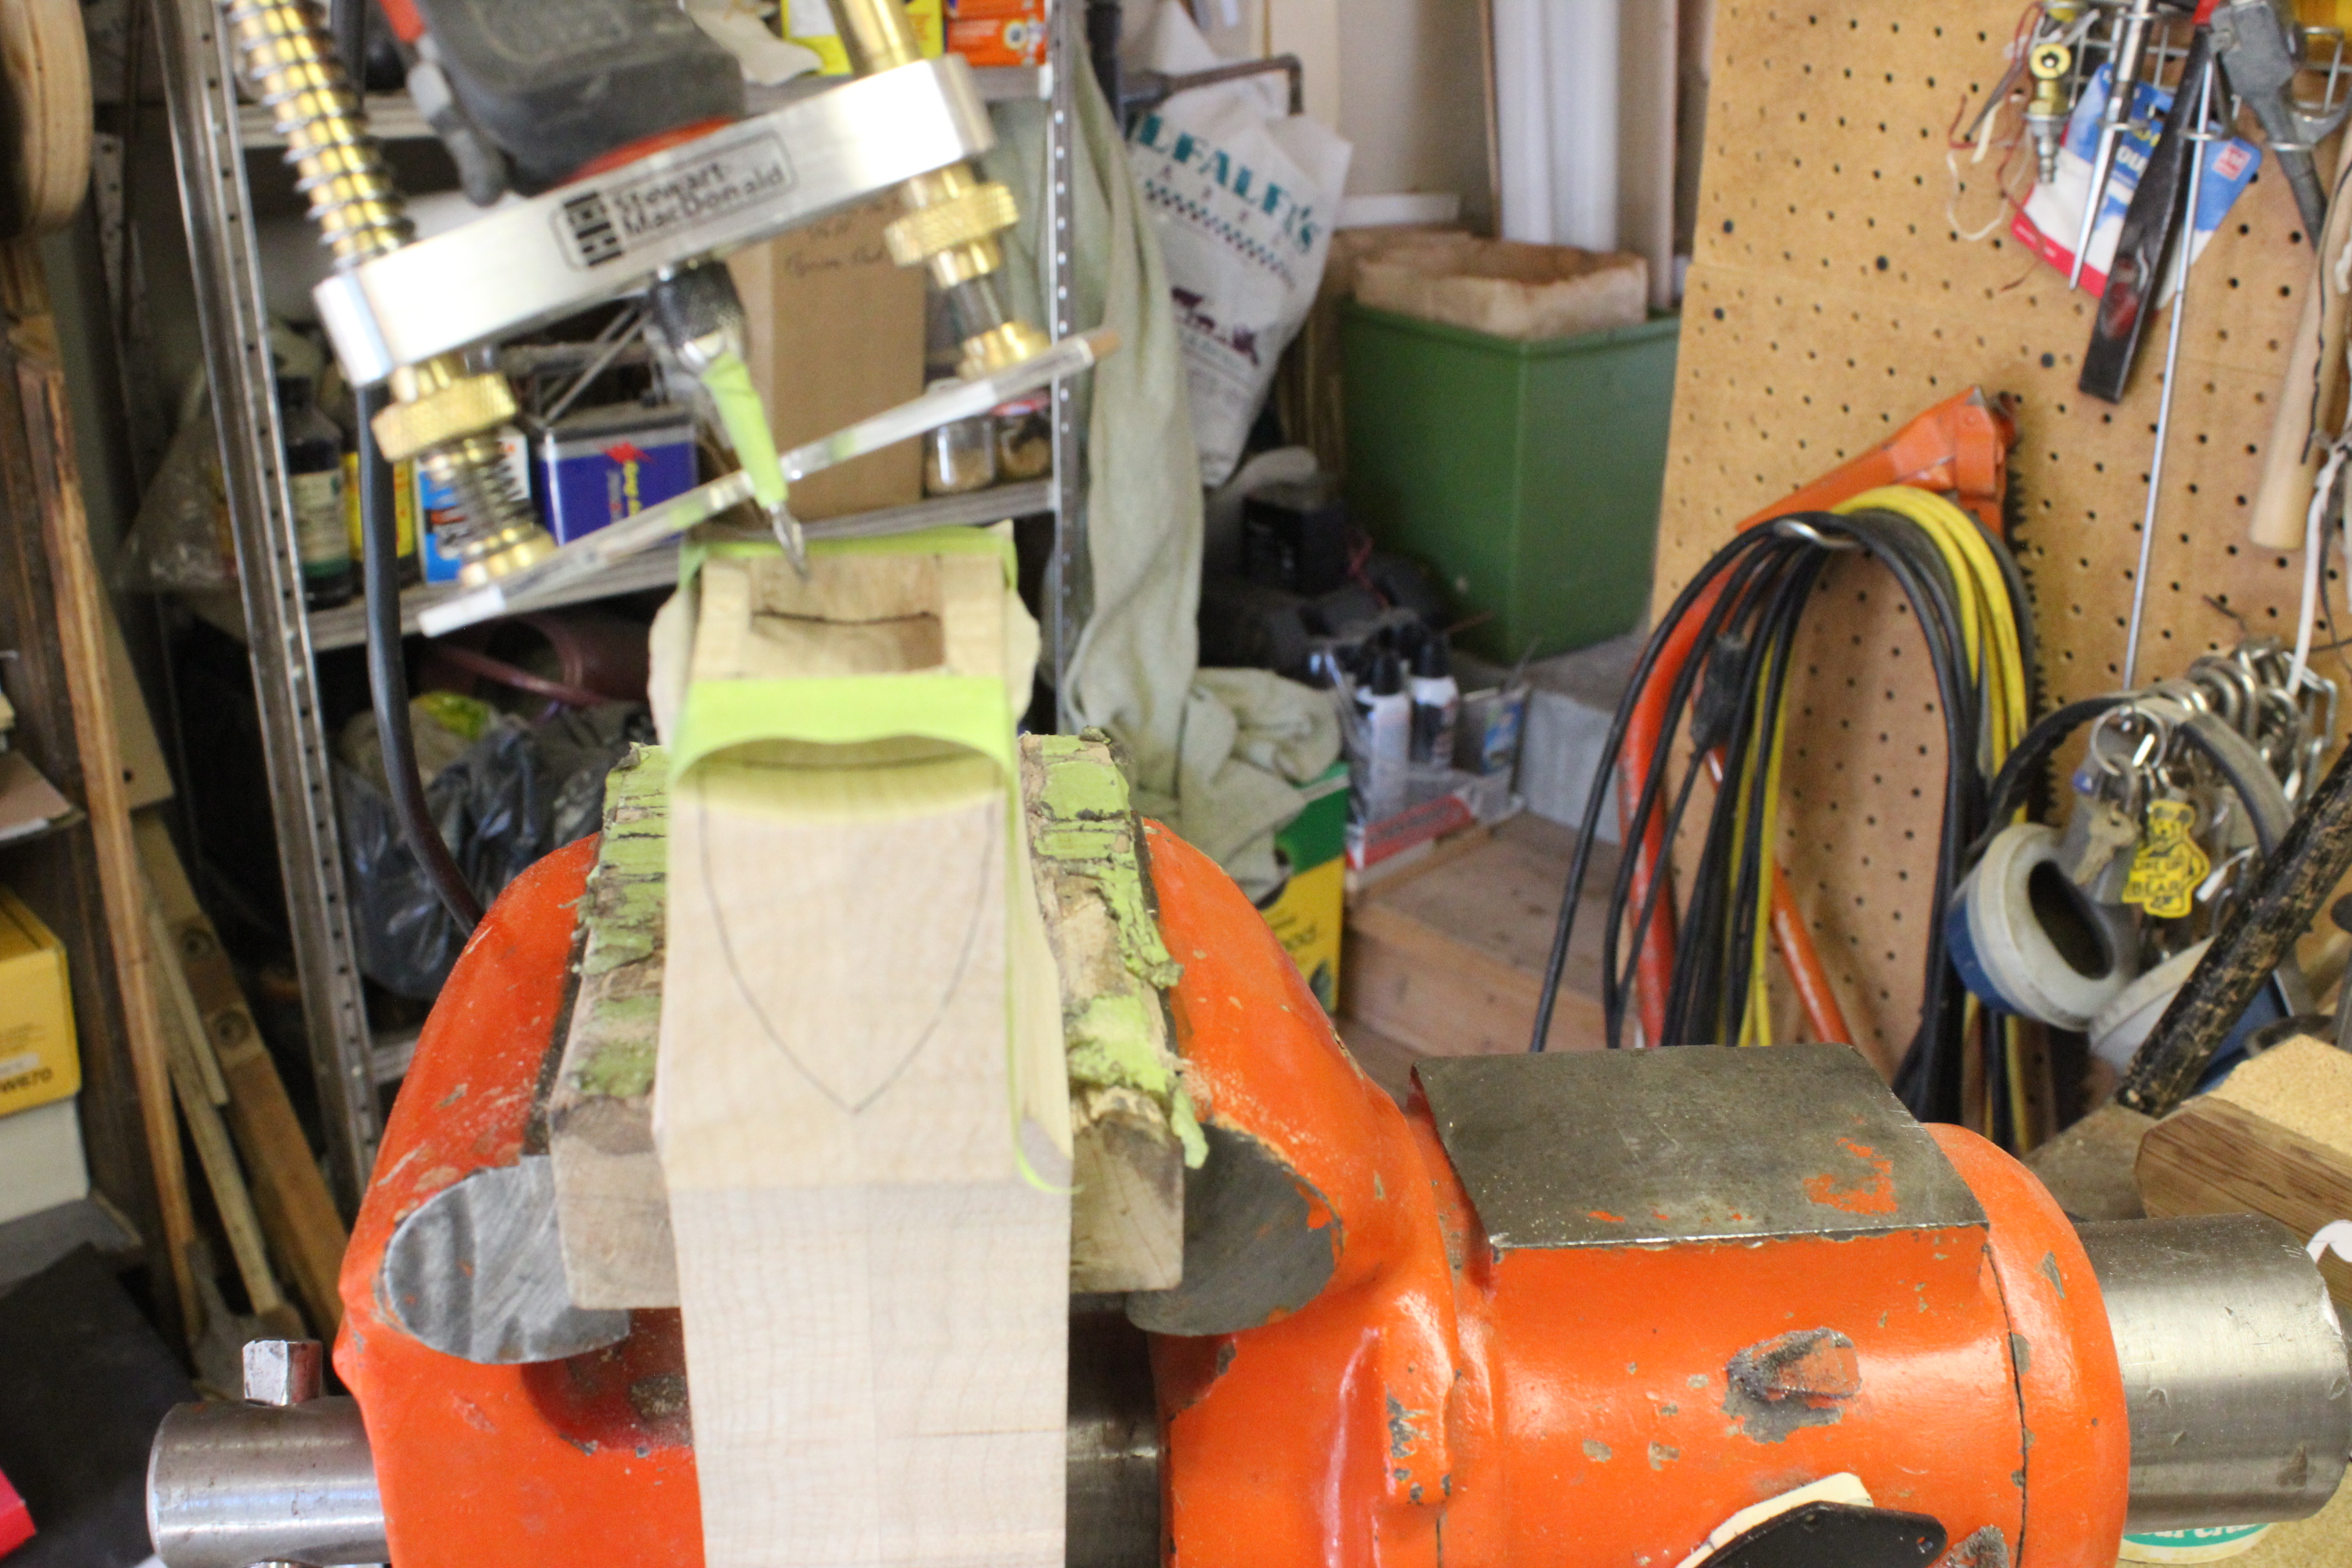
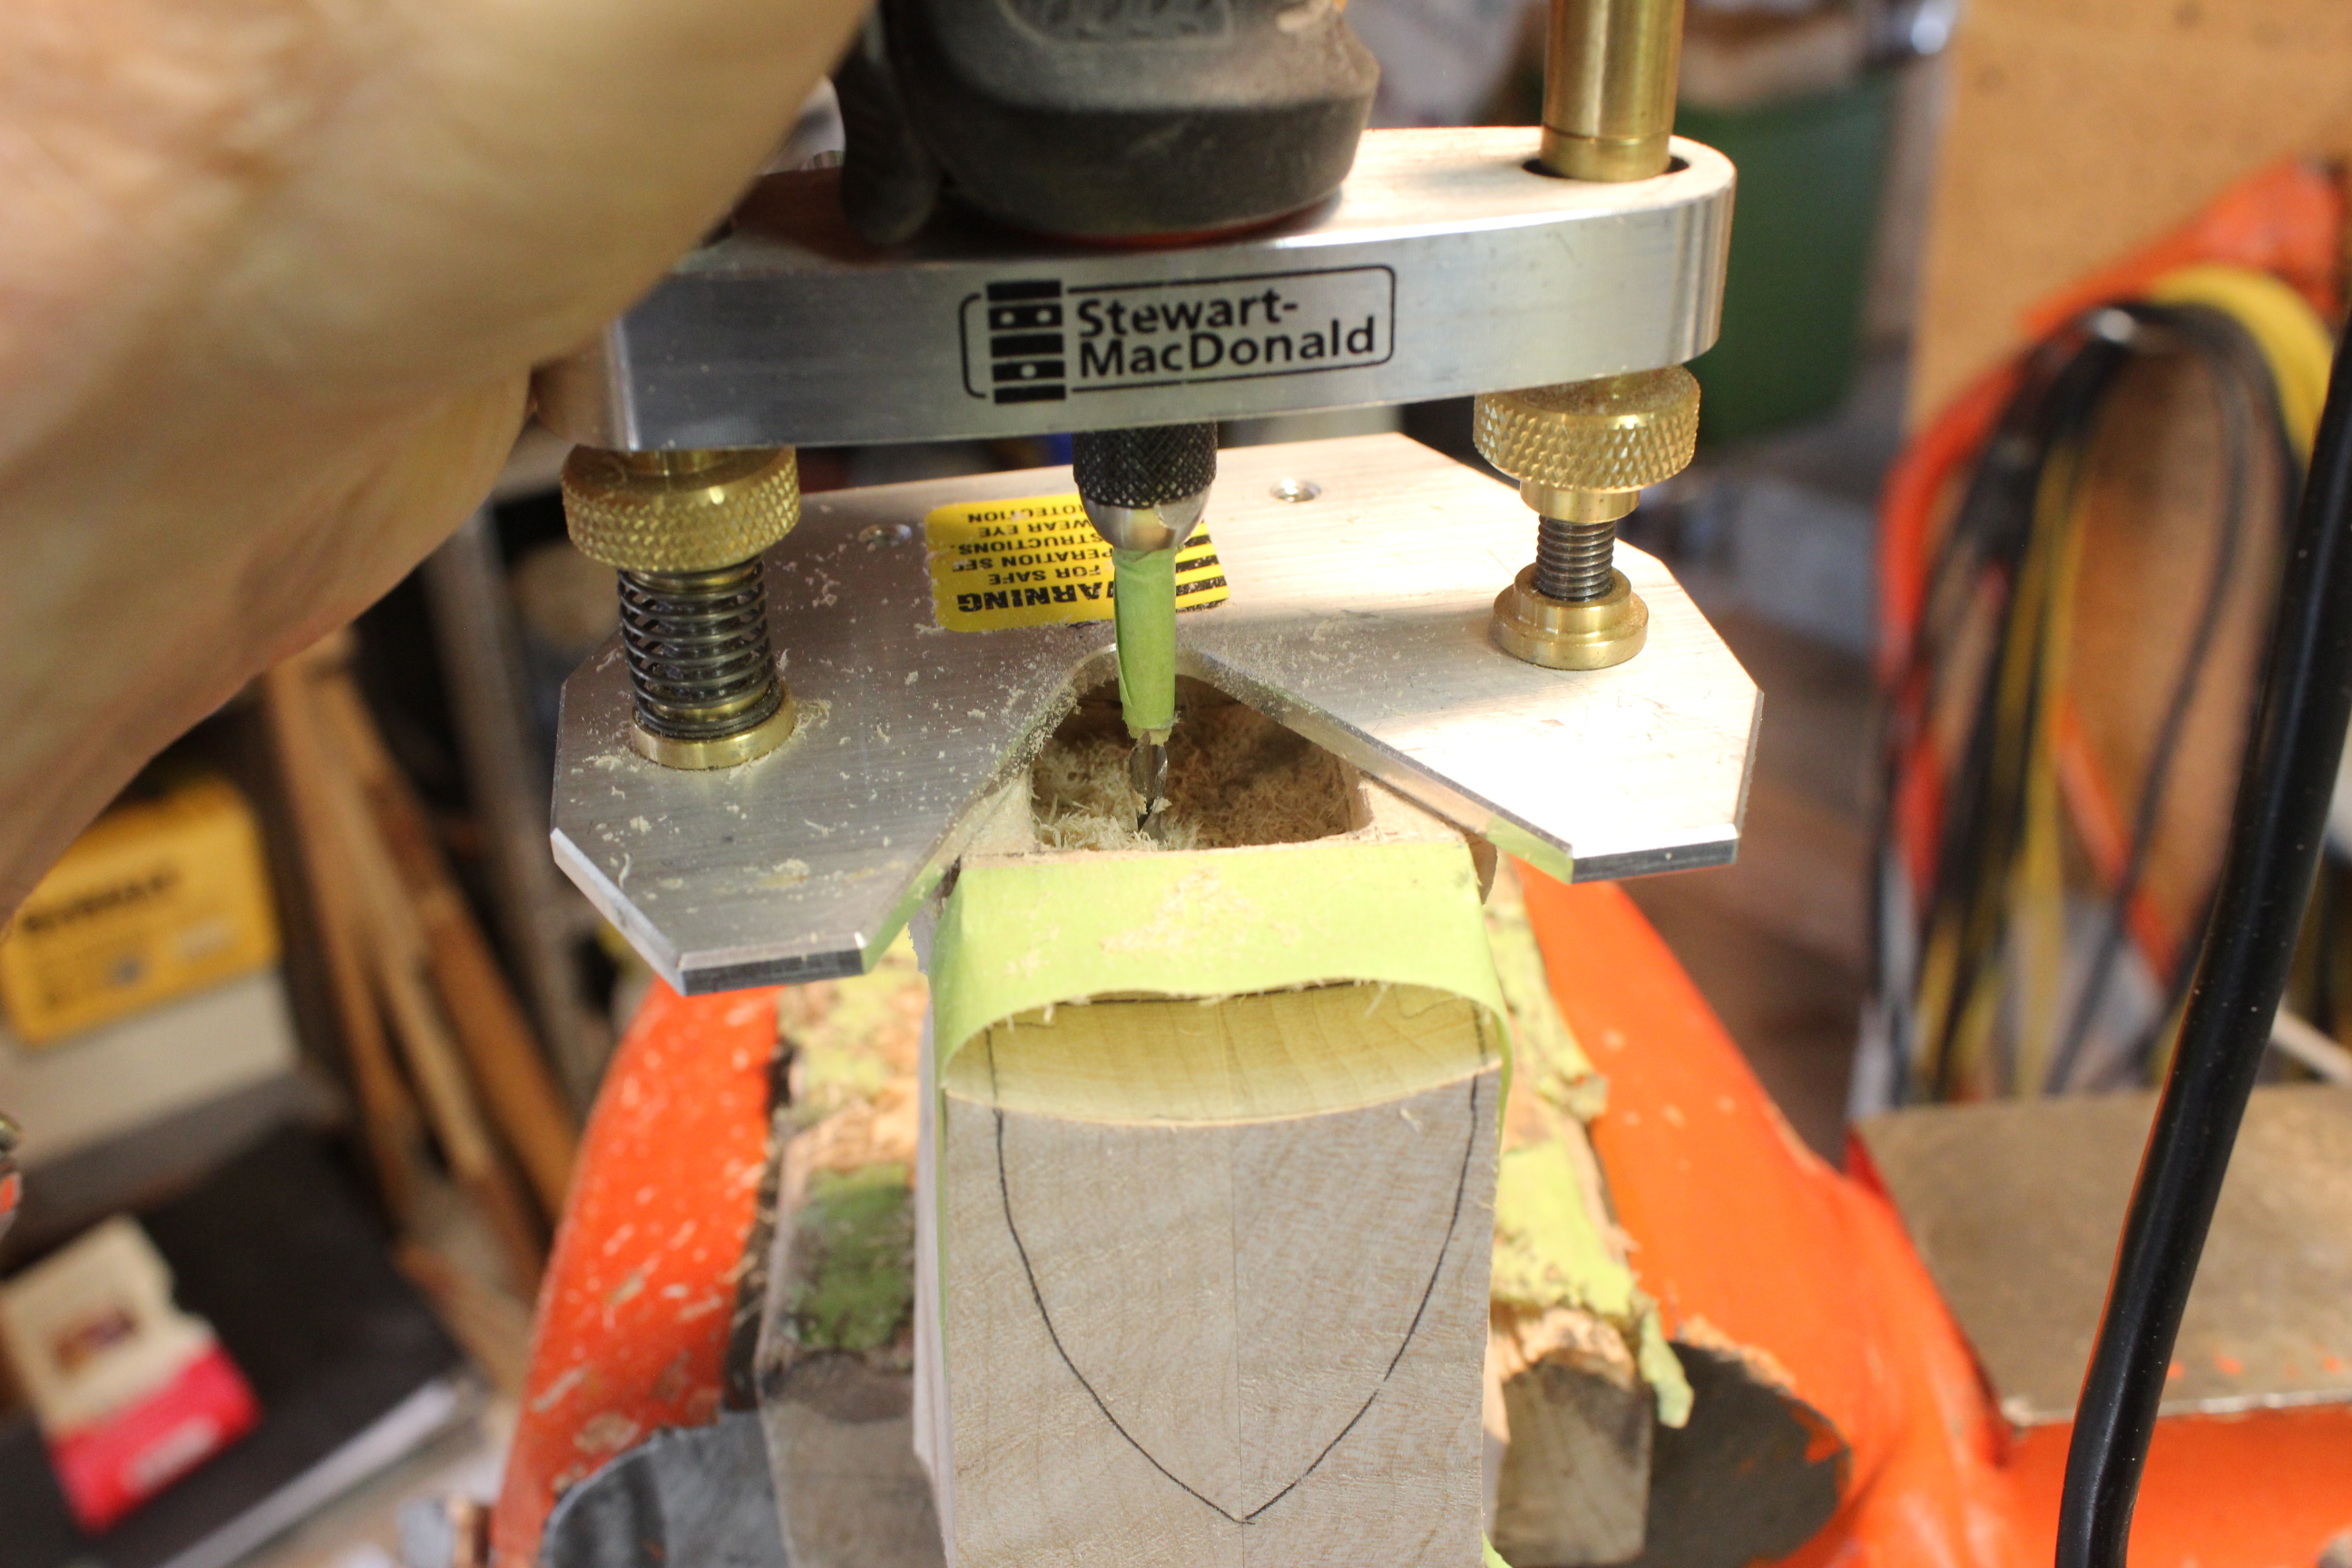
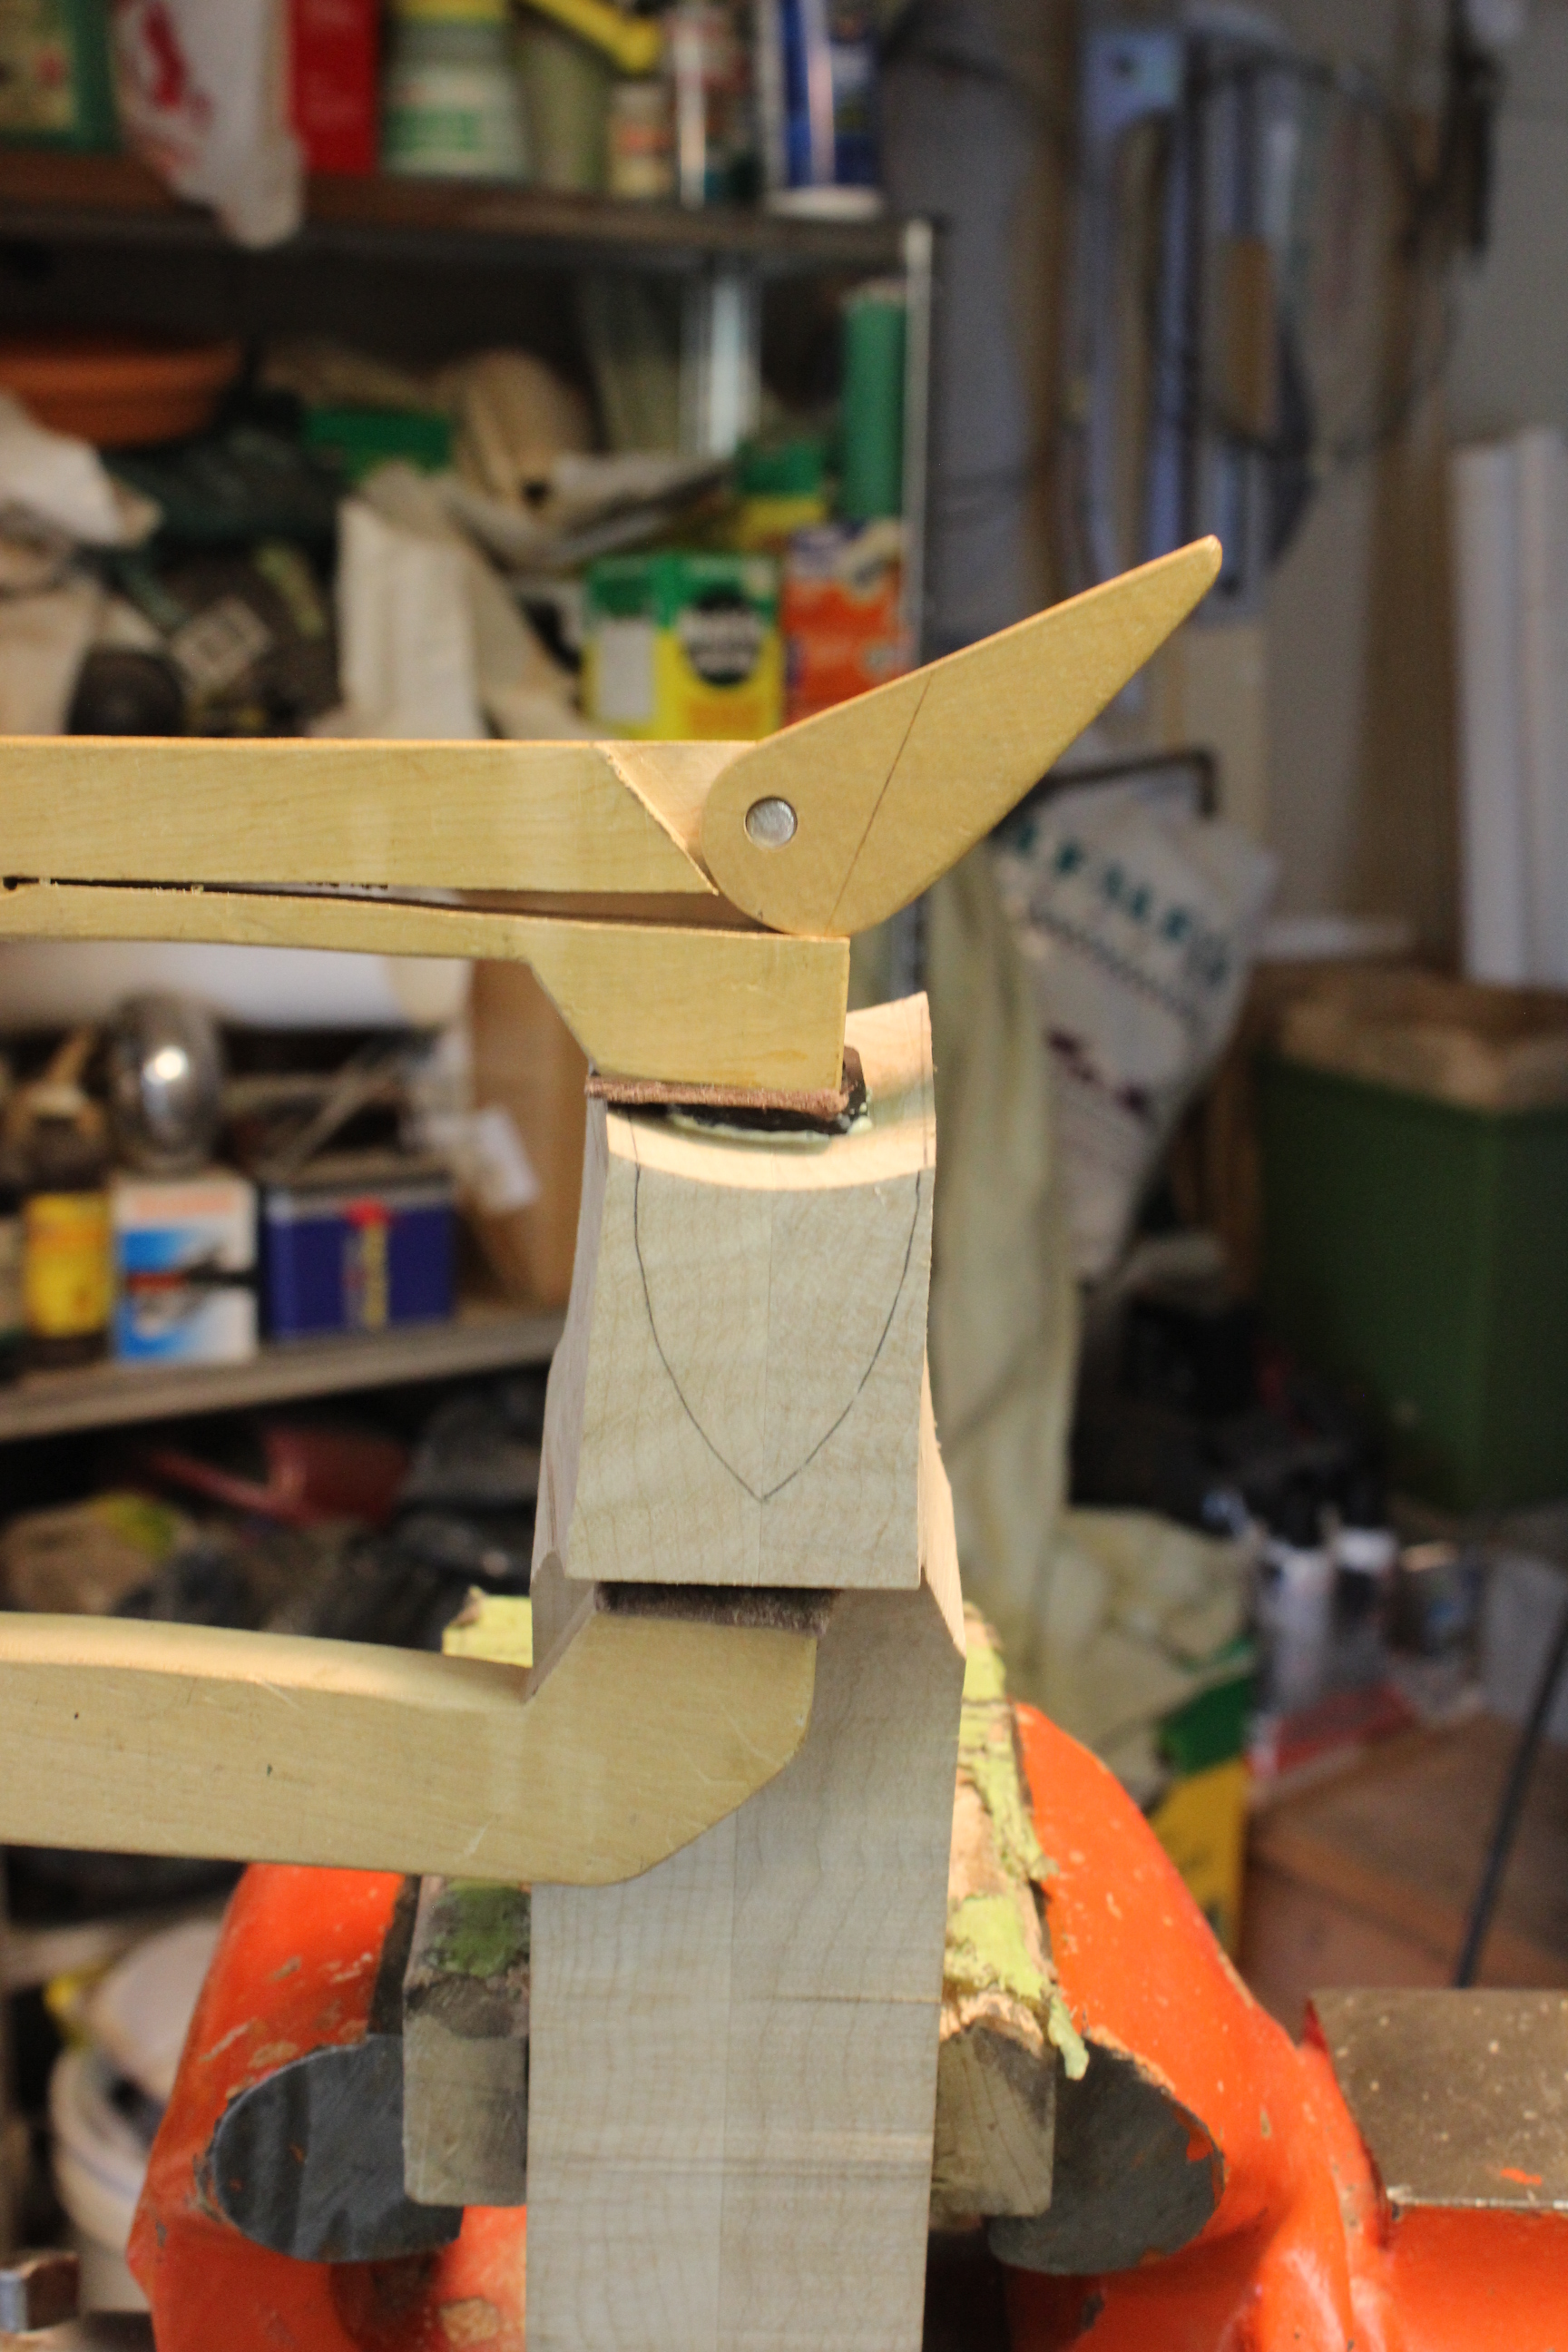
In Page 4 I show a method of neck attachment that uses a simple shim of wood for adjusting the alignment of the neck/body for side to side and vertical alignment. That is a fairly simple method. Here I show a way using the same method I use for my mandolins. This preserves the rounded headblock end of the body and fits the neck to it with a concave curvature that also sets the neck position side to side and the back angle for the bridge height. A bit tricky to do by hand, so I use the same jig I use for the mandolins that keys on truss rod slot to center the neck and is tilt adjustable. This jig goes onto my oscillation spindle sander with a large diameter aluminum drum covered with sandpaper on the spindle. I don't show the exact details of these jigs here but I'm willing to share is anyone is interested. The drum would need to be made on a lathe so some machine shop charges if you don't have one. The tilt jig can be made by hand.
Here I am skipping all the neck prep steps and focusing only on the neck/body attachment steps. Further, these necks are being attached to arch top bouzoukis, the settings are a bit different than shown for the flat top instrument for the rest of this Toot.
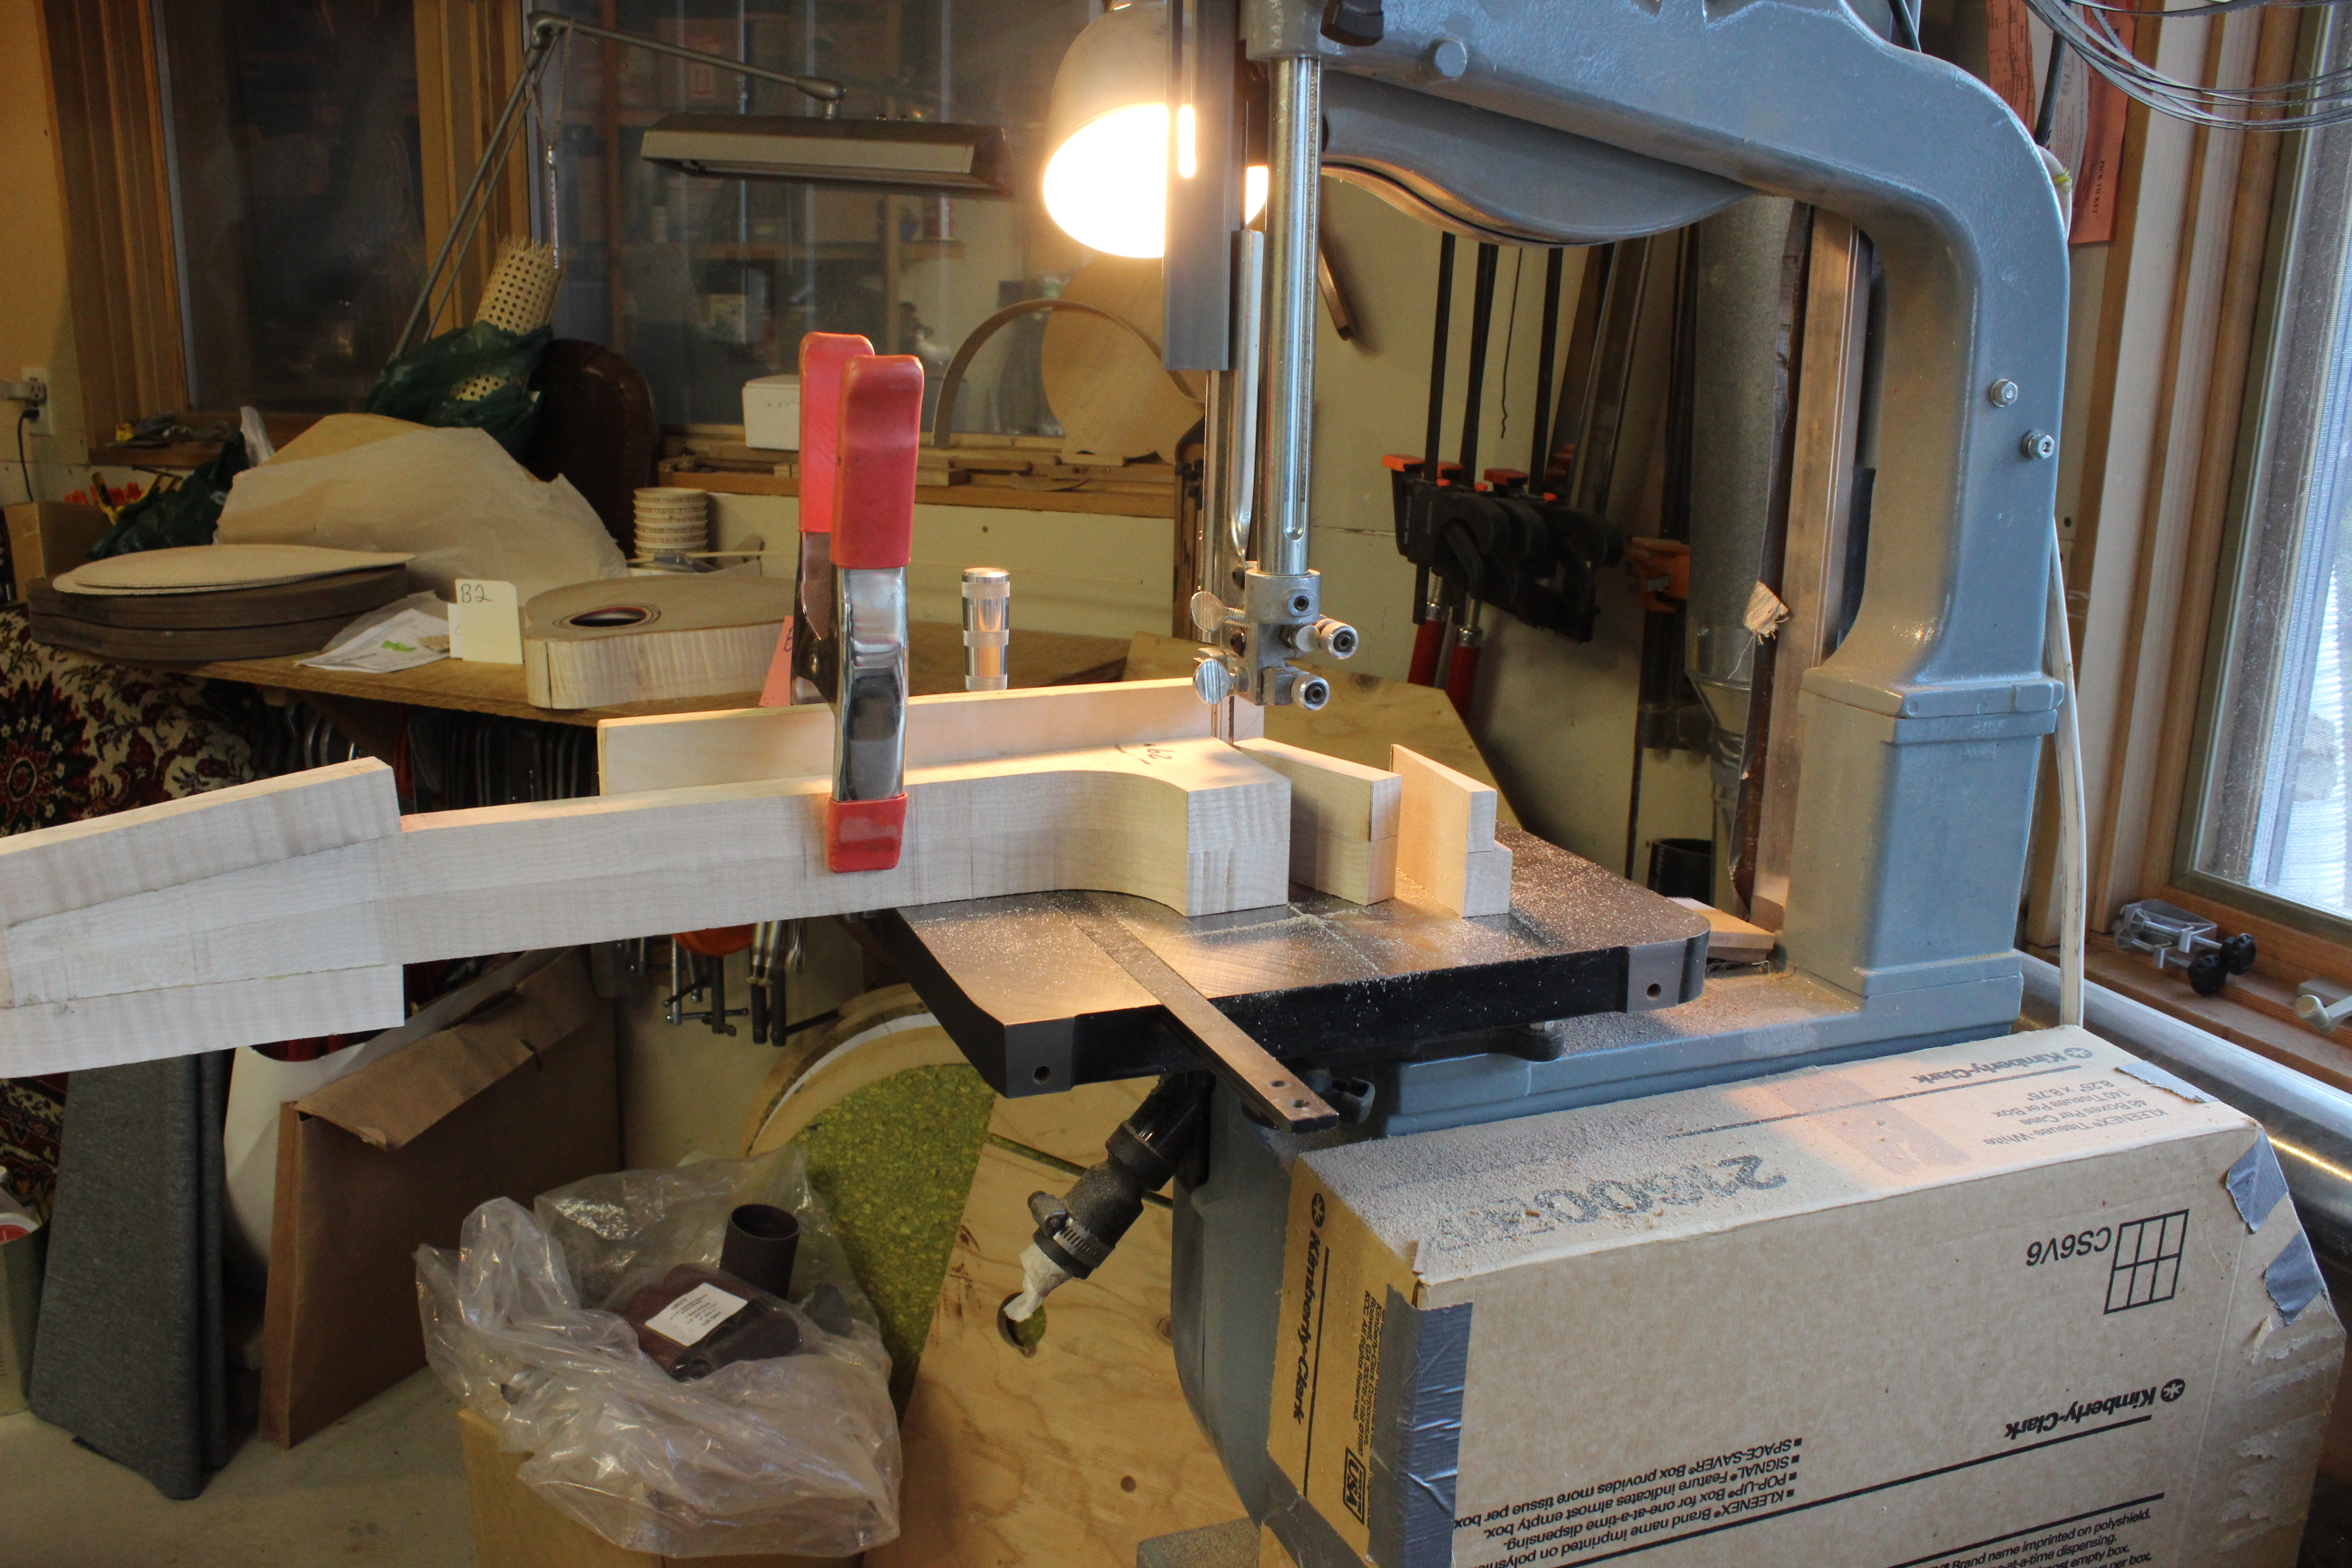
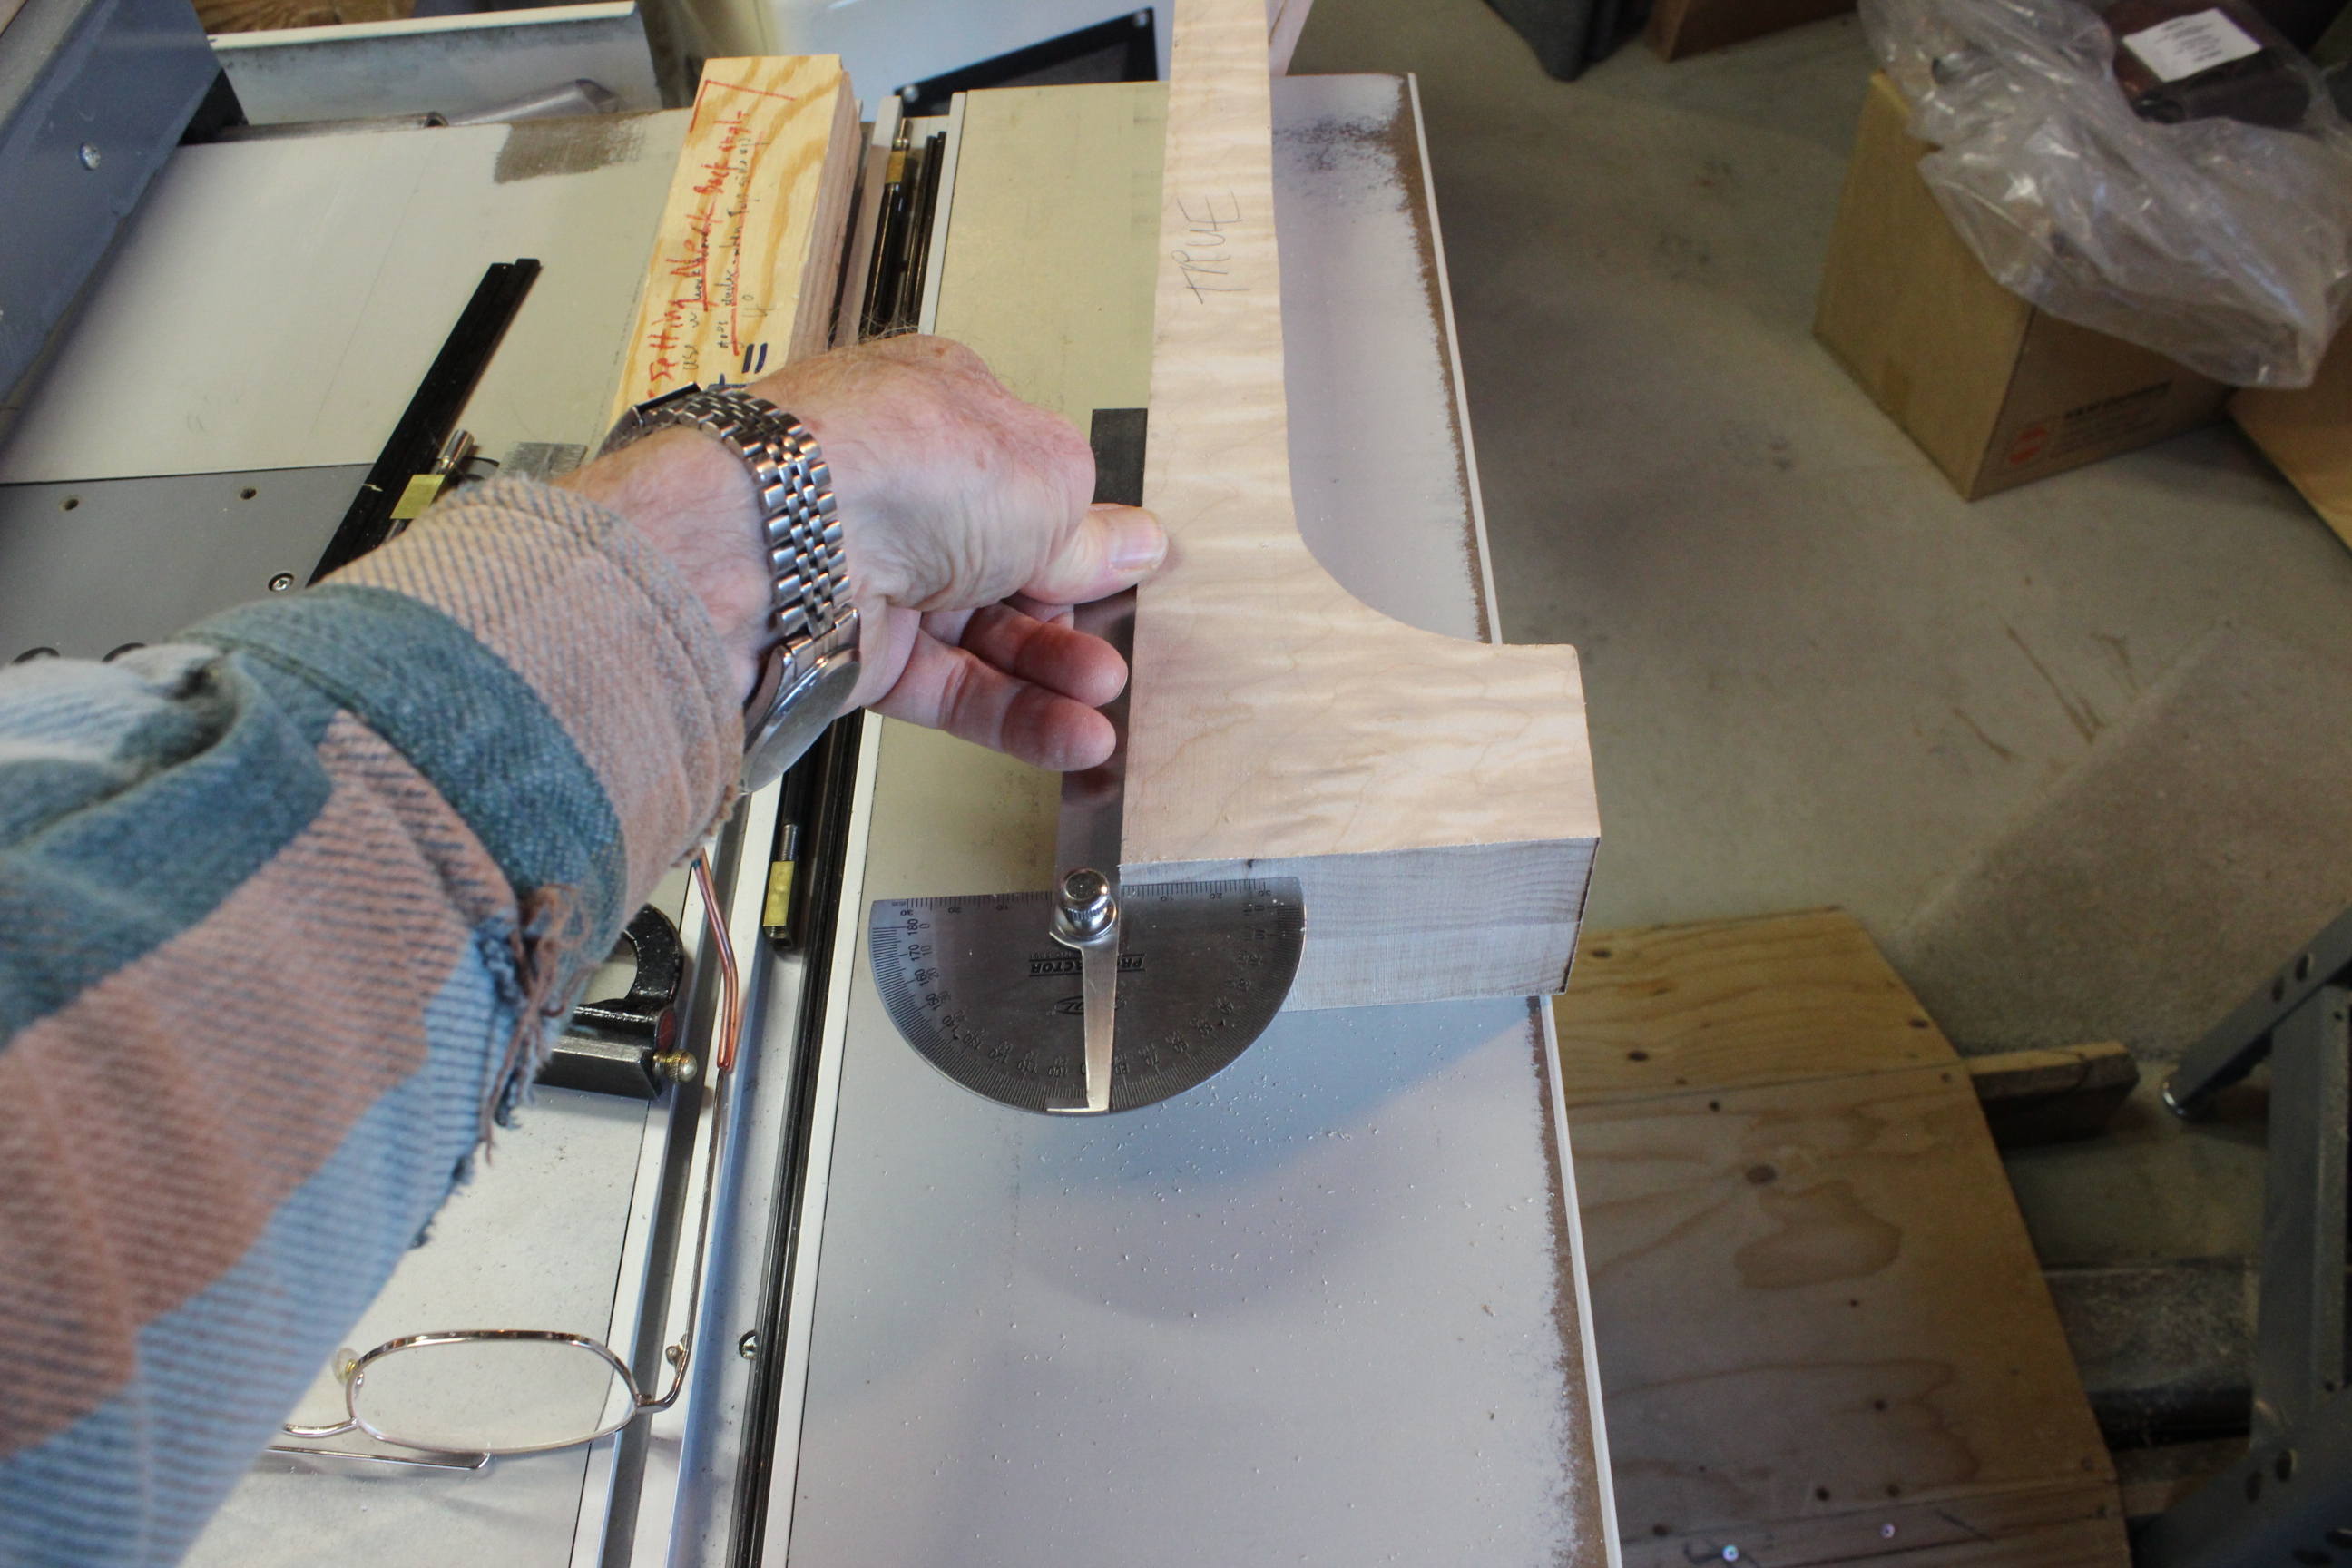
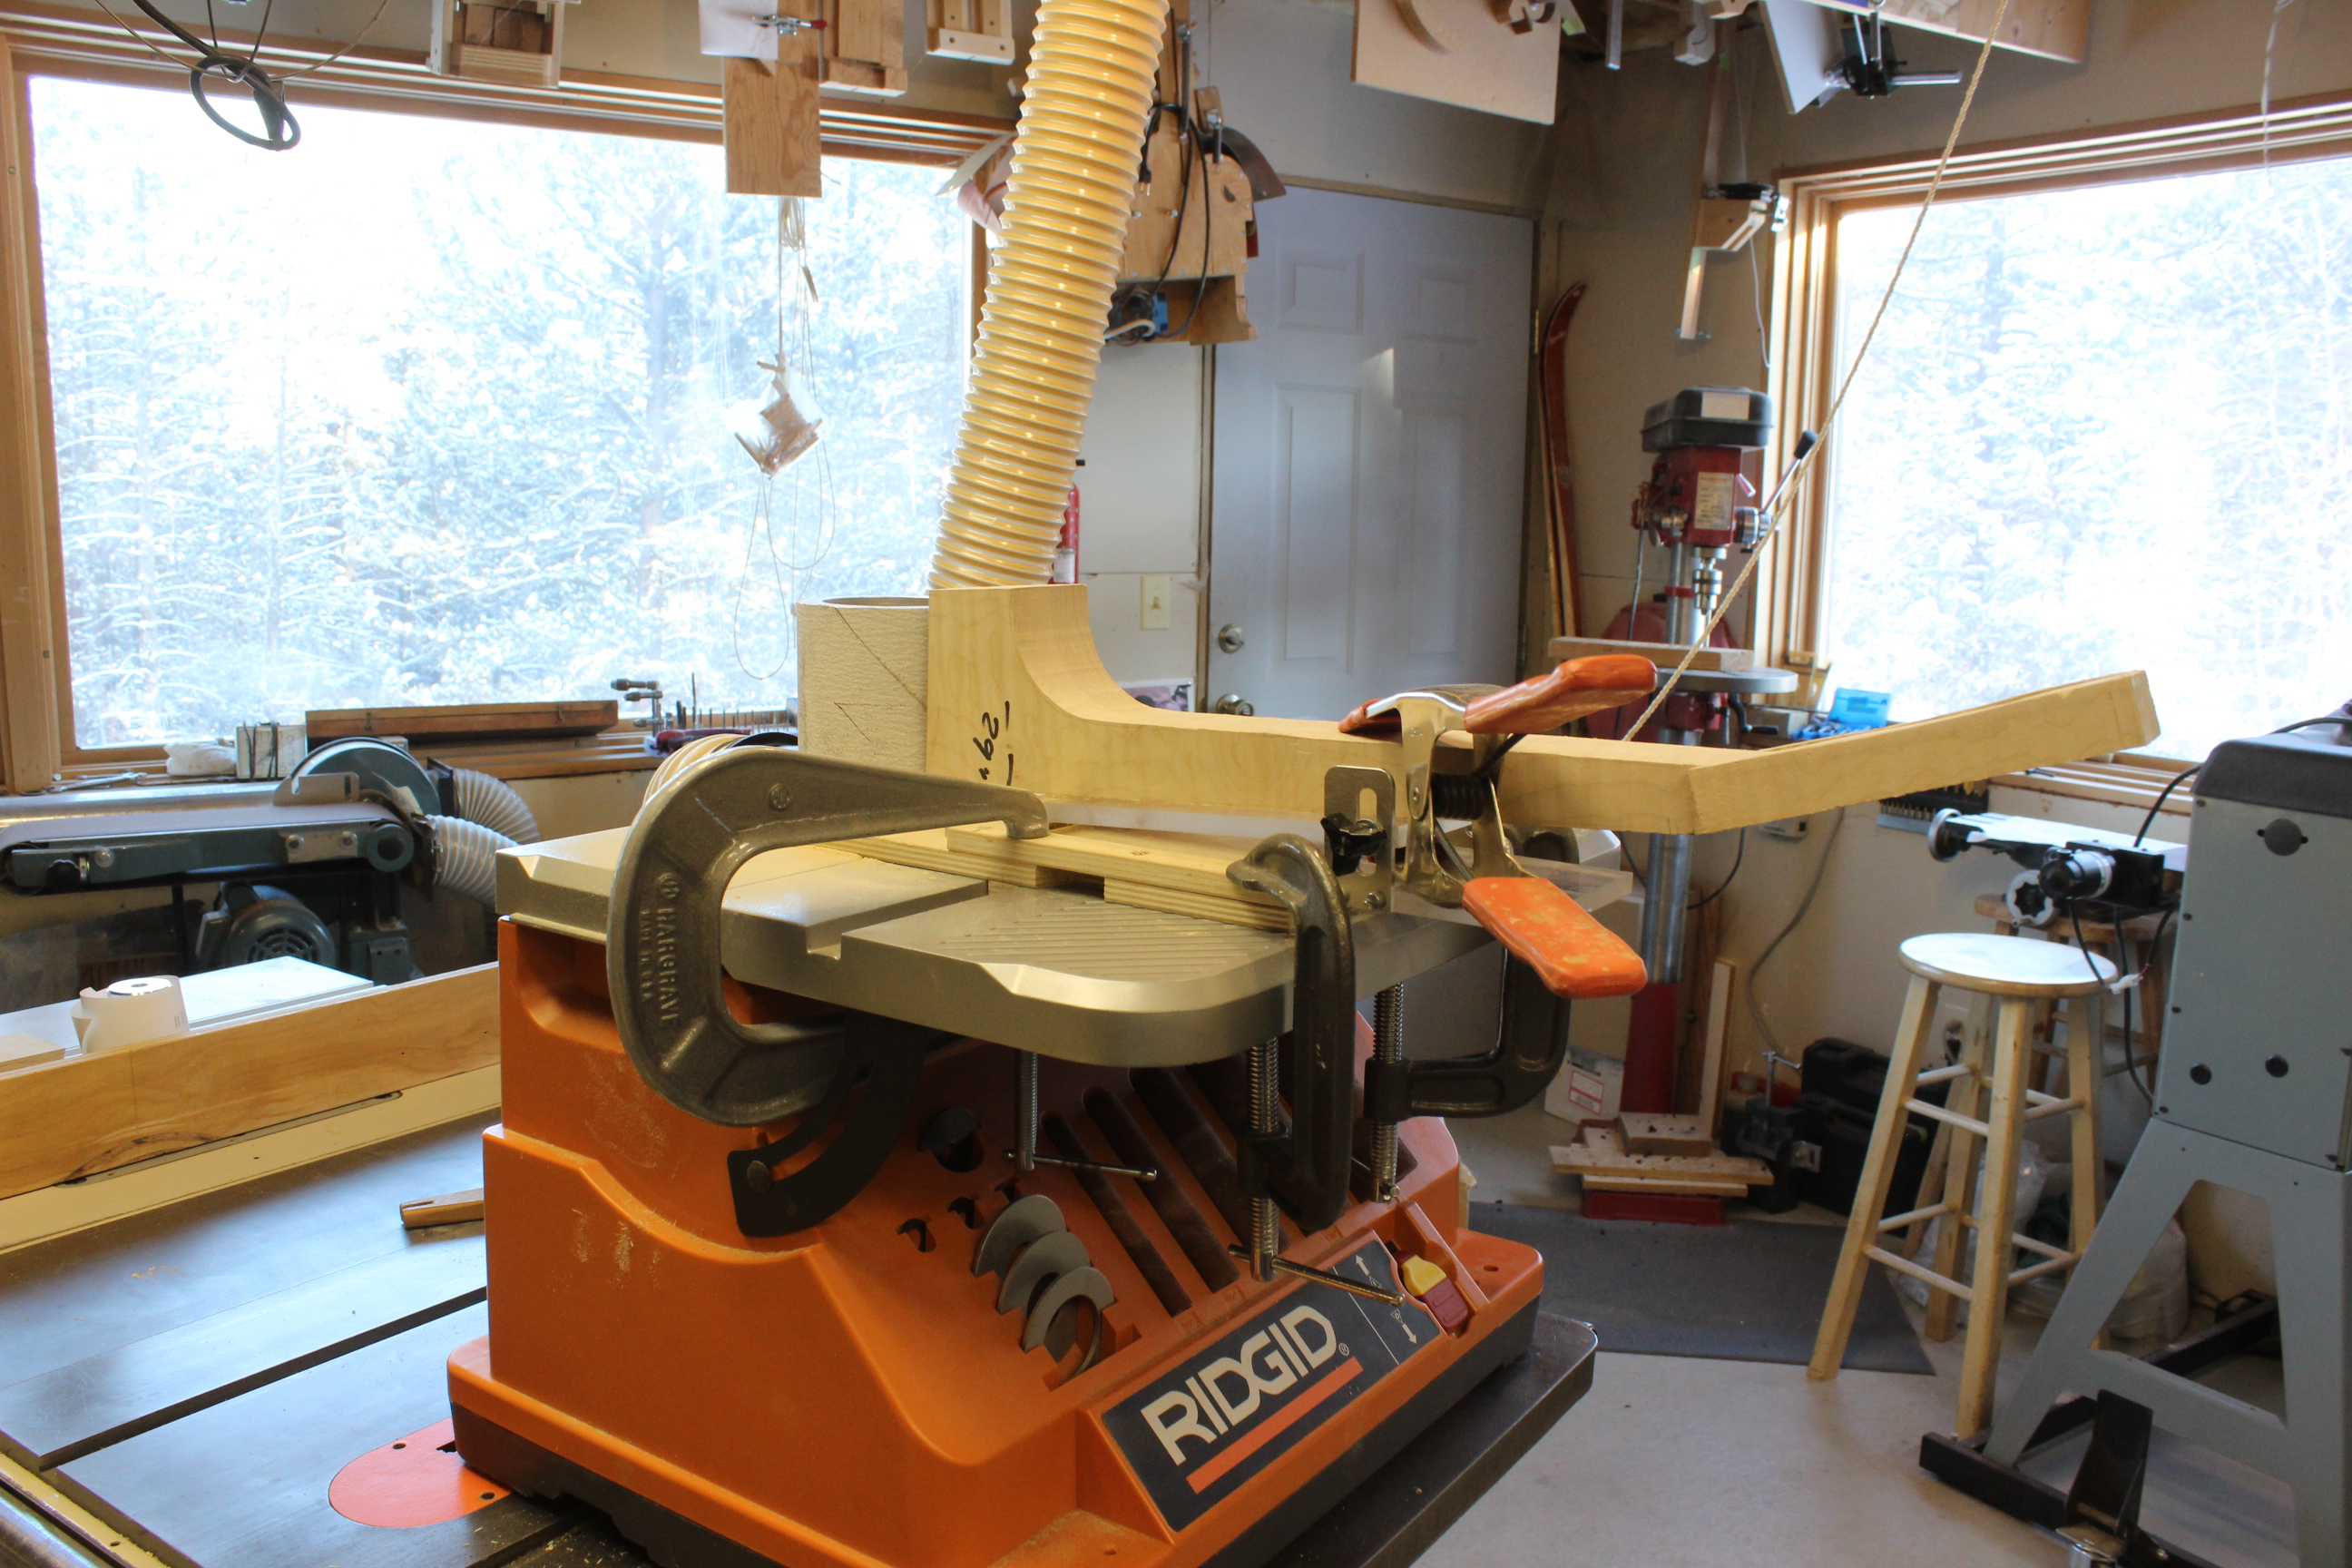

I measure the amount of back angle that I want, usually about 3 degrees for an arch top, and set that into my miter fence for the bandsaw. I do a few test cuts first of course and then mark and trim off the butt end of the neck. The third photos shows the spindle sander setup. You can see the oversized sanding drum on the spindle. Notice the pieces of plywood under the jig and around the sanding drum. Since the spindle goes up and down it was necessary to space up the large drum so it didn't hit the table. Then the plywood makes a new table floor so the drum can go below the ply floor as it oscillates up and down. The tilt jig keys into the slot on the table and has a marked center line so that it can be positioned exactly true to the center line of the drum. There is a plastic tilt table that slides in and out in the base. So the neck can be mounted on that keyed to the truss rod slot. The table is tilted and adjusted so the butt is exactly true and parallel to the drum. You then push the neck on the sliding jig into the drum and sand away with the proper curvature and angle. The sanding drum is made so when the paper is on it sands a curvature that is Just Smaller than the curvature of the body. This makes sure that it wedges to the body. I have drawn a line across where the body is to meet the neck and I slowly sand up right to that line.
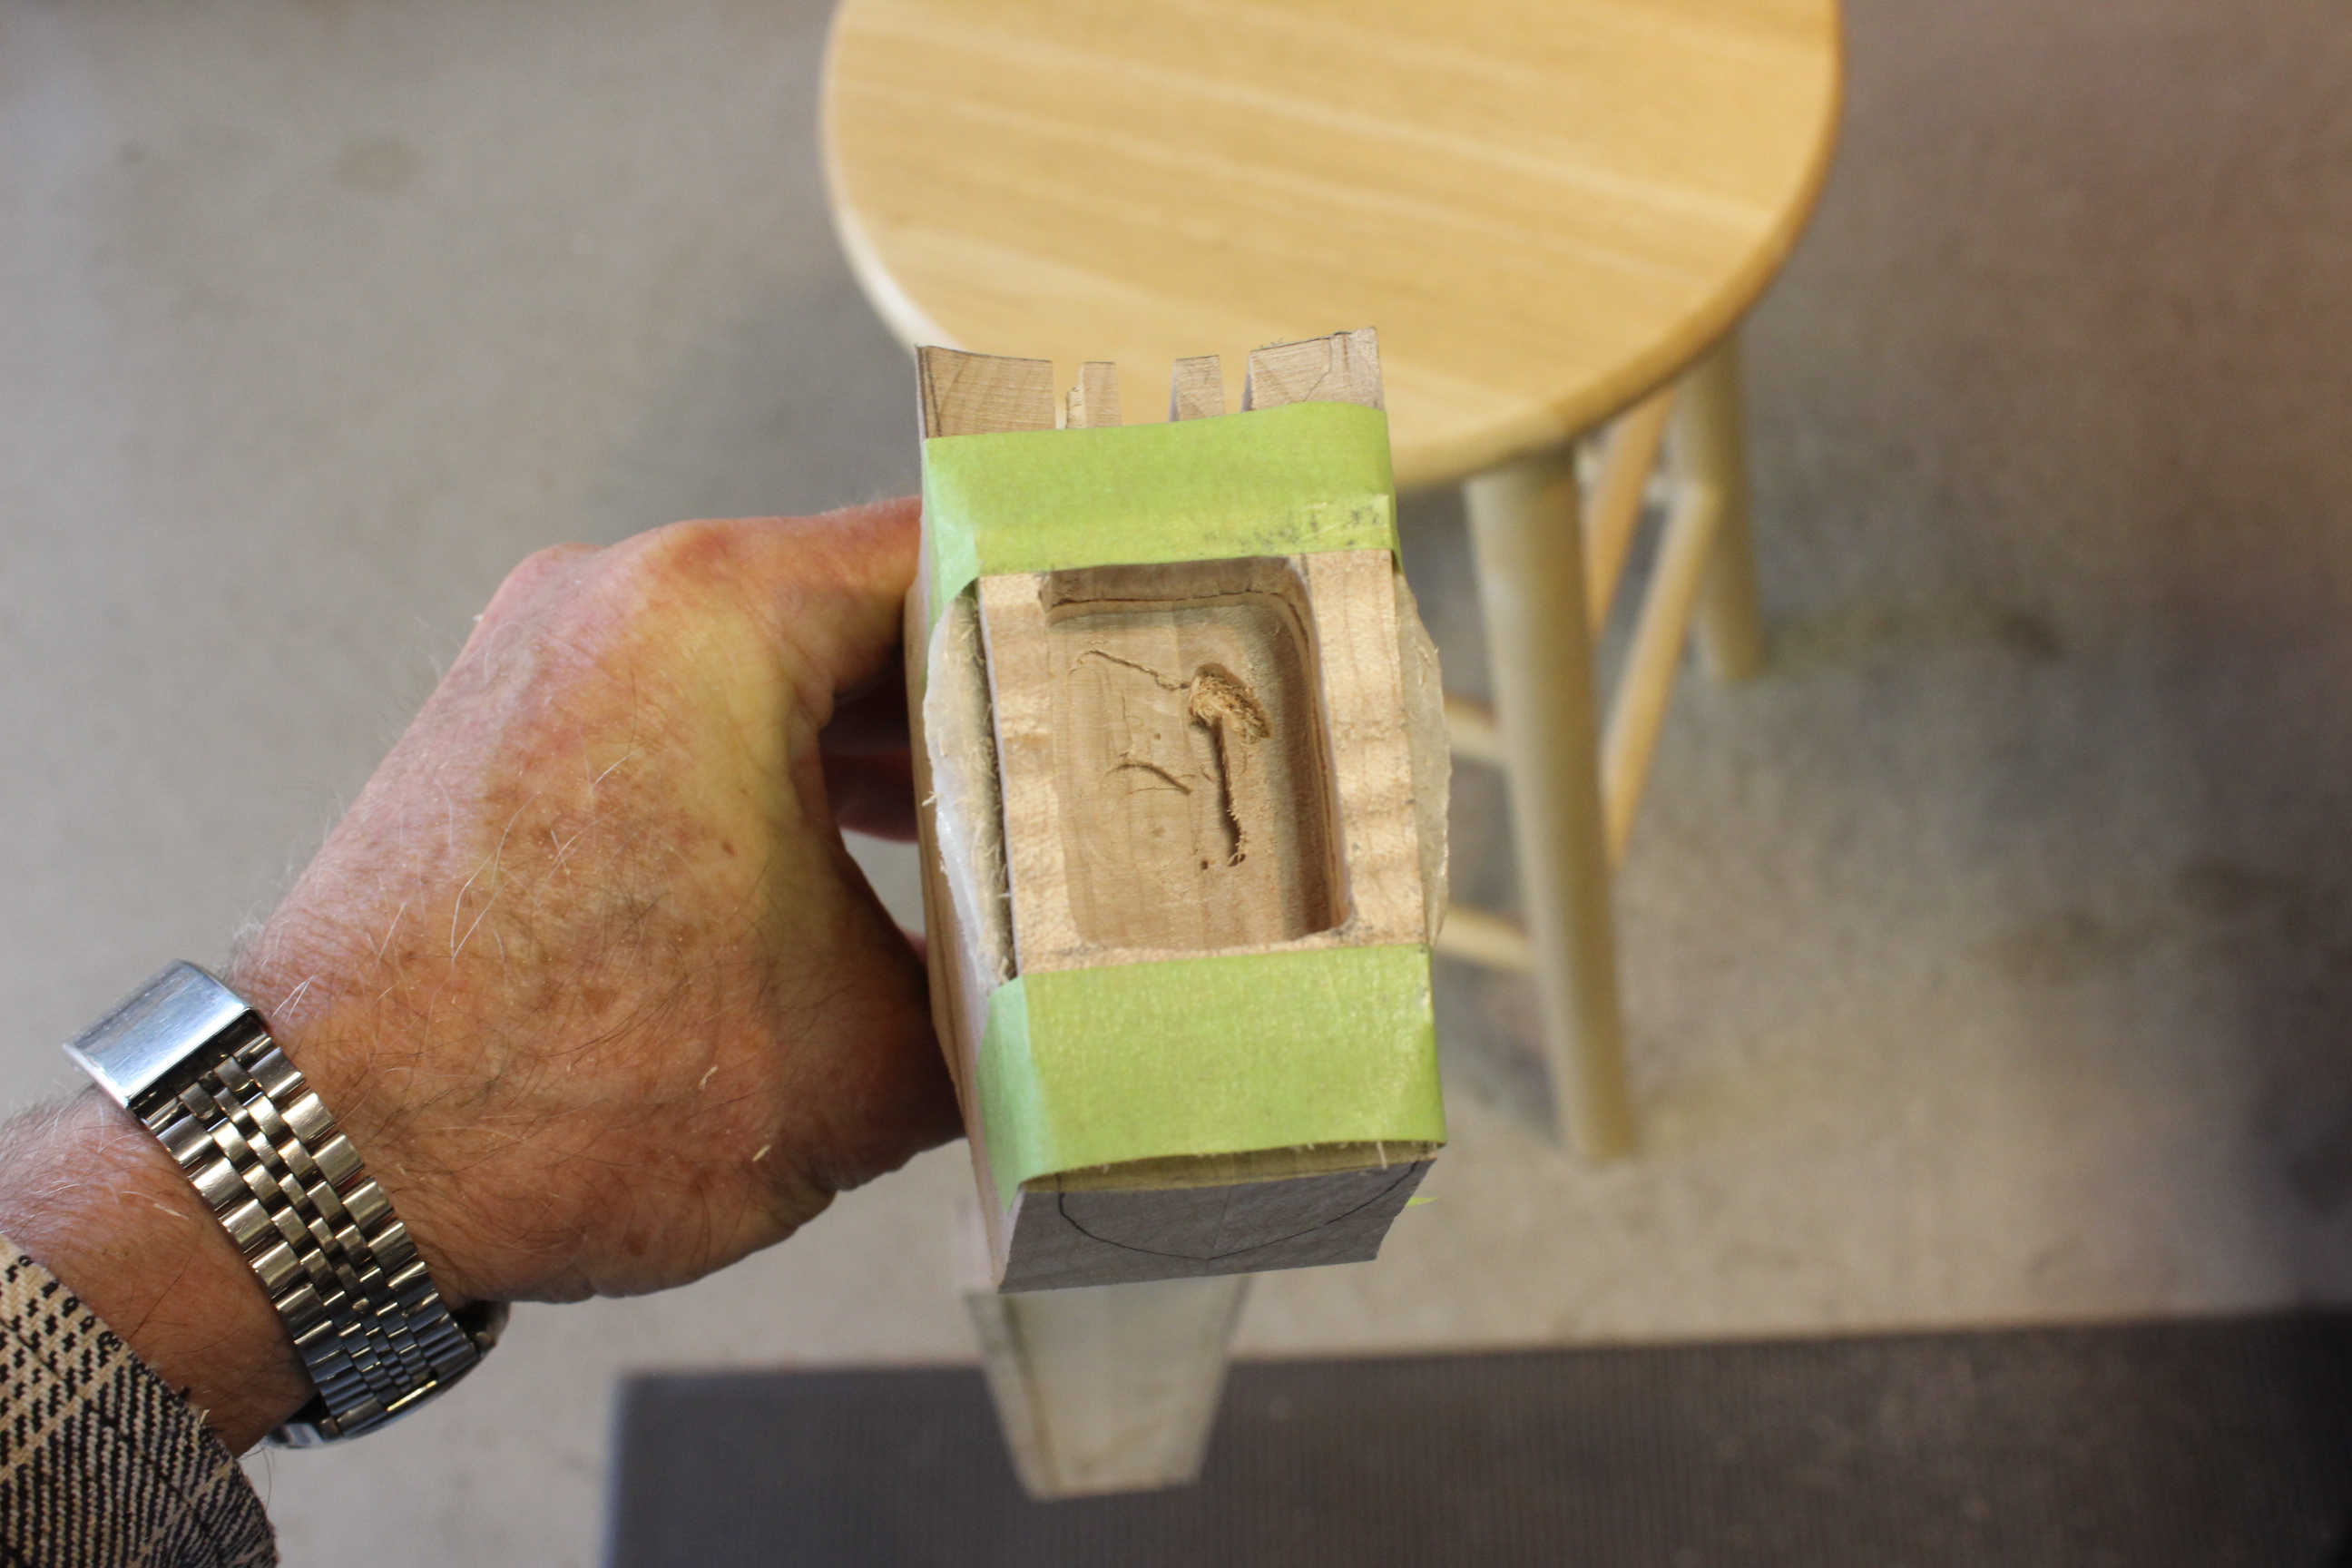
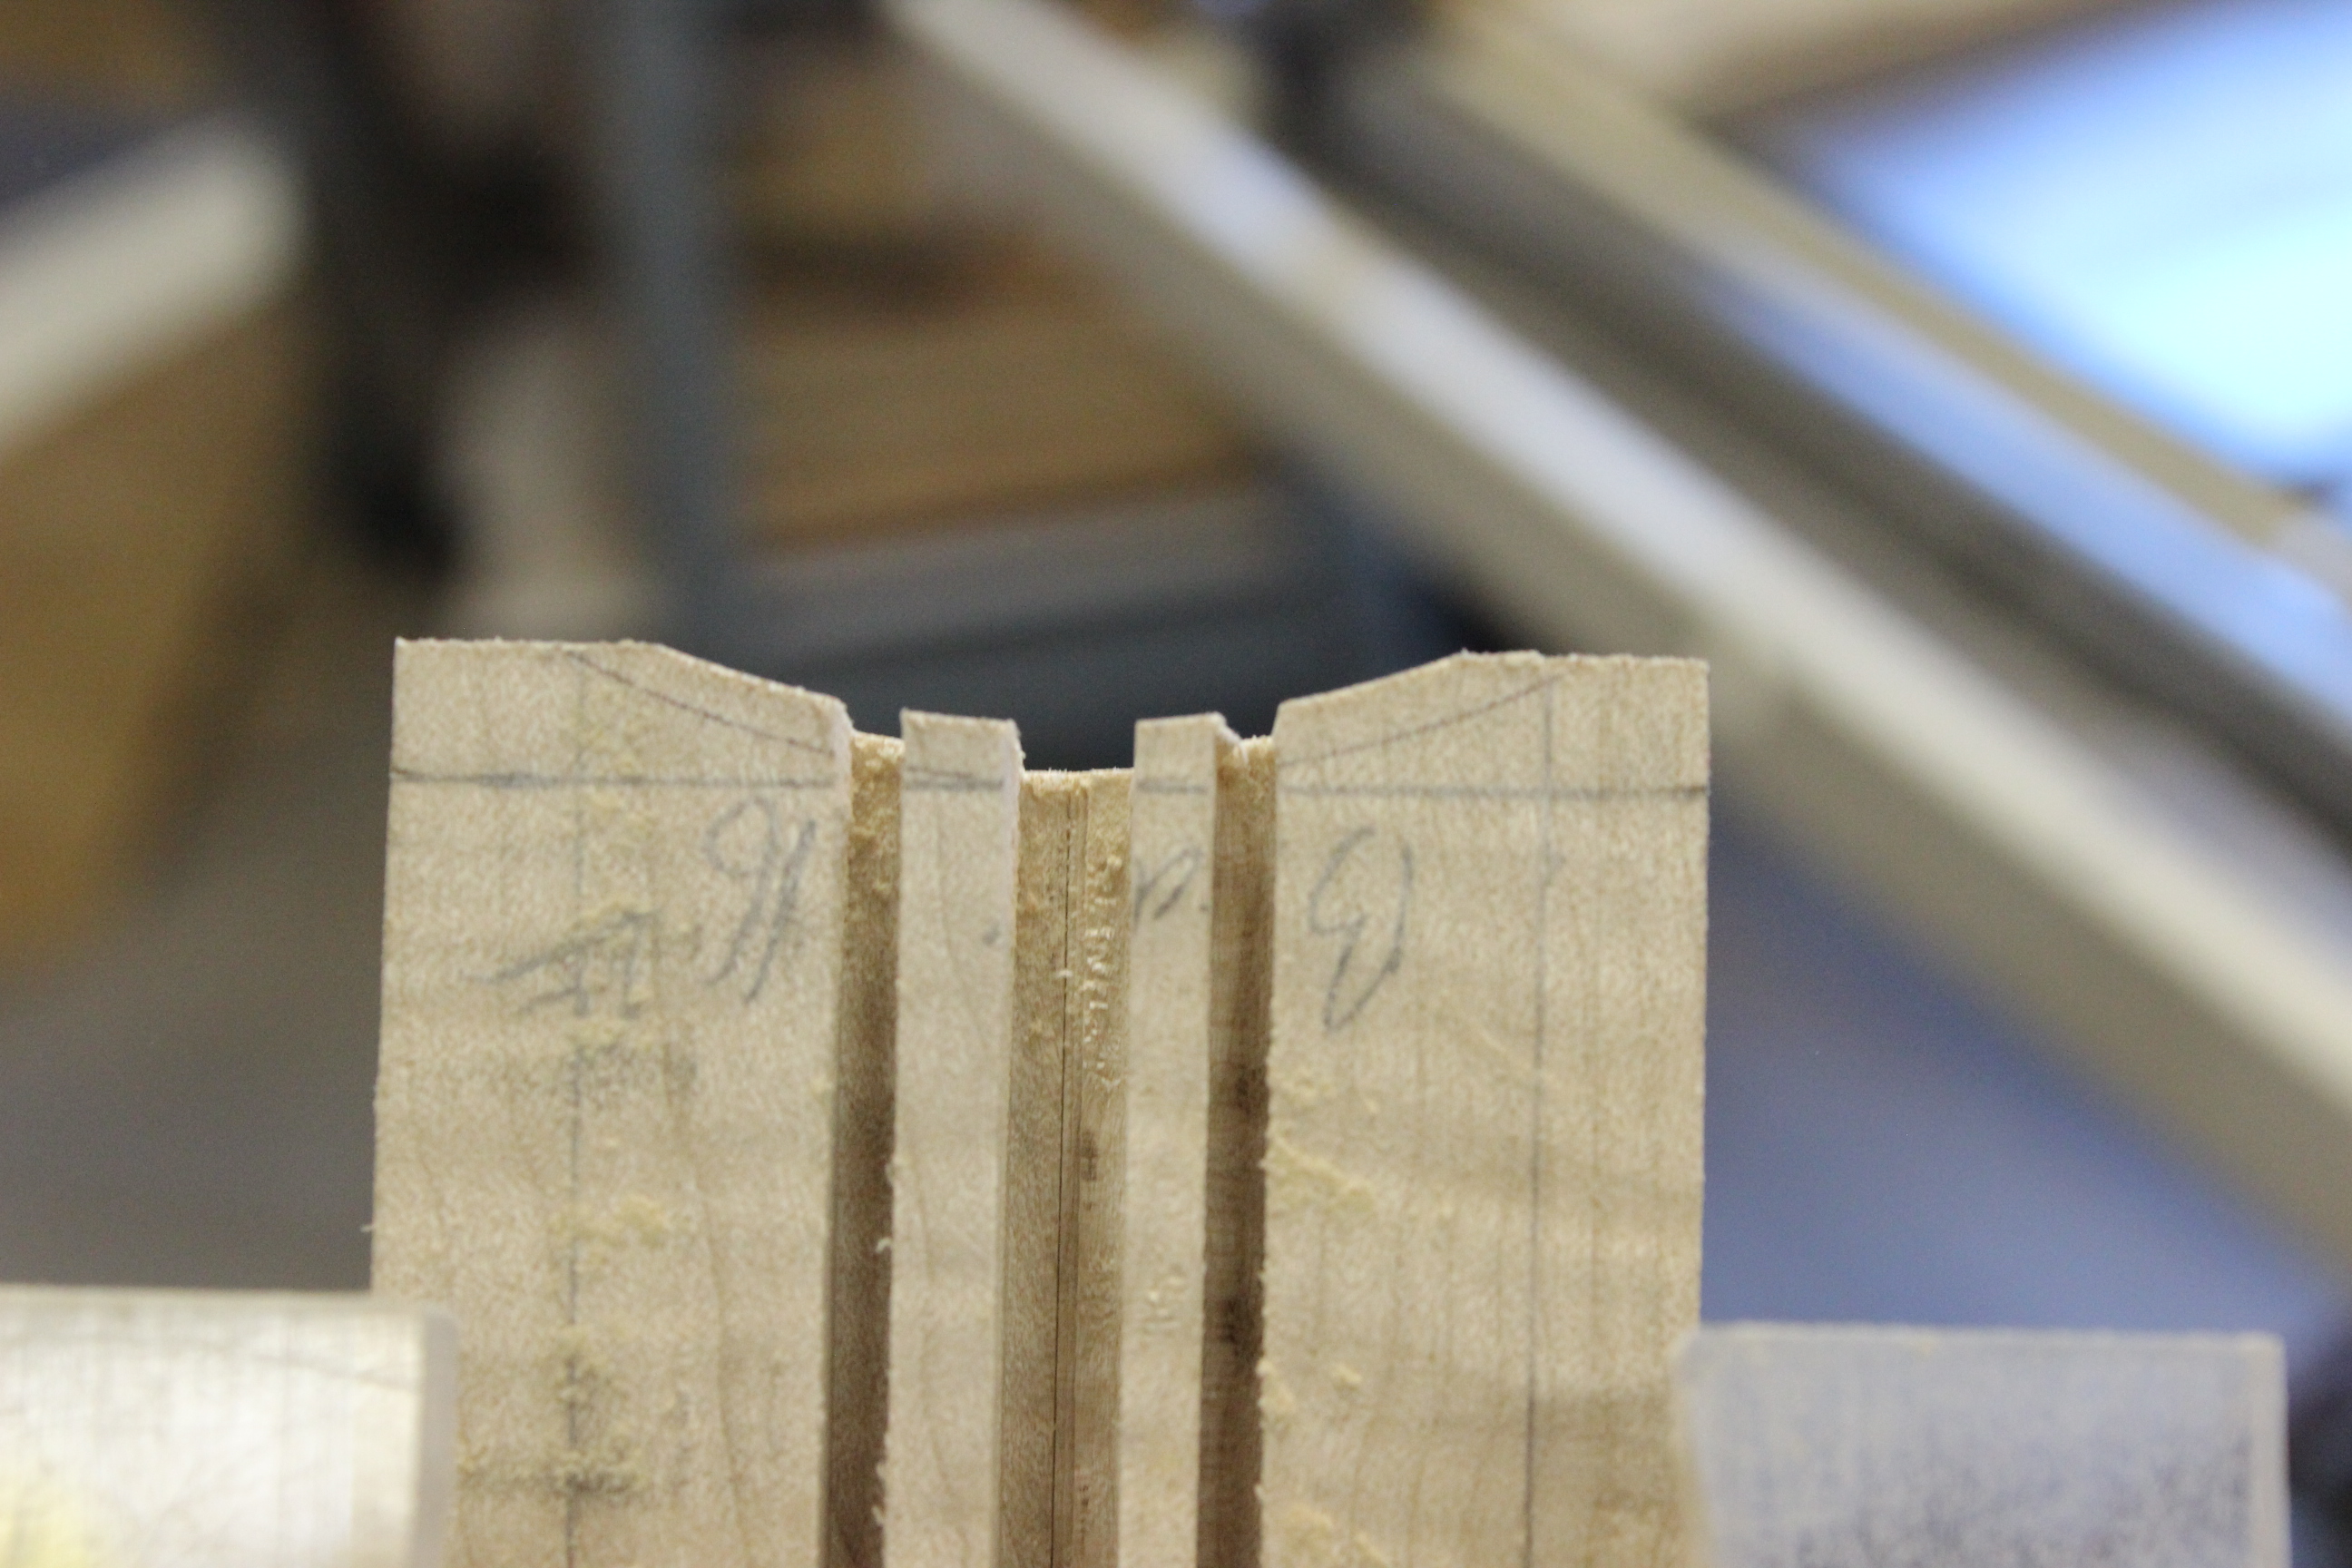
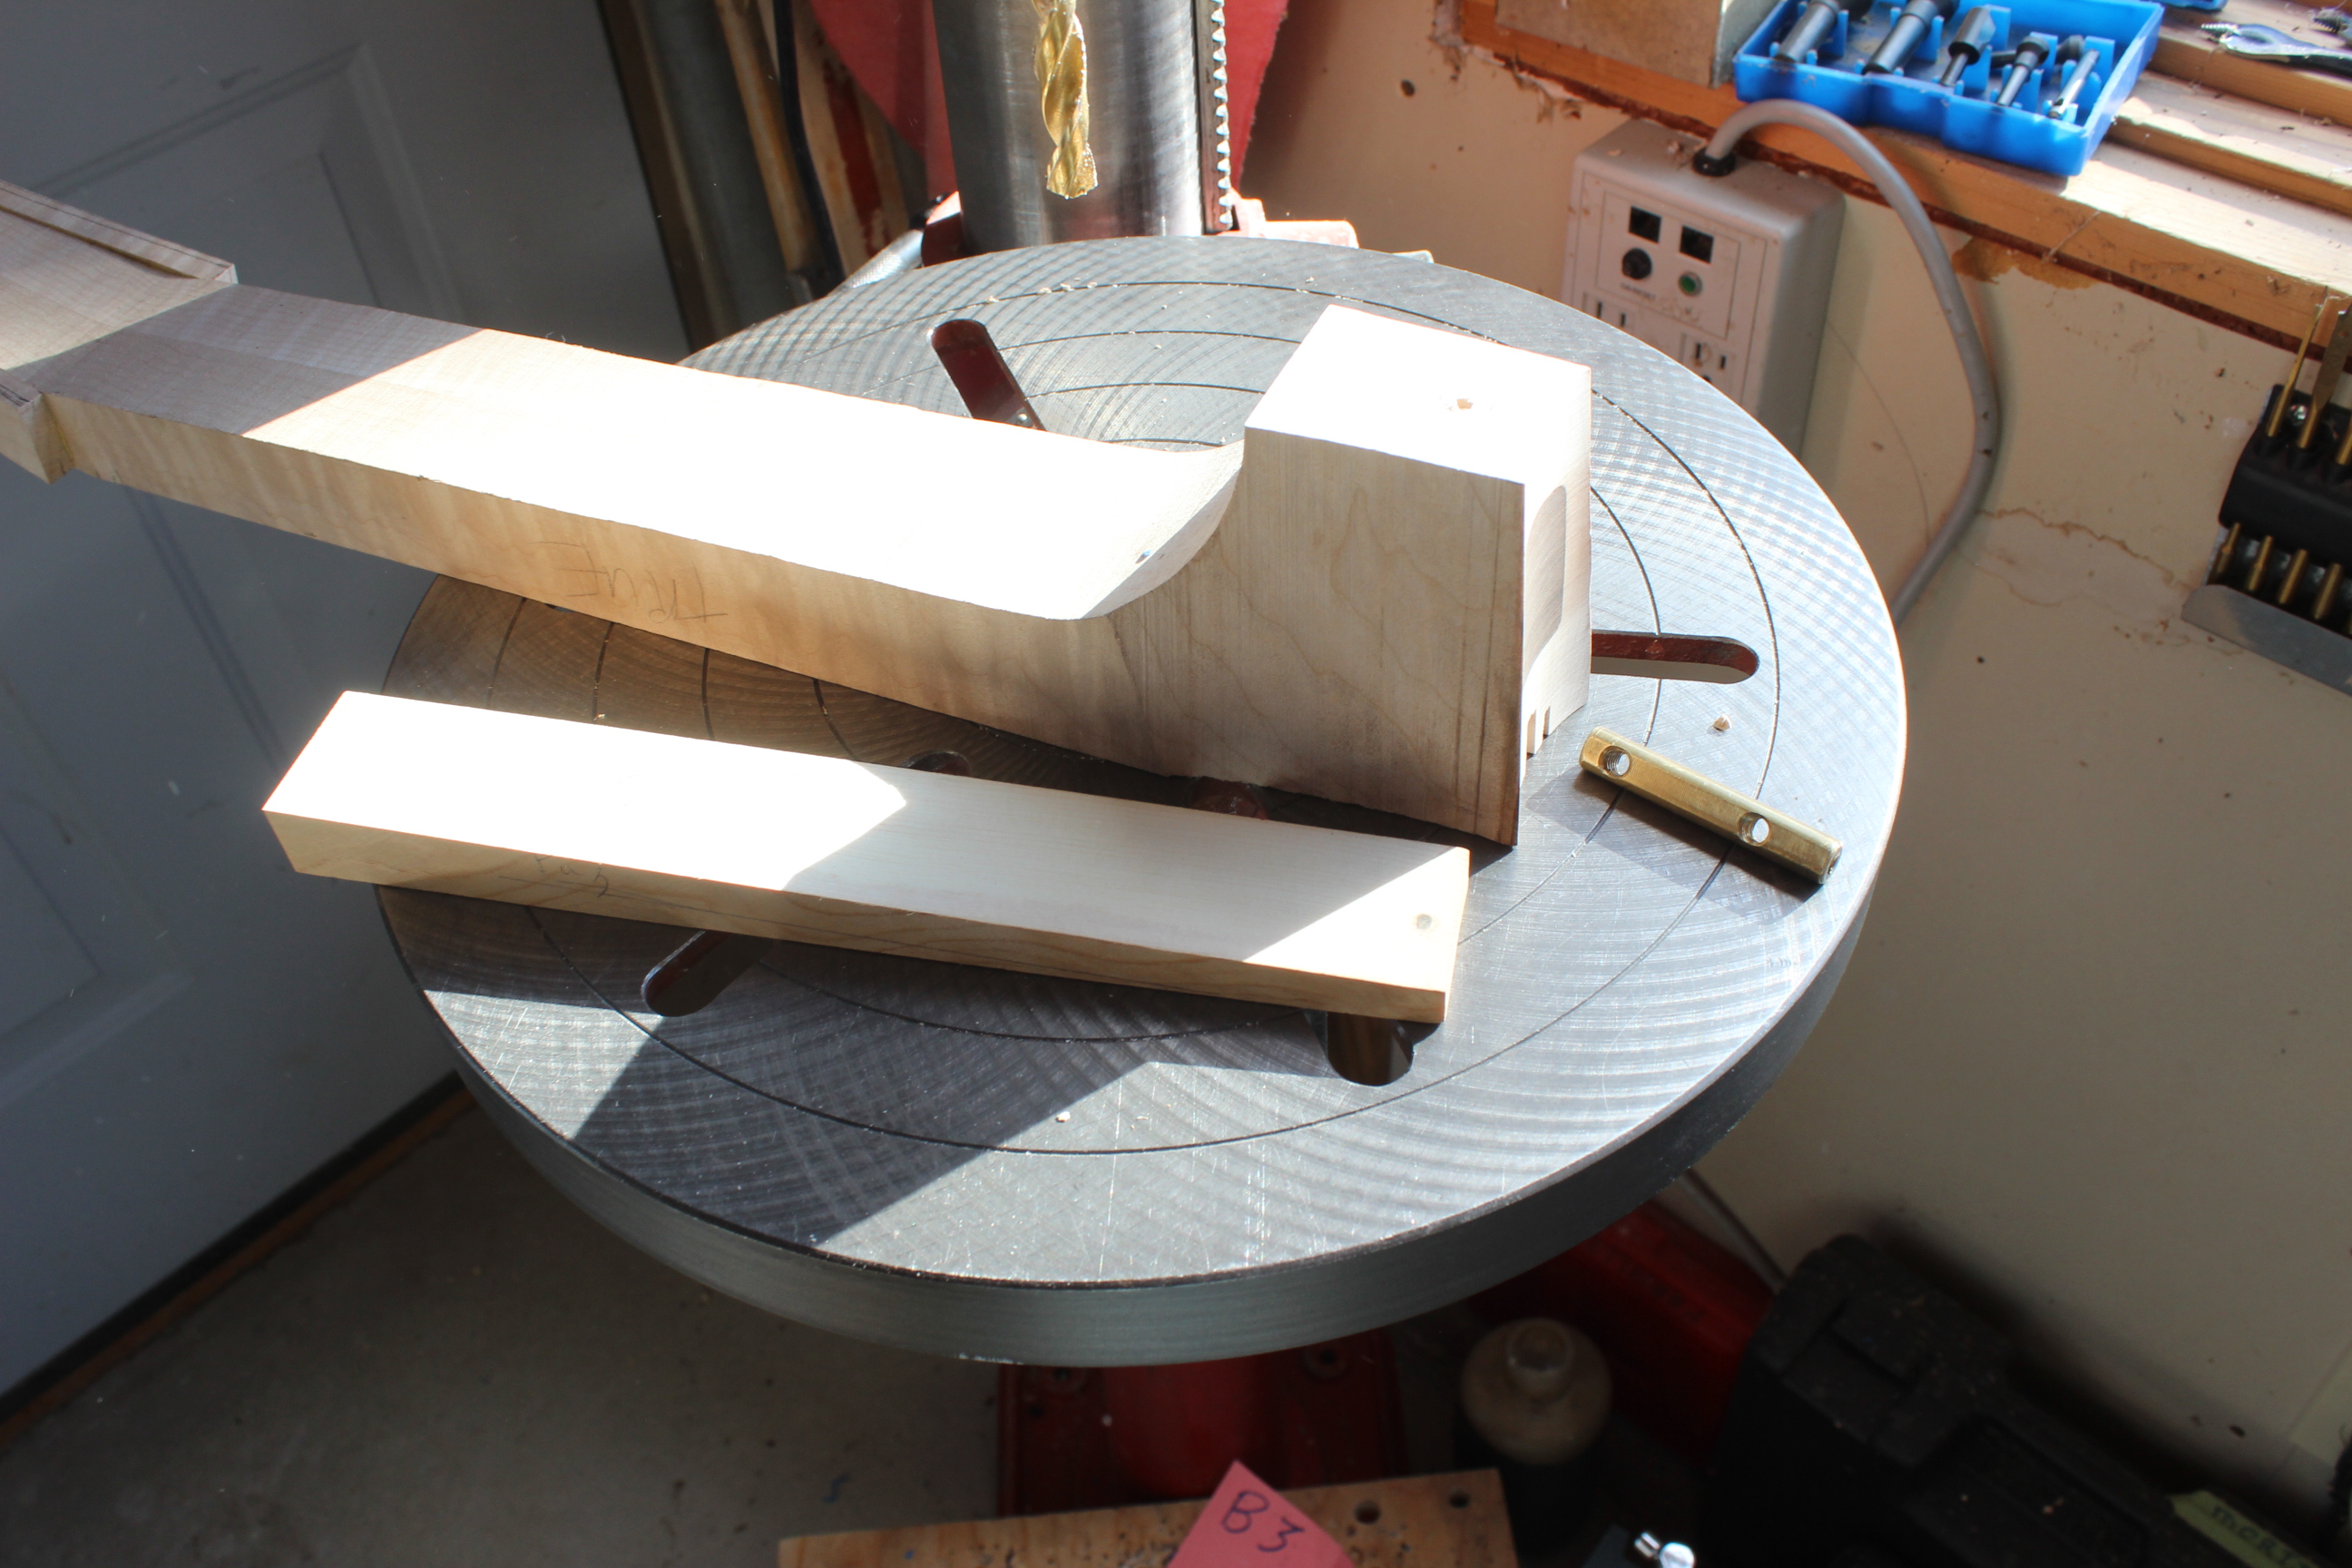
This next series of shots is for a reinforcement of the end grain. The neck wood at the butt is end grain so there is a chance that it might pull out or crack with the type of anchor that I use. Therefore I put in a graft of cross grain wood that reinforces that area. I'm using yet another Super-High-Teck router guide jig for this that I just double-stick tape in place. Here I just run the smooth part of the Dremel bit up to it to act as a guide and run around and cut out some material.
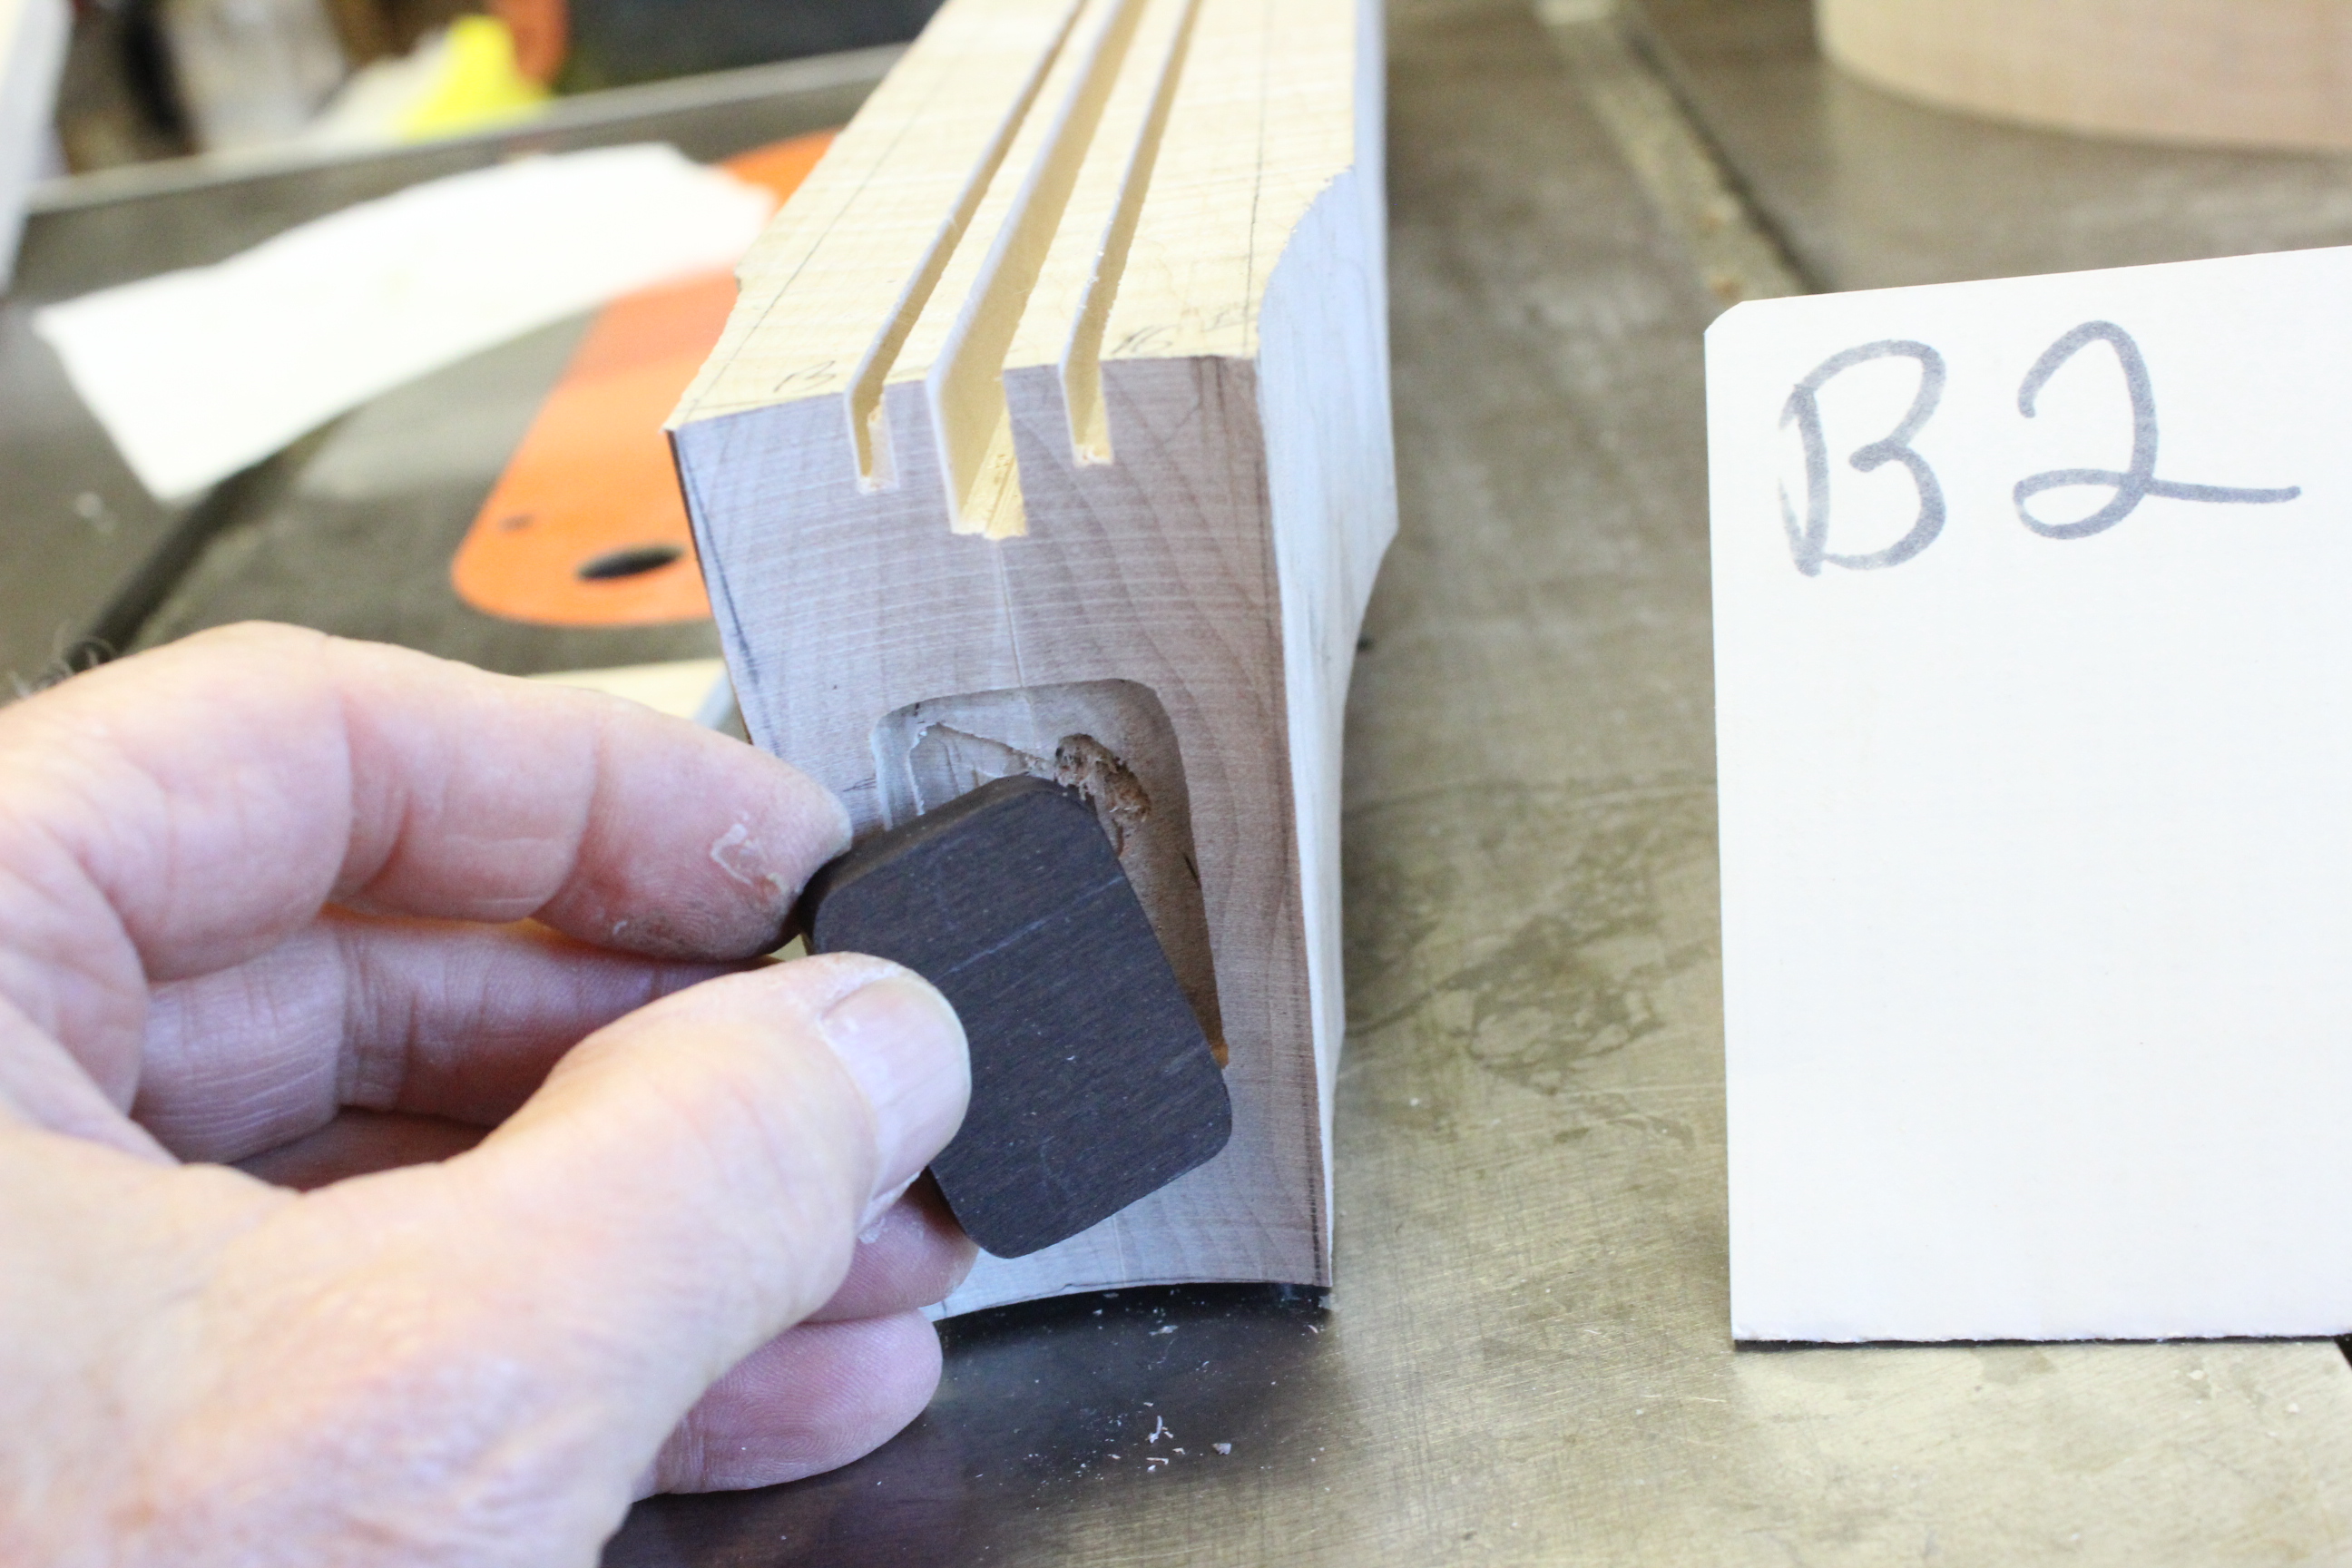
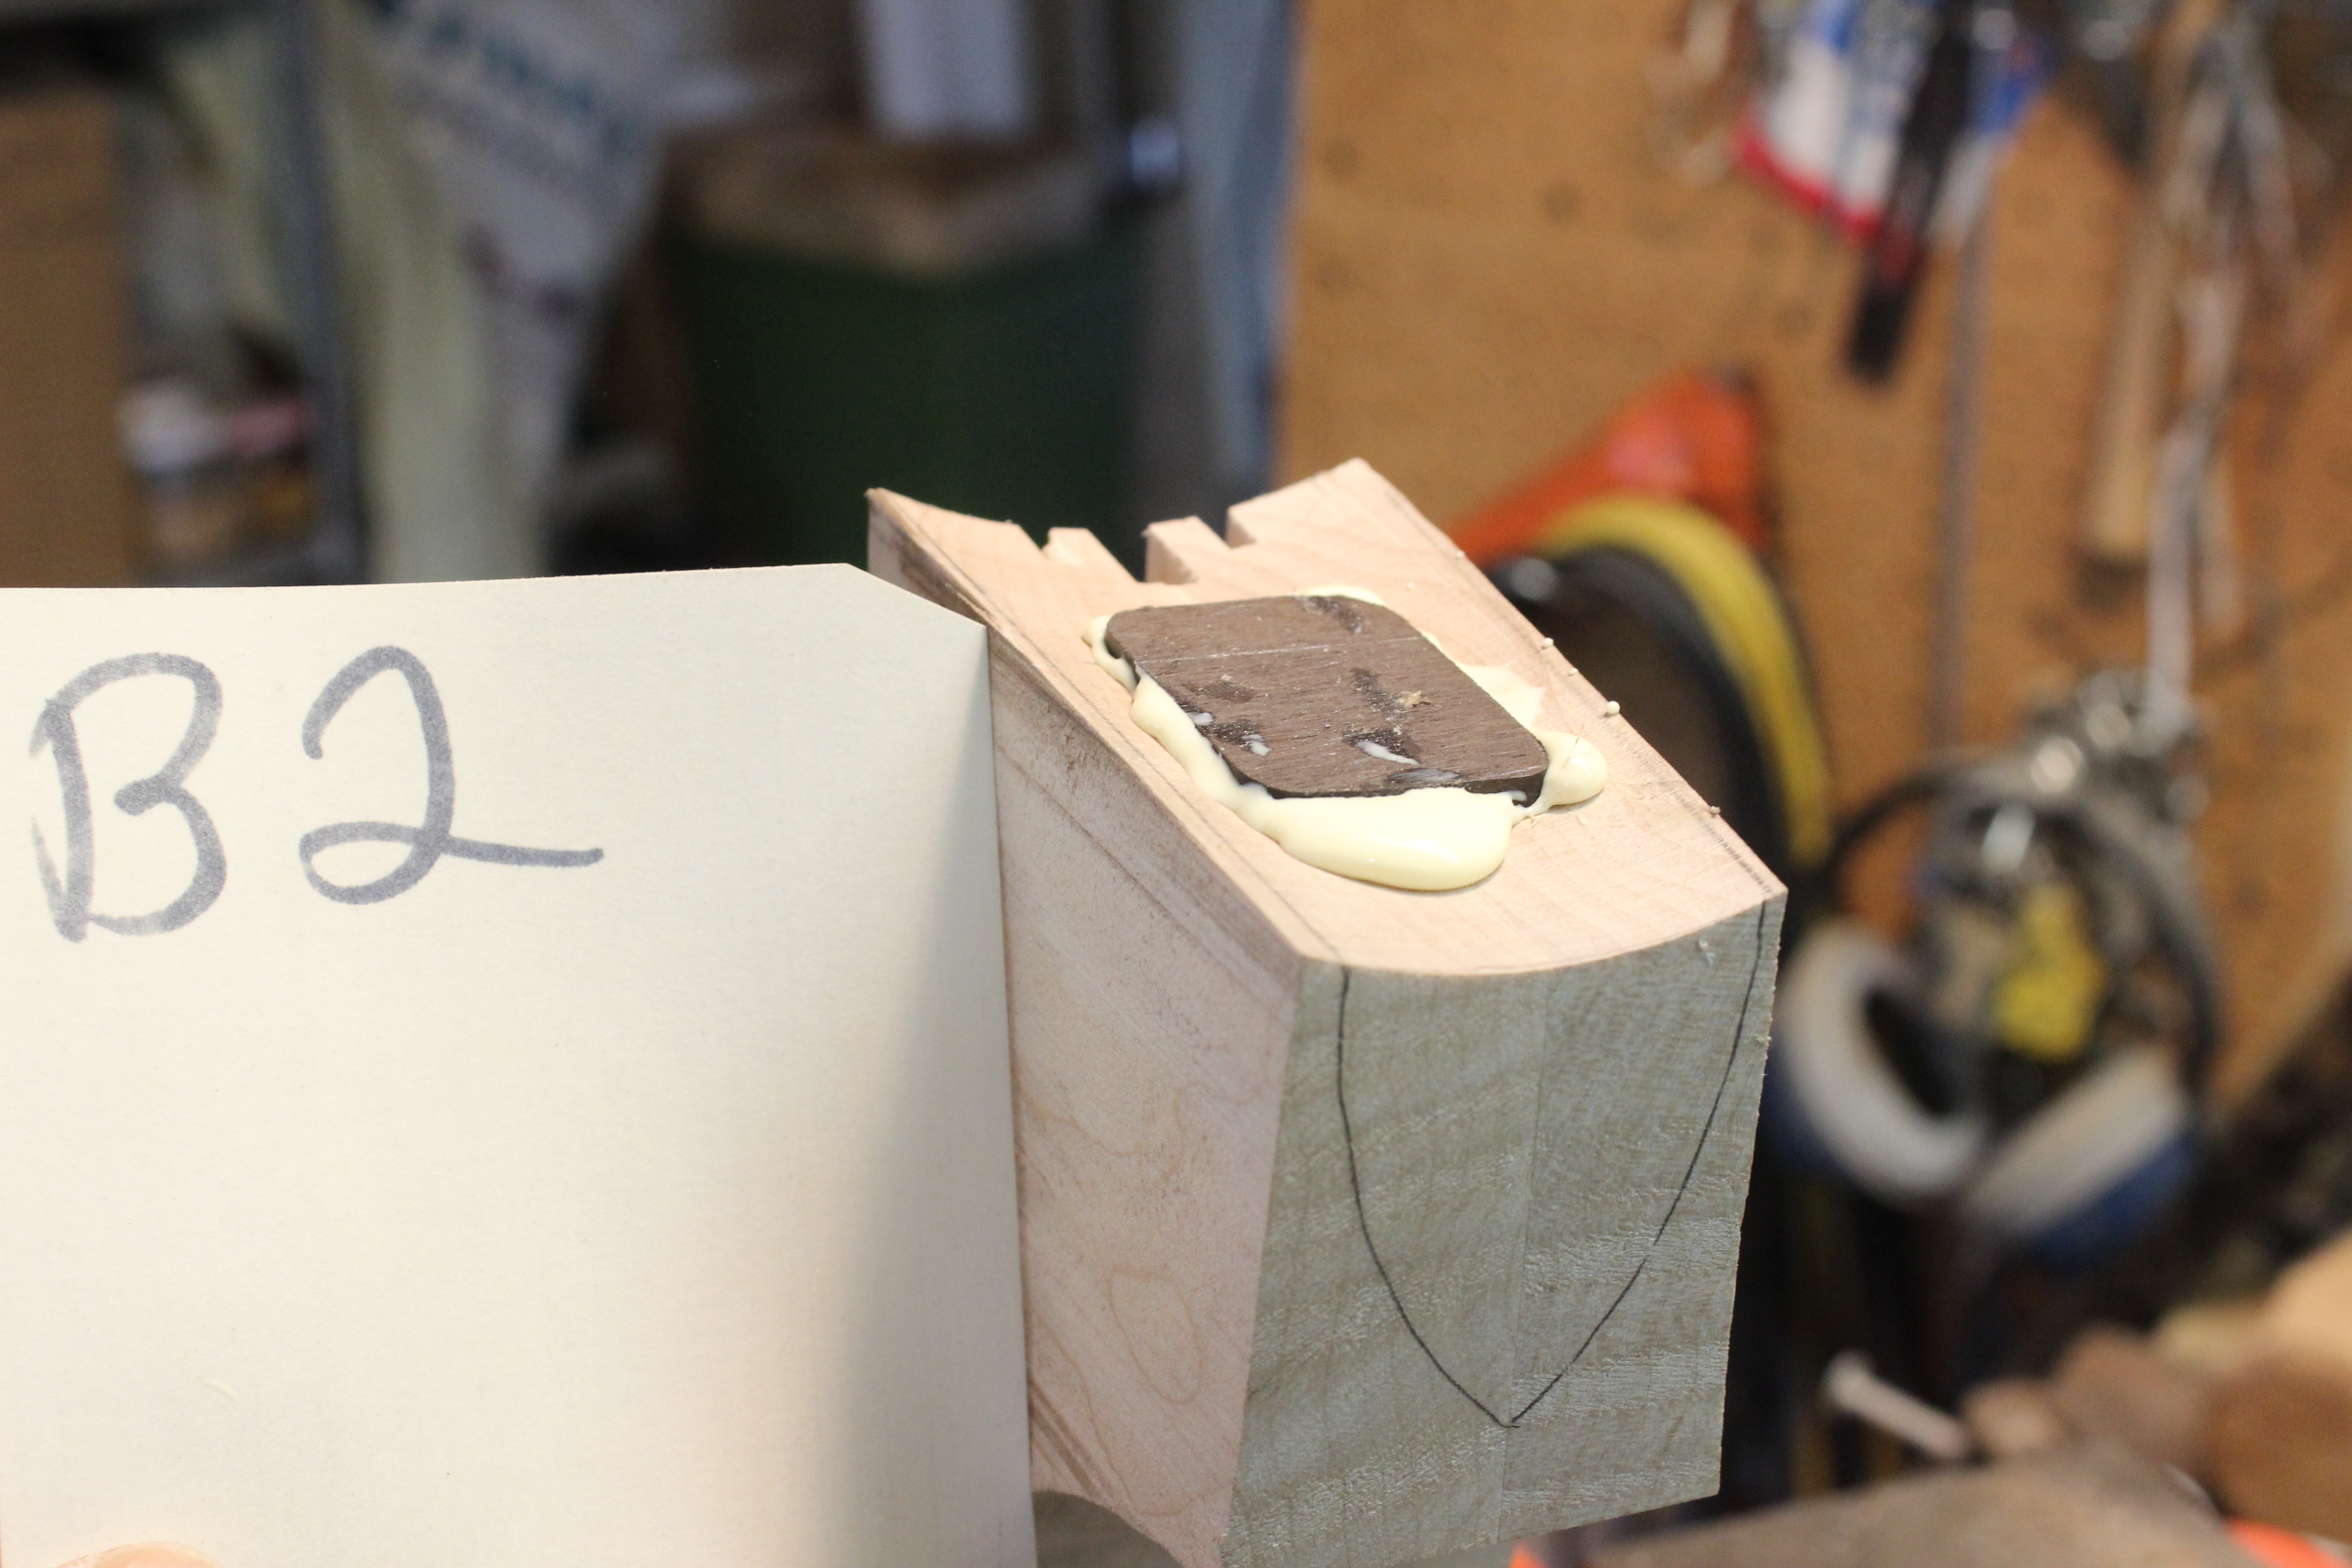
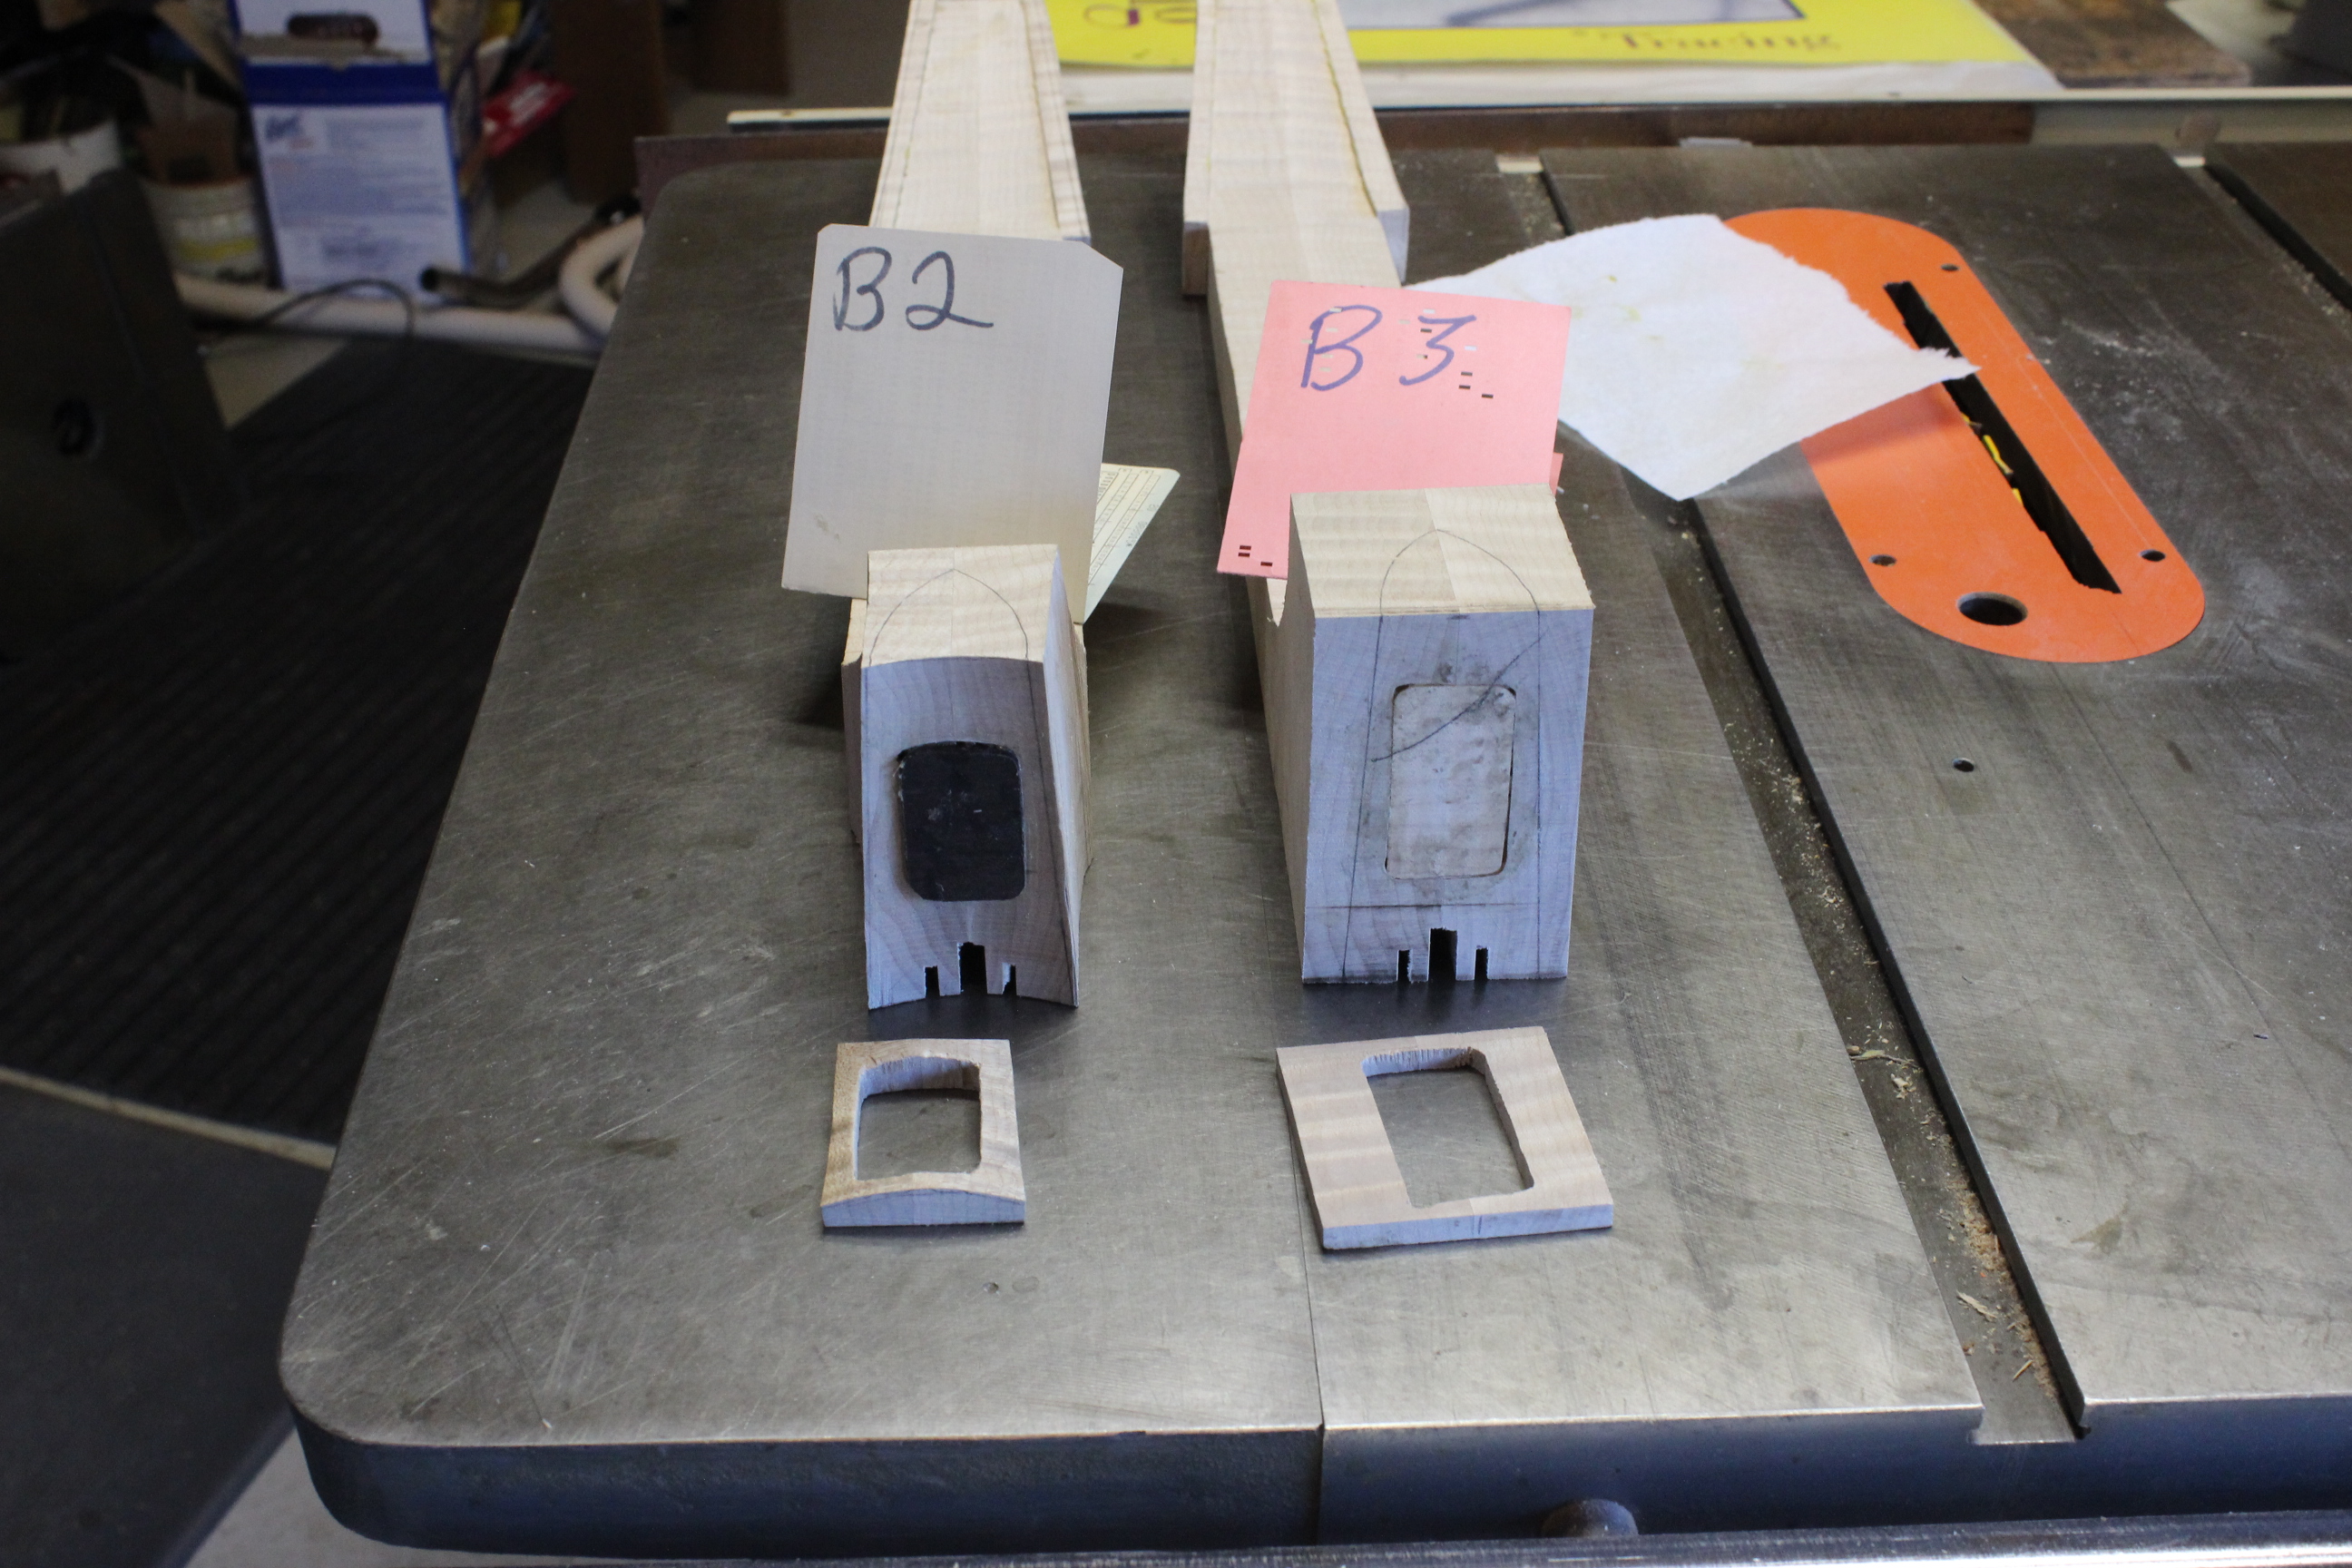
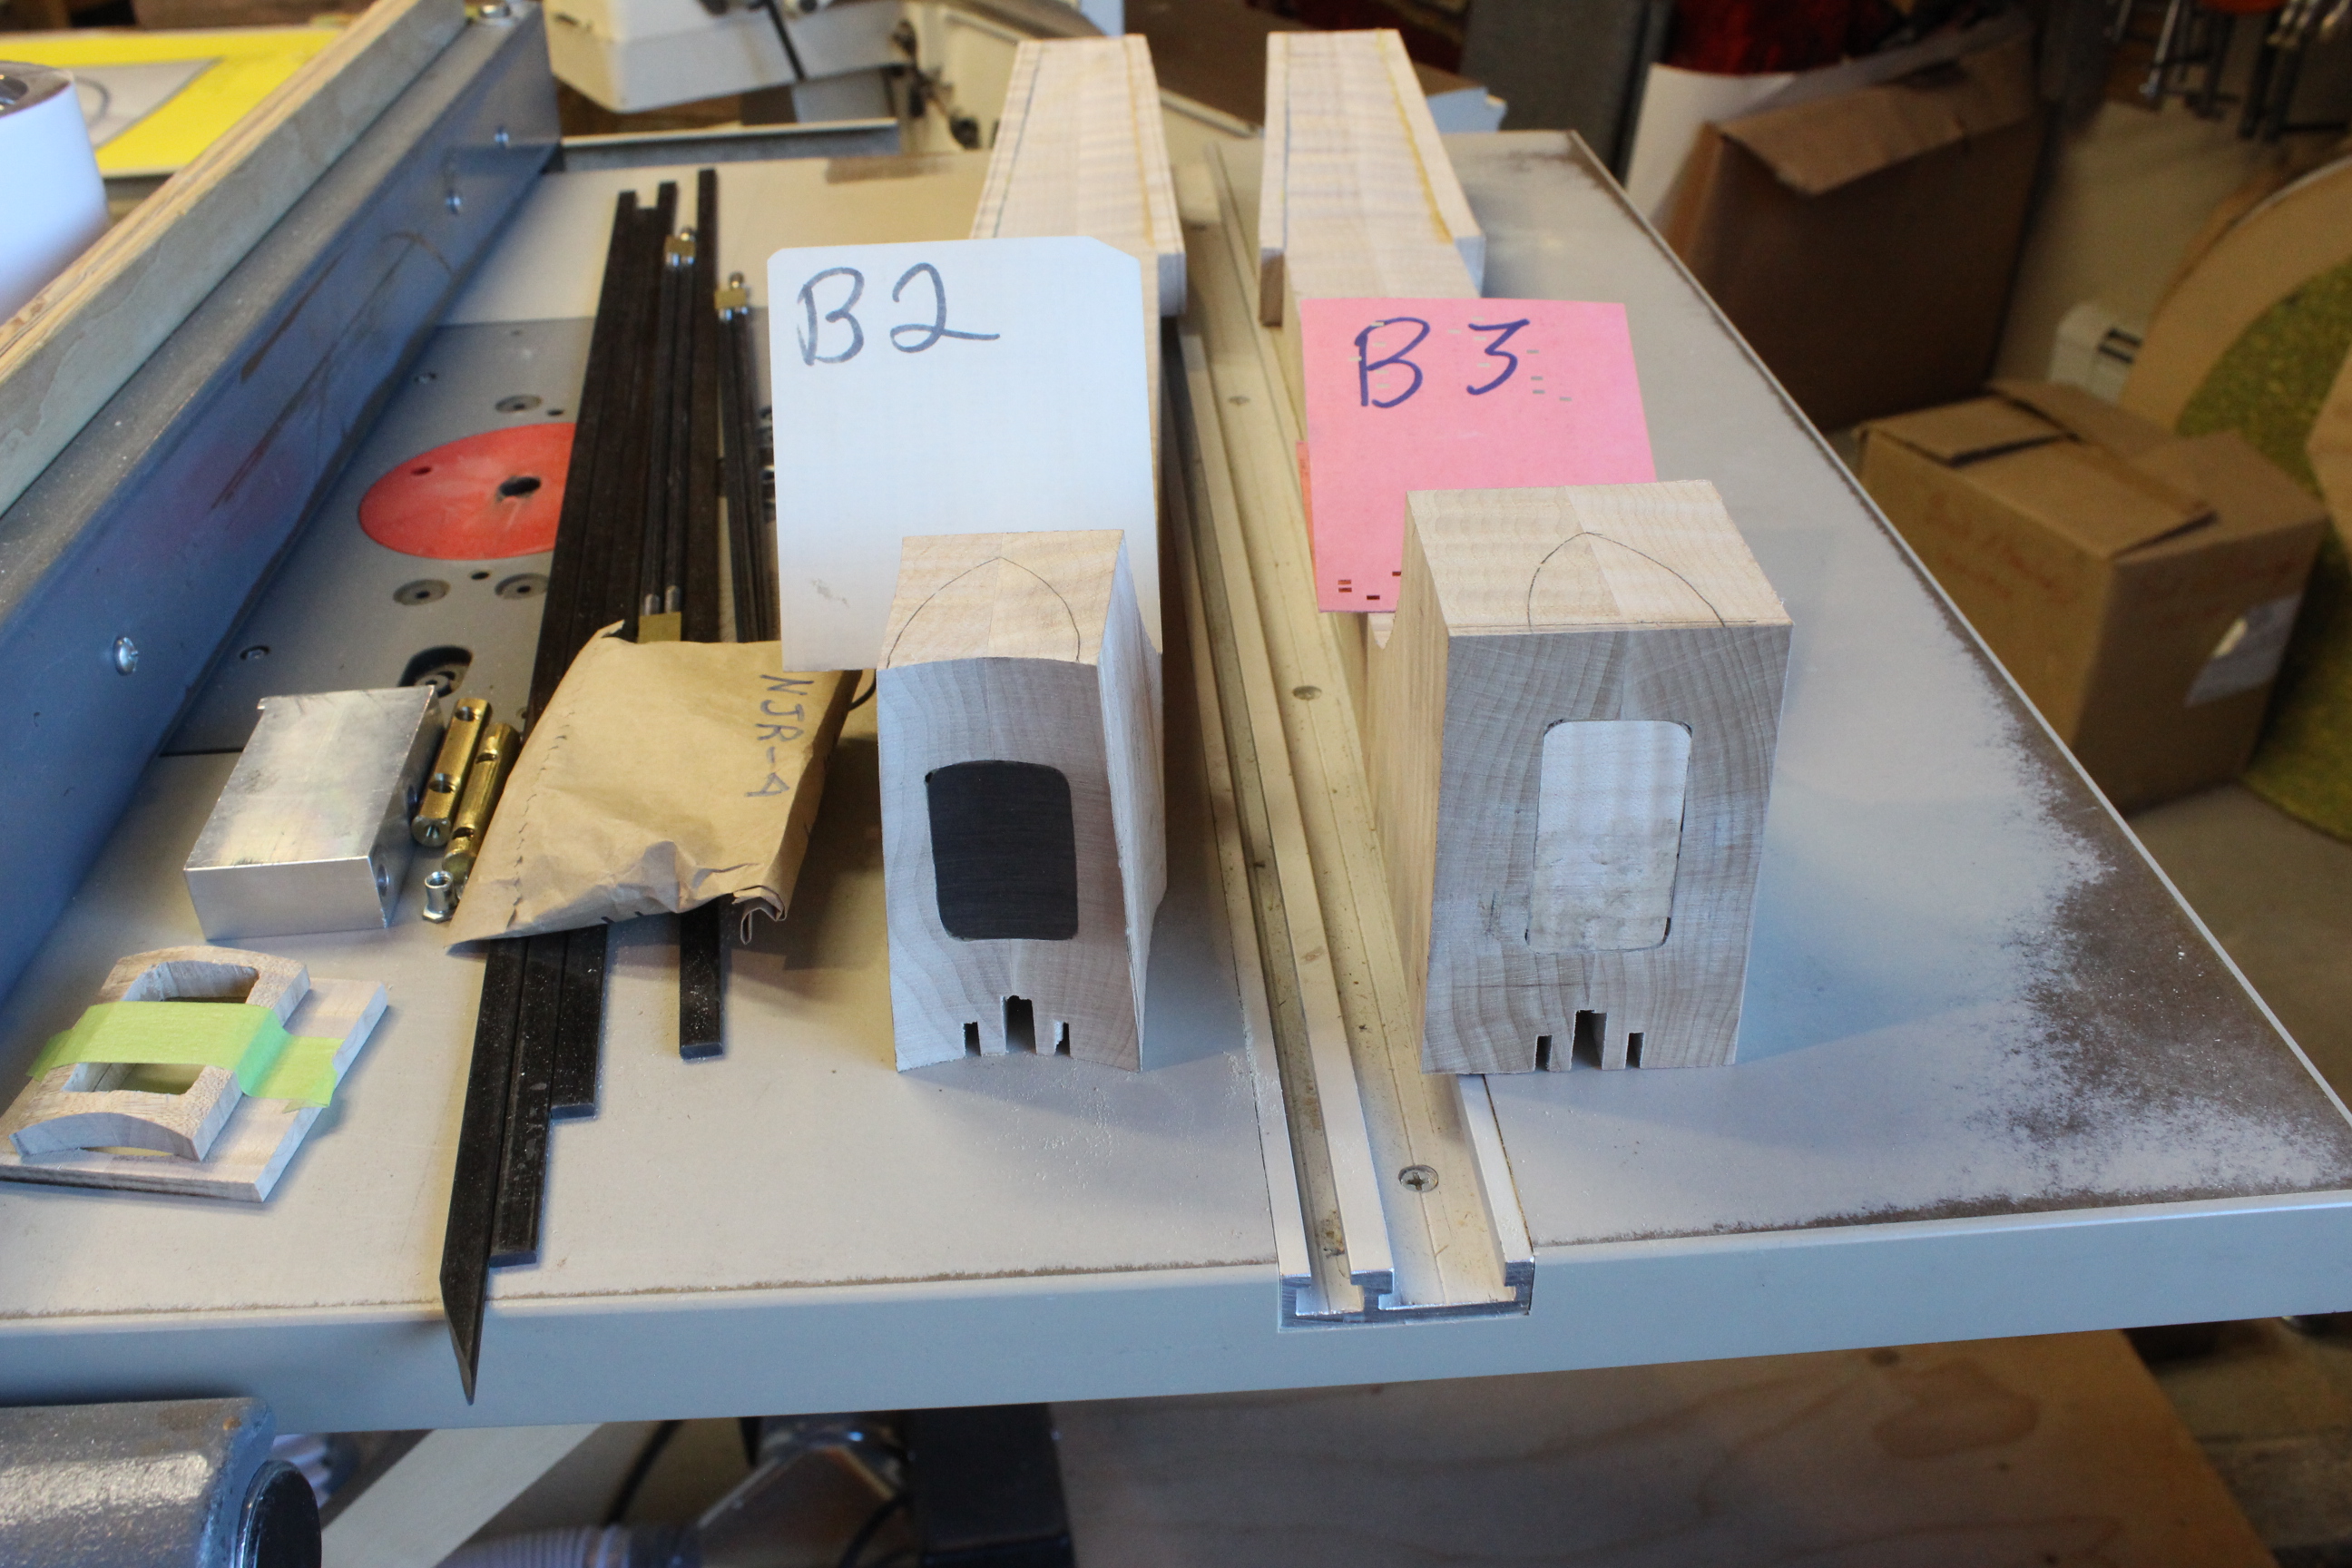
The cross grain piece, a chunk of ebony in this case, is shaped and fit and glued in a bit proud. Then I sand off the butt end again with the spindle sander being careful not to lose my angle or go any deeper. The next two photos just show two types of little jigs and the hardware for the upcoming steps.

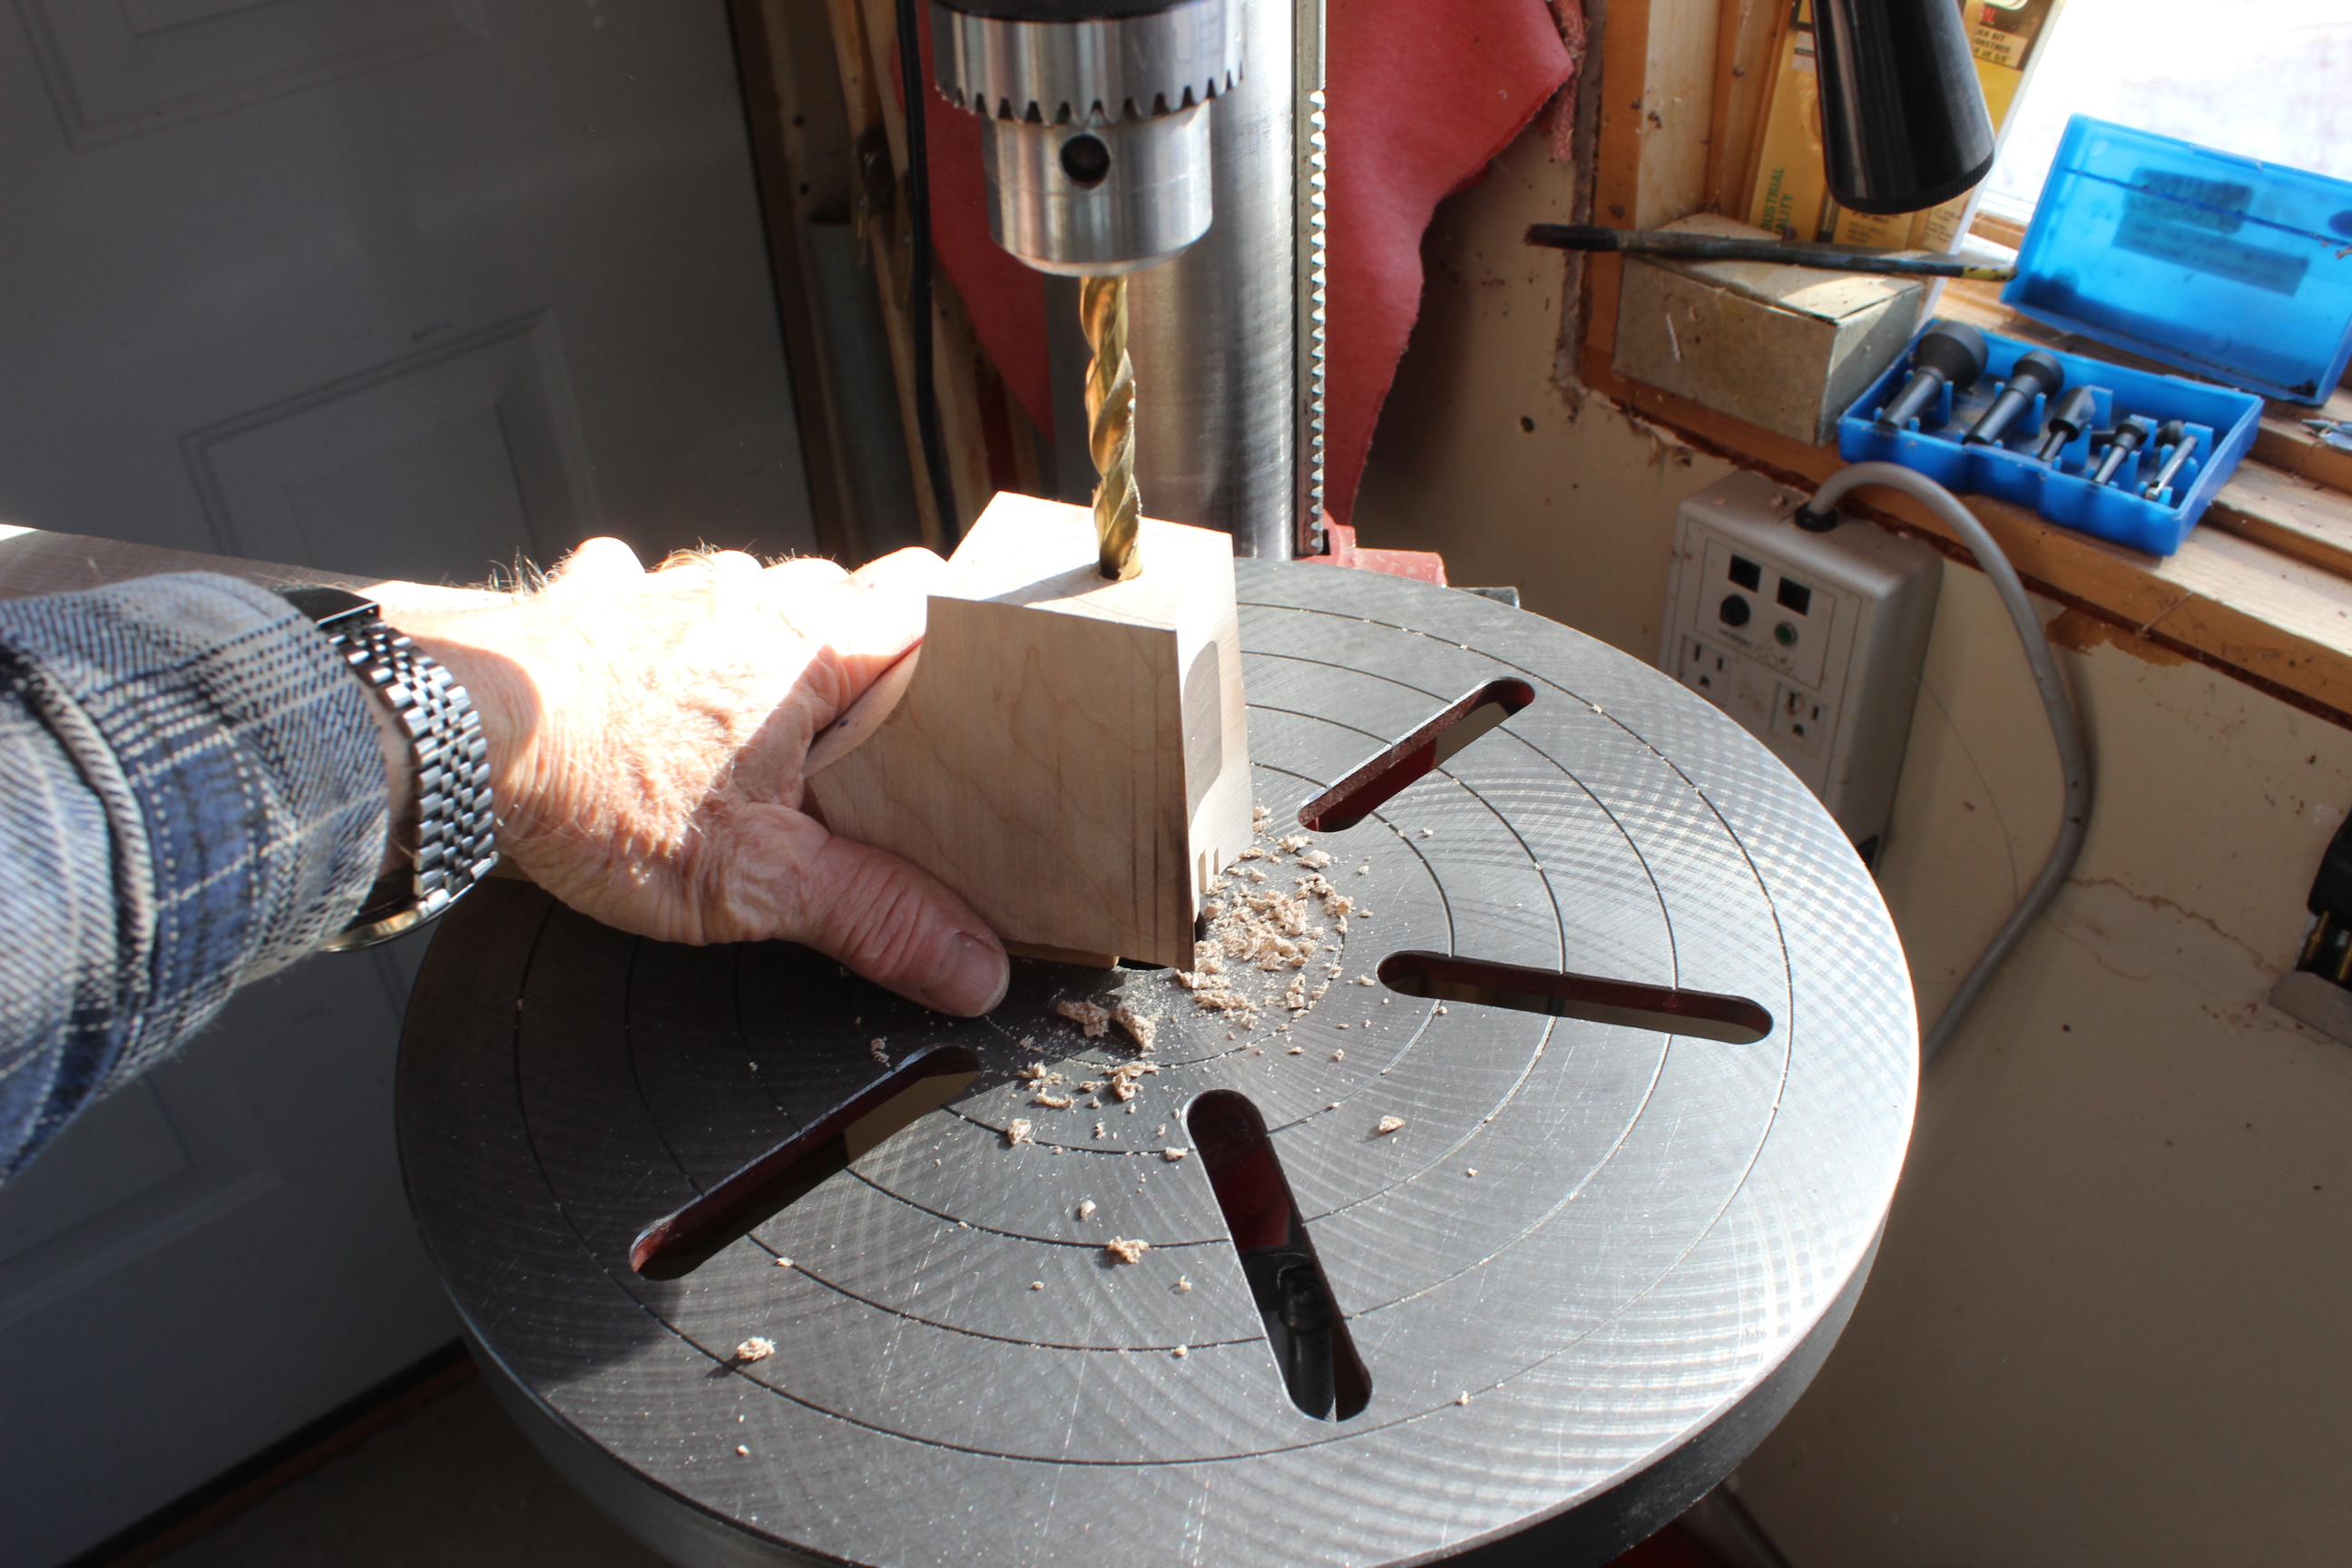
We return now to the body and drill the bolt holes for the anchor bolts. I've standardized my neck bolts so I have a drill jig to easily get the spacing every time but measure/drill by hand works just fine if slower.
I install the anchor bolt the same way as I do for my other neck joints. I put the neck up on a wedge shim so that the butt end is vertical and drill the hole to take the anchor. You can see the brass anchor in the second photo, it is cross drilled and tapped to take 1/4-20 furniture bolts. It goes down in the hole and the anchor bolts come across and thread into it.
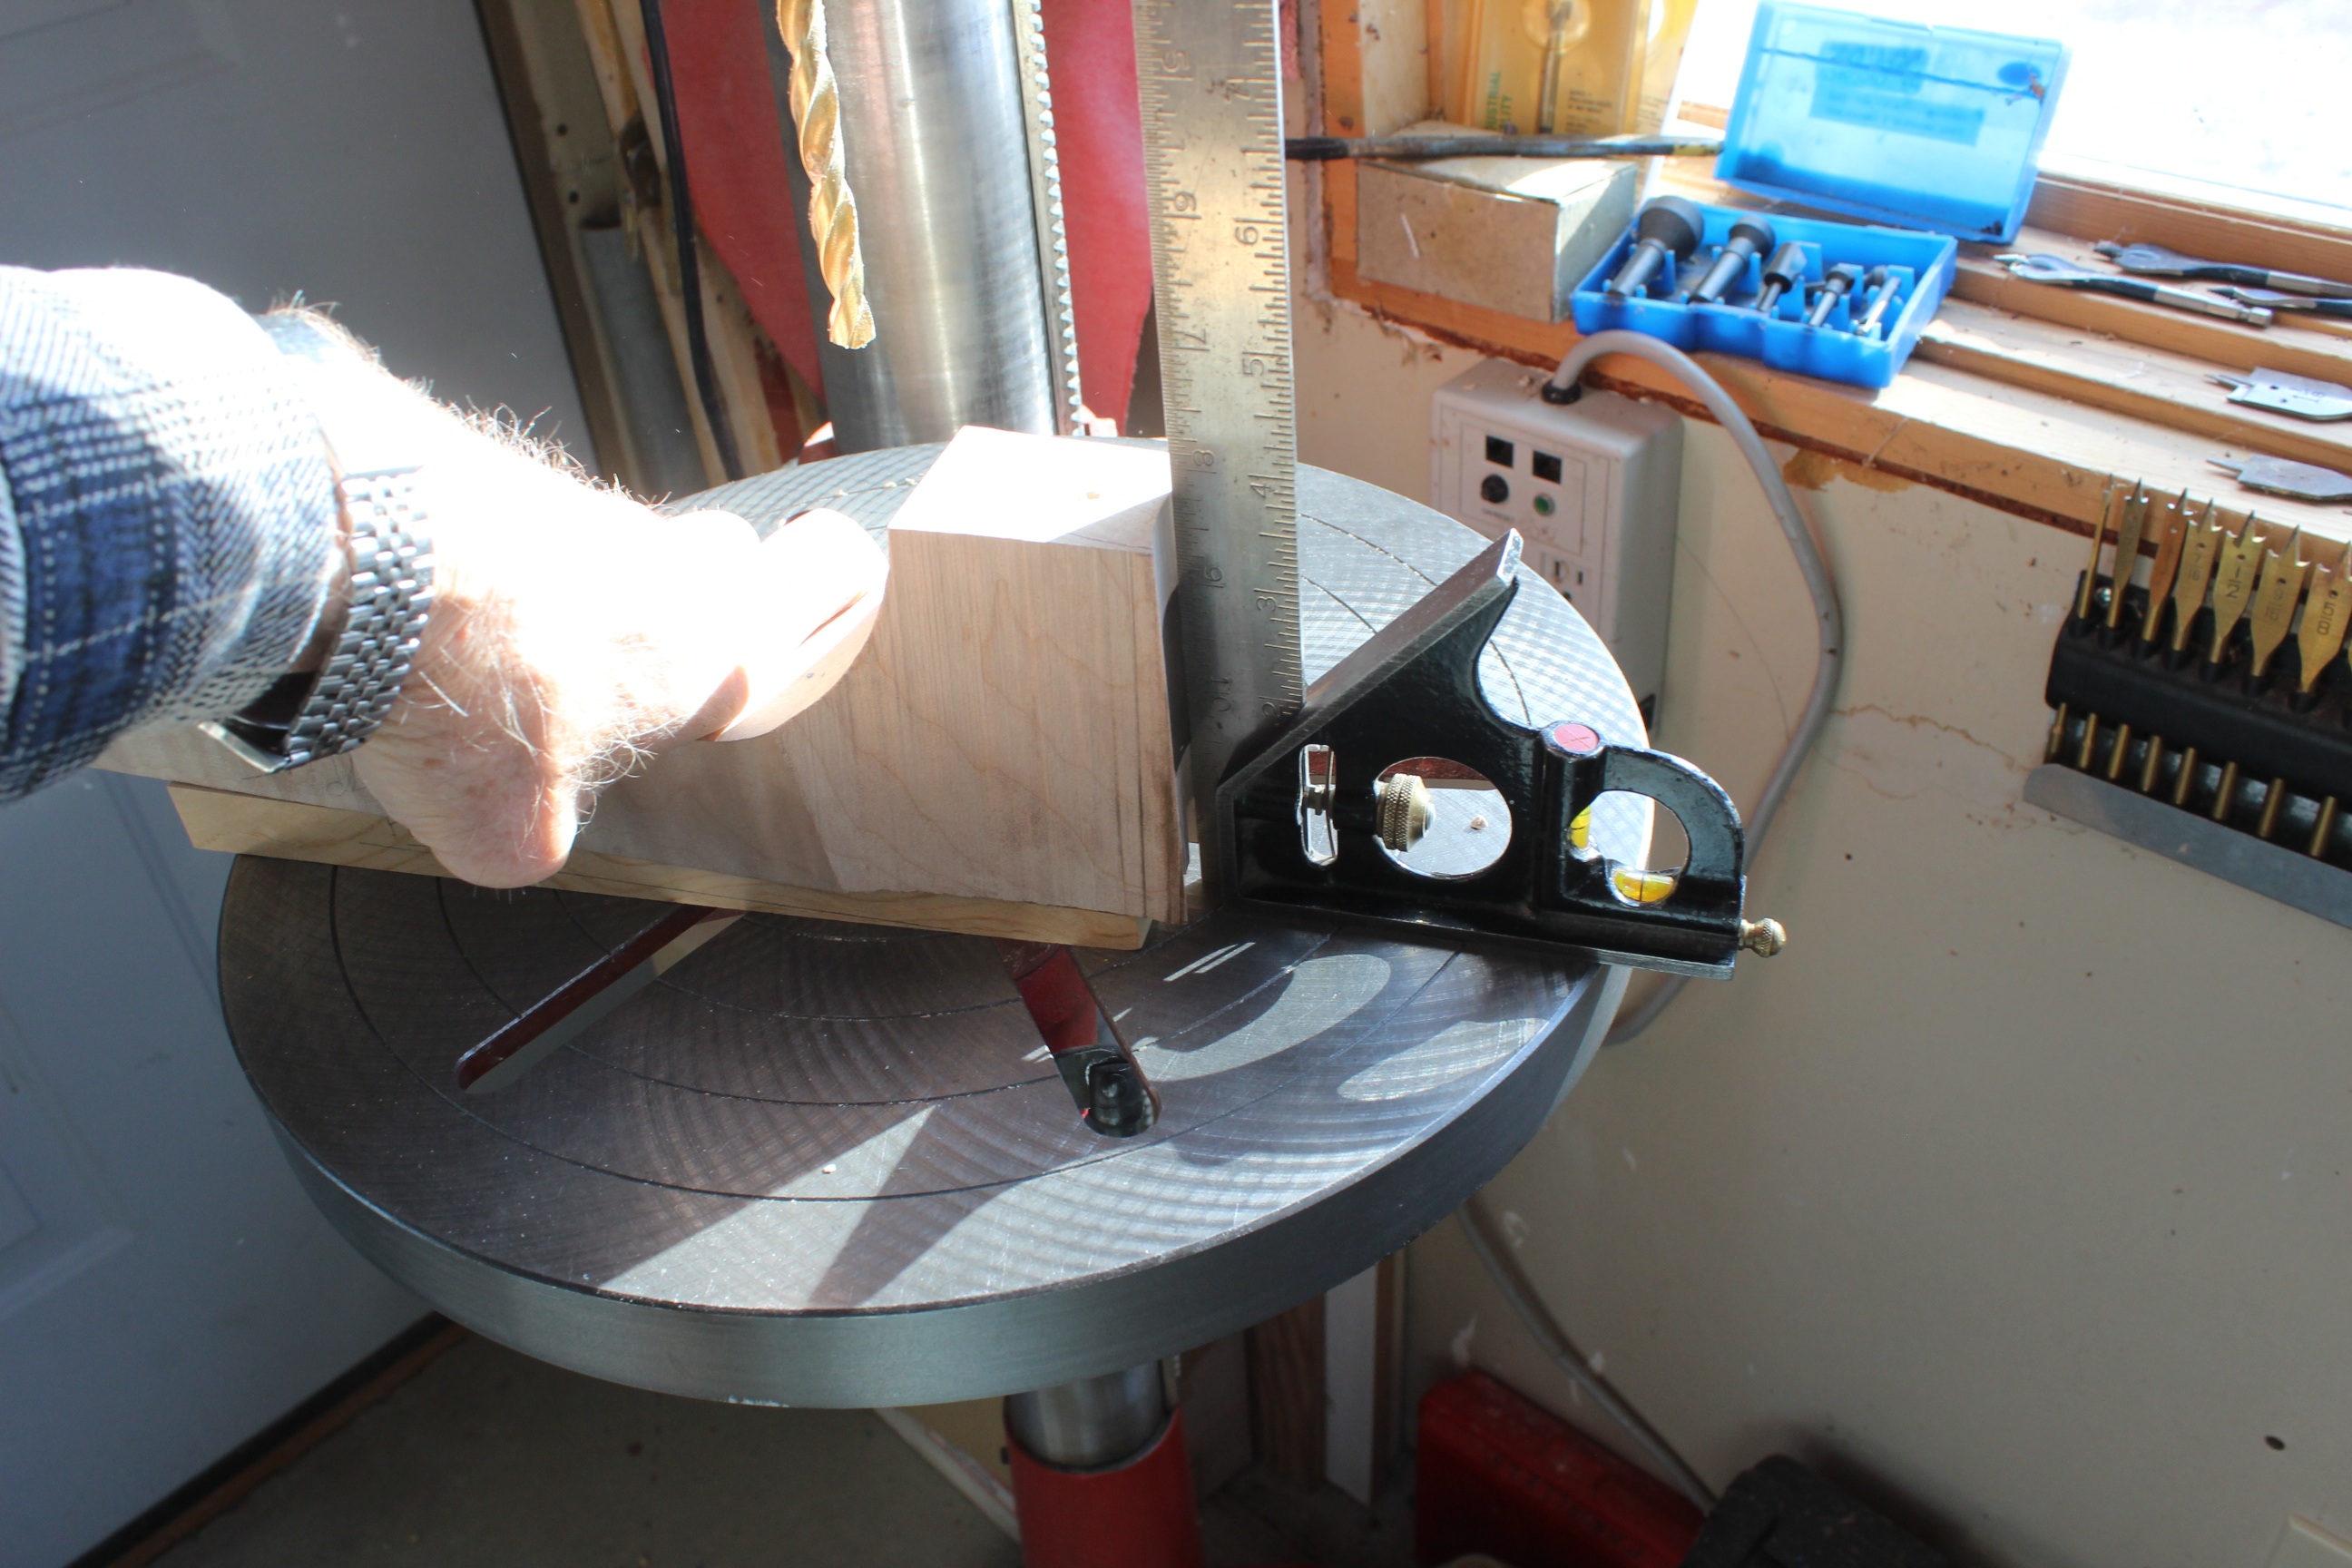
Last of all I check my back angle with a simple jig and also insert long graphite bars in the slots in the neck and use them to check side-to-side alignment true to the body centerline. If anything is off I make tweak adjustments to my spindle sander jig and re-sand the butt end until all is true. The smaller radius curvature of the neck should make it snug nice and tight to the body with no gaps in the joint.
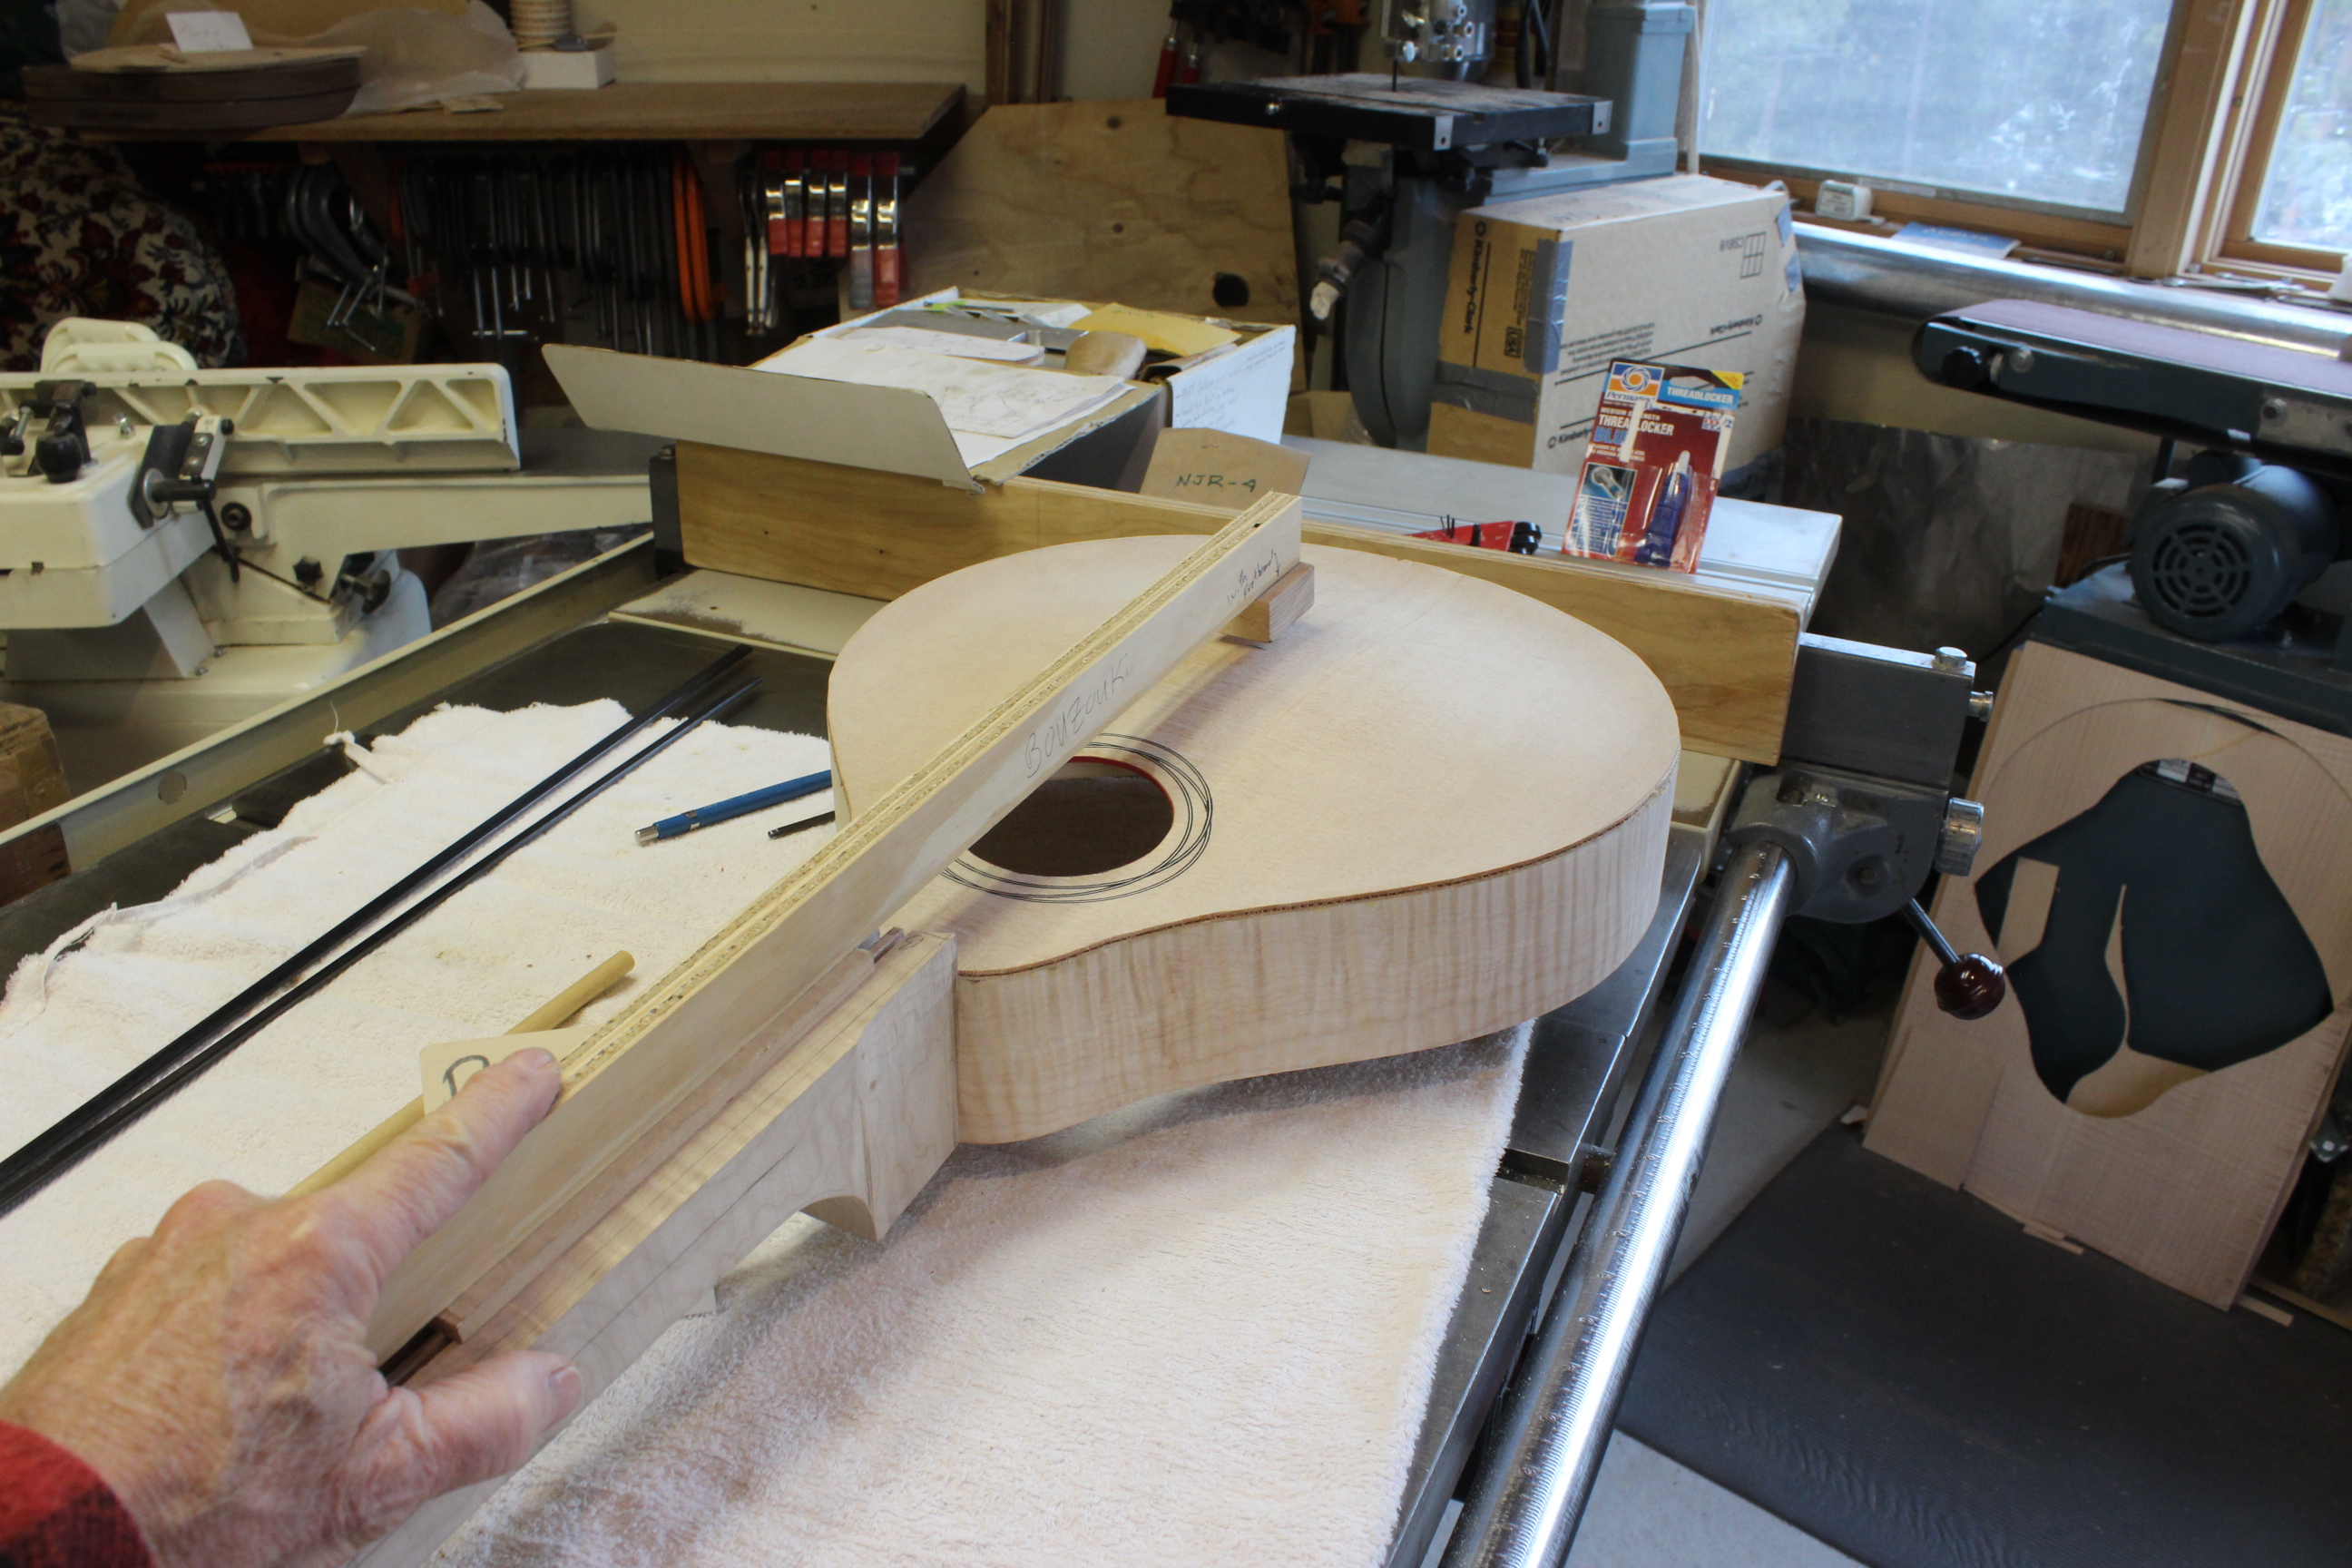
Note here that the fretboard extension has not yet been attached. For this neck attachment I just use the same sort of extension as I do in my mandolins so see the Toot on building mandolins for more detail on that.
A word of WARNING. Note here that I have not yet carved the heel. Once I do that will change the neck/body joint interface and may raise the back angle a little bit. So after carving be sure to double check your alignments again.