Let's Build A Guitar (Page 2)
Last Modified - November 6, 2012
In Page 1 we built the double plates. We now have the plates roughed out but not braced. At this point I run some Chladni modes on the plates before they are braced.
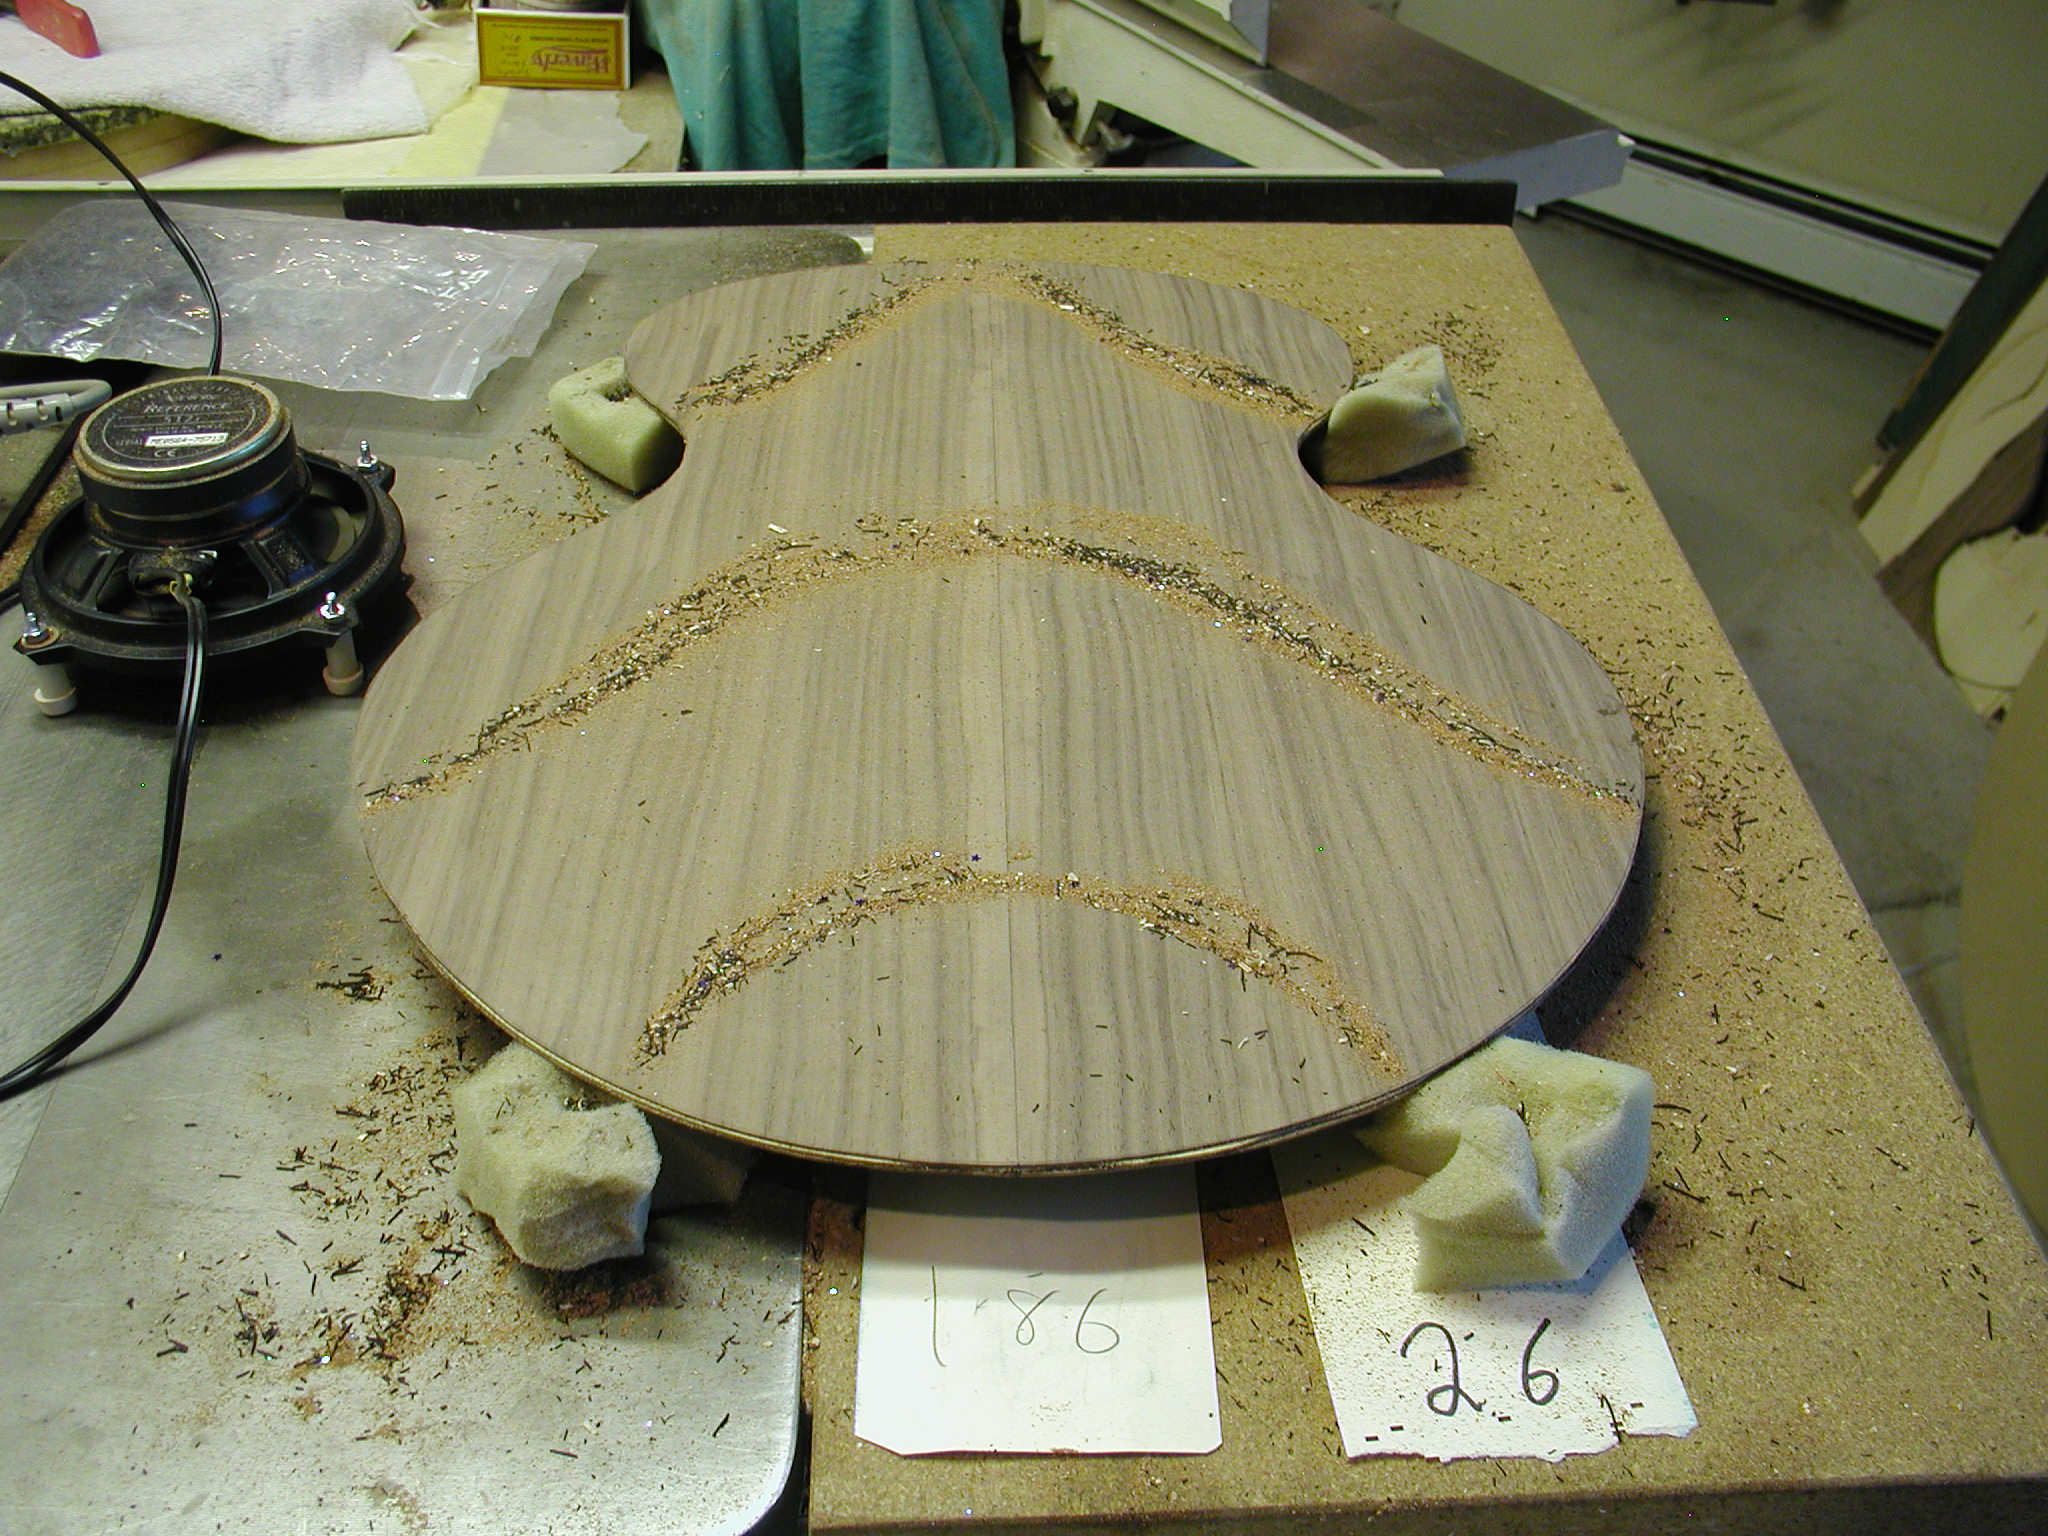
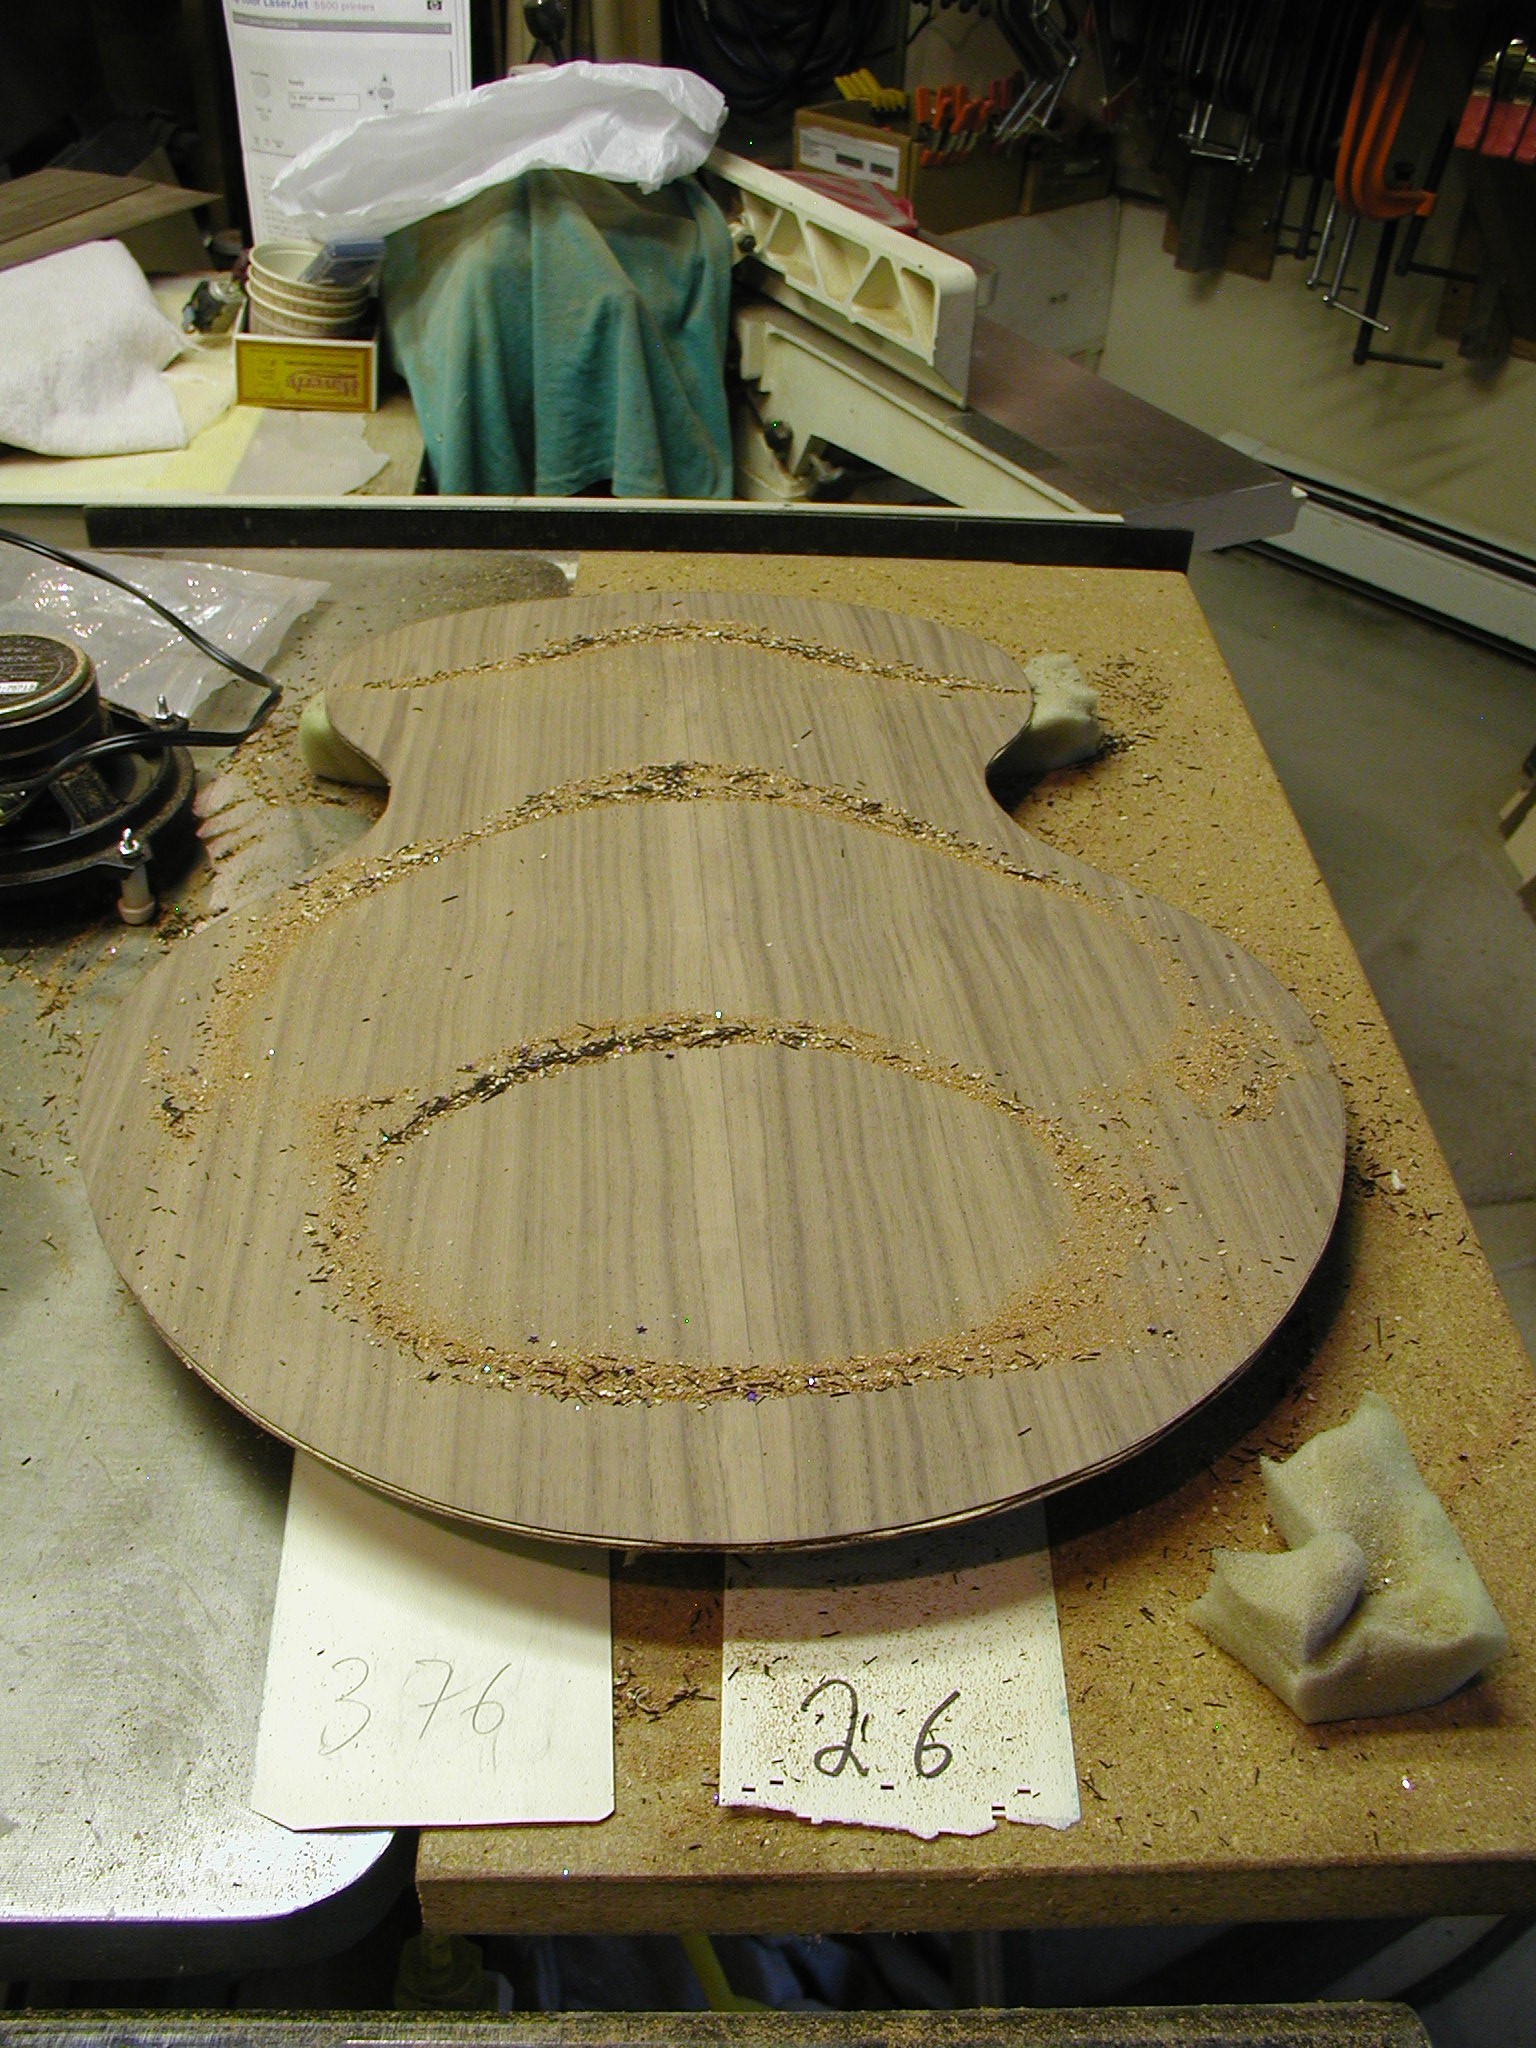
These are just a few for example. I am looking here to see at what frequencies the modes happen and how clean and balanced they are. The mode shapes for a given model of guitar are the same but where they occur and how clean they are is not. What I notice with the double tops is that the modes are very clean and narrow and the frequency at which they happen is very narrow, plus-minus only a few Hertz , and they are very strong, almost violent. Which all says that the plates are much more uniform than a similar solid plate. This is understandable since the Nomex has kind of homogenized out the wood variances. Since I know the modes I don't run them out to their cleanest and narrowest before taking the photo. This is mostly for myself and record keeping related to Chladni modes in general for various models.
Now it is bracing time.
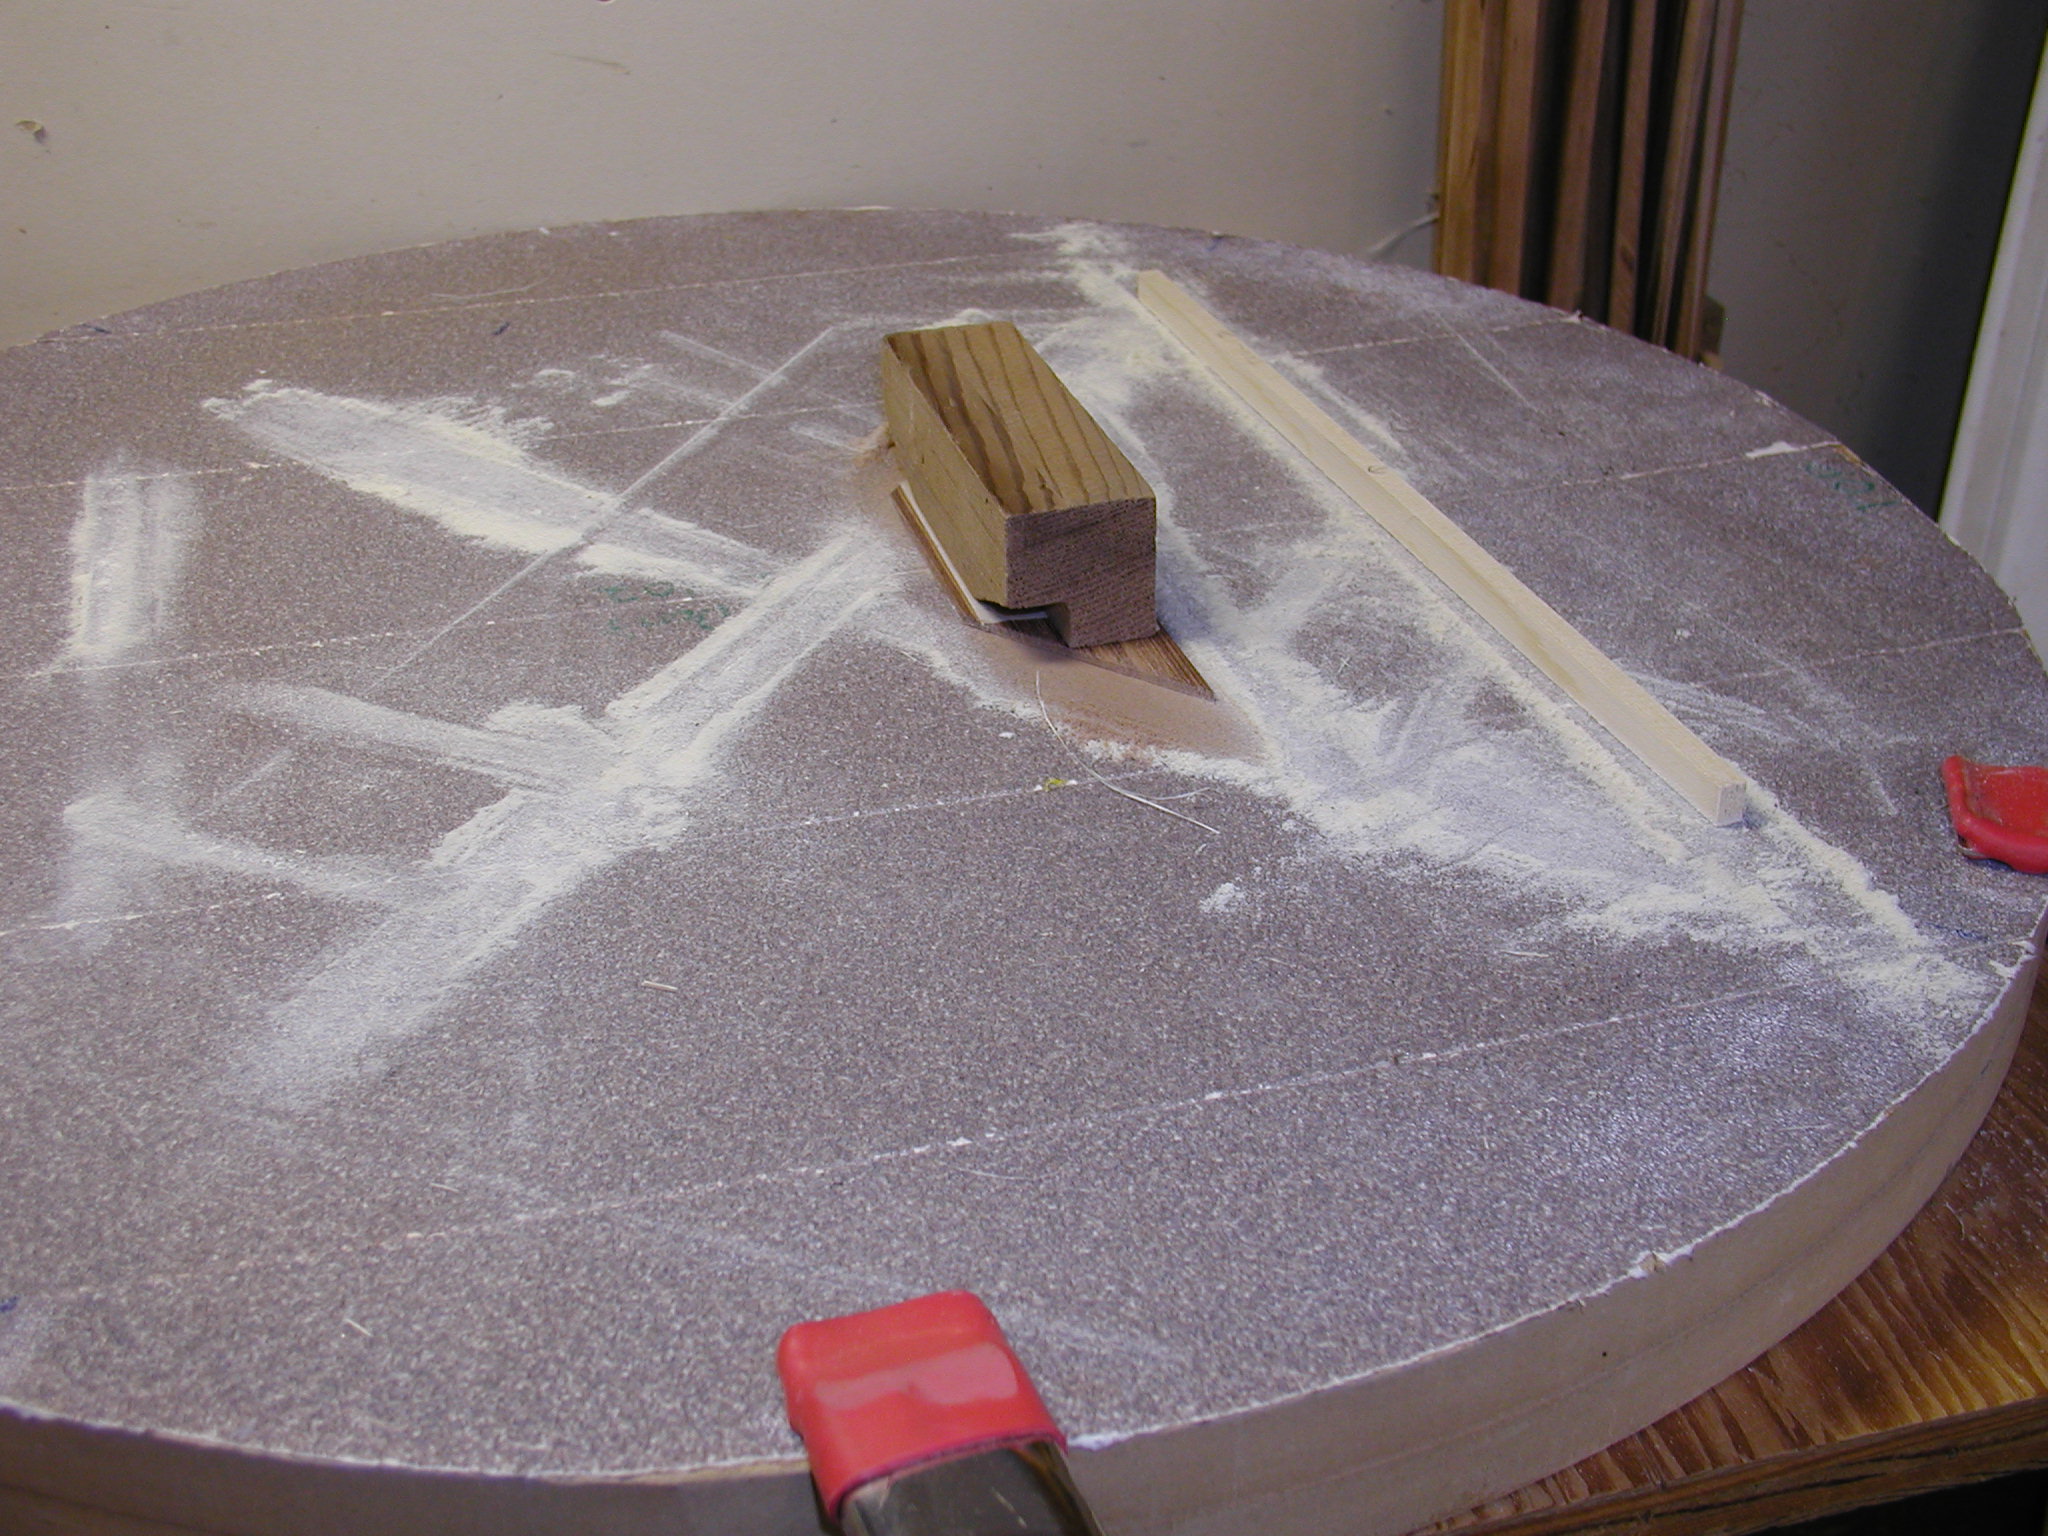

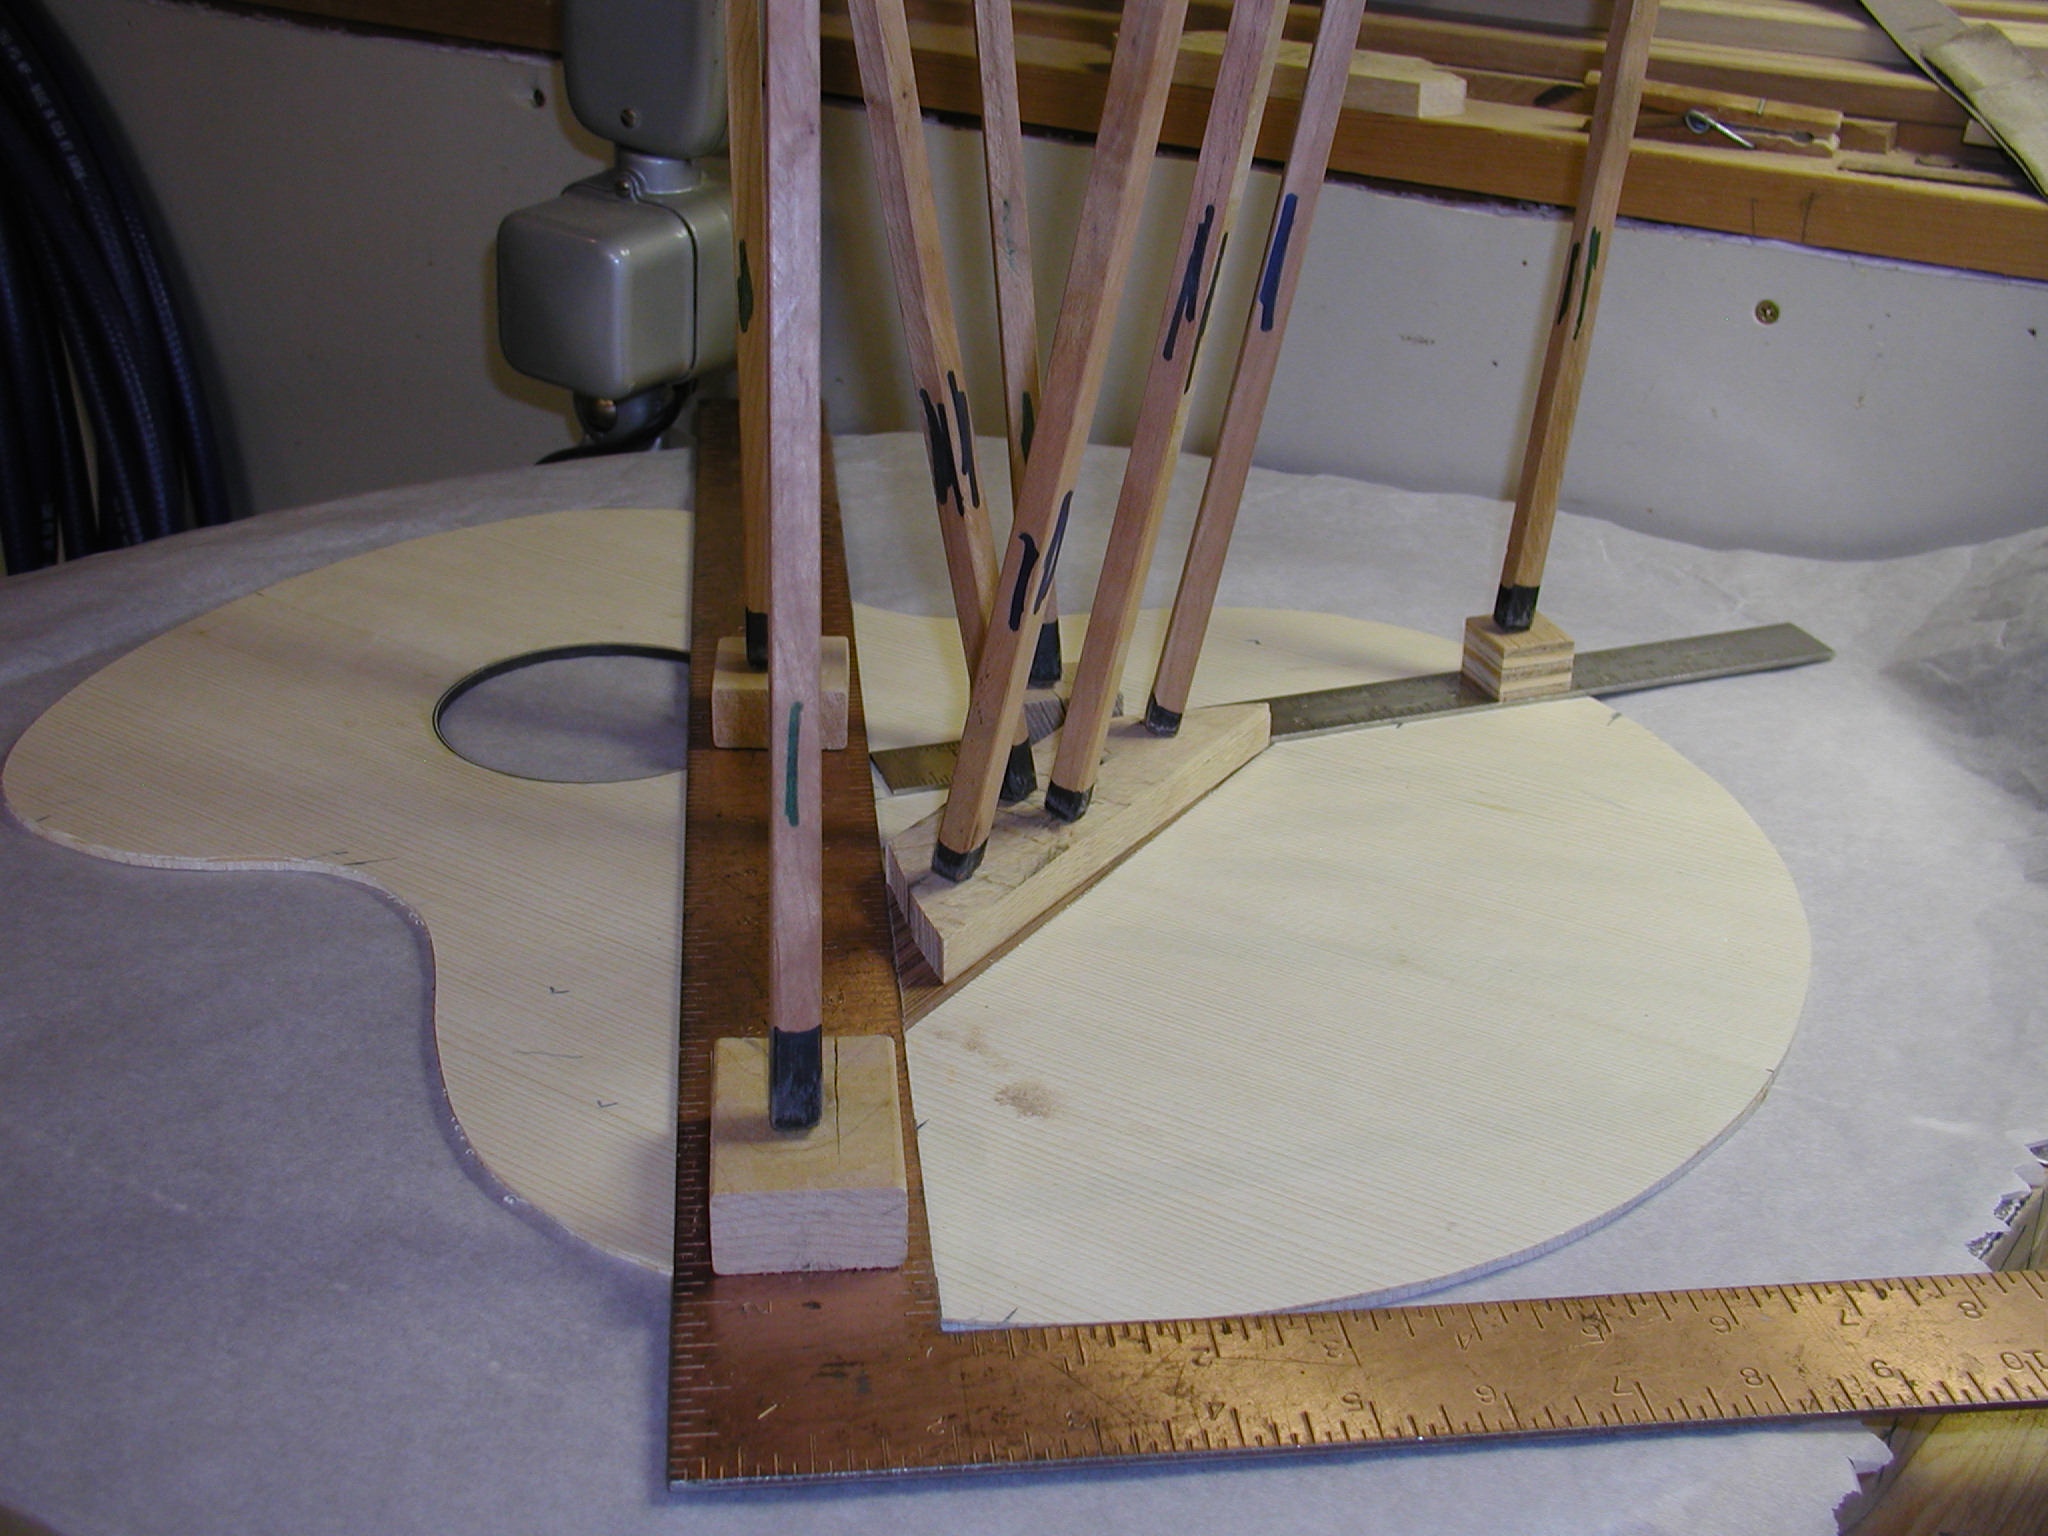
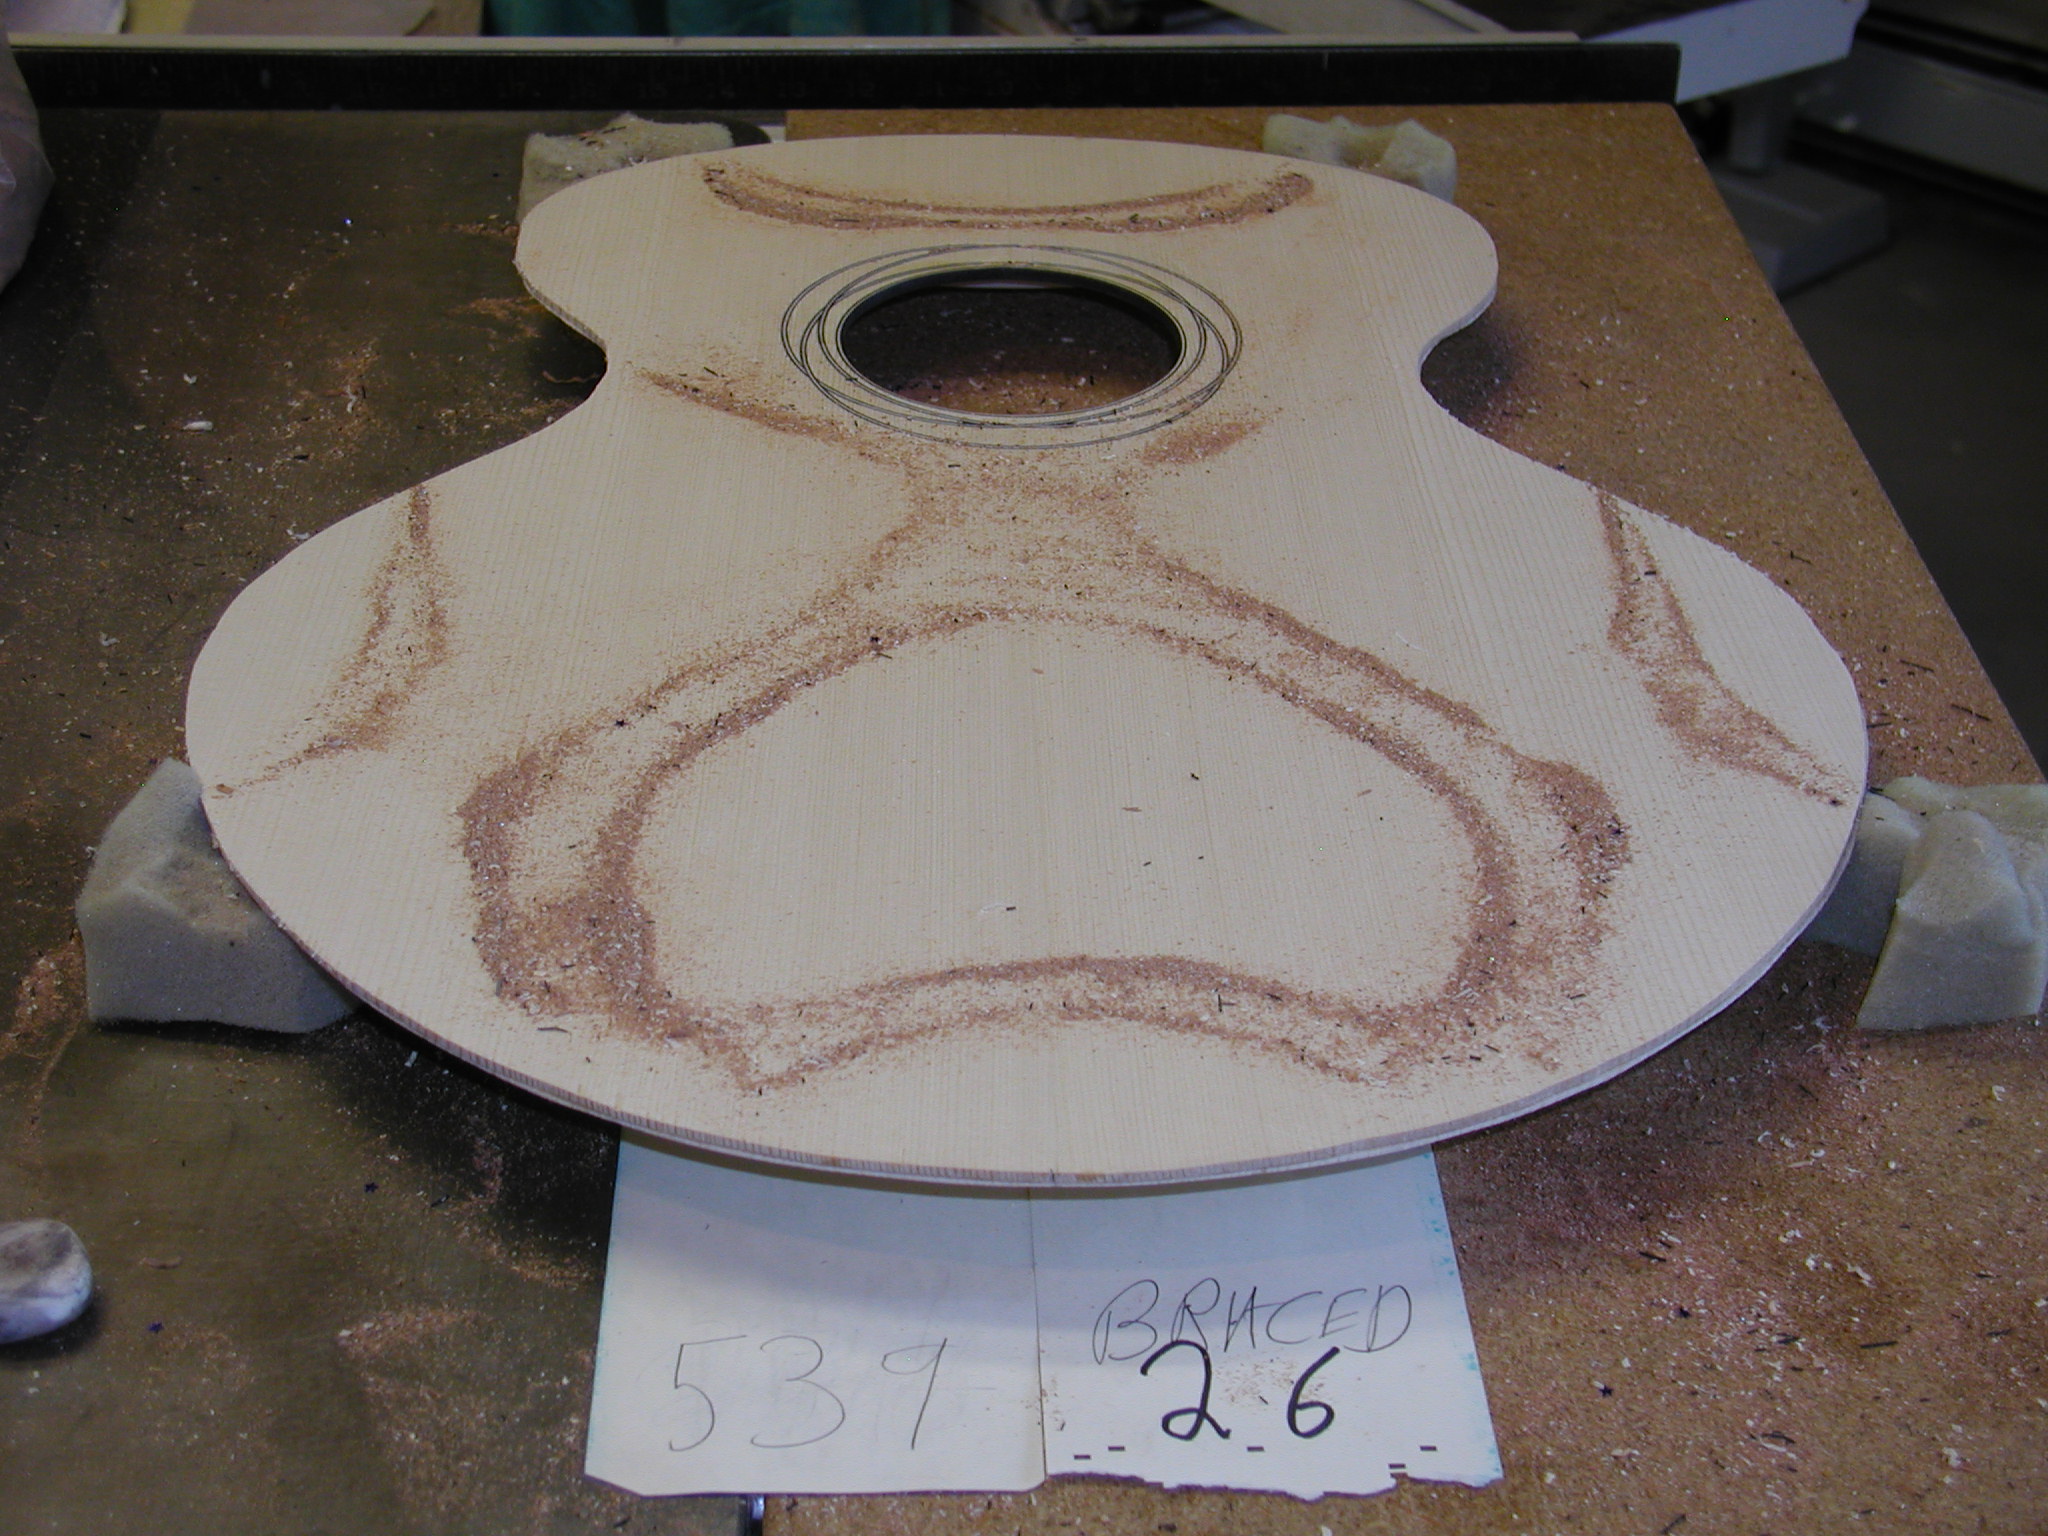
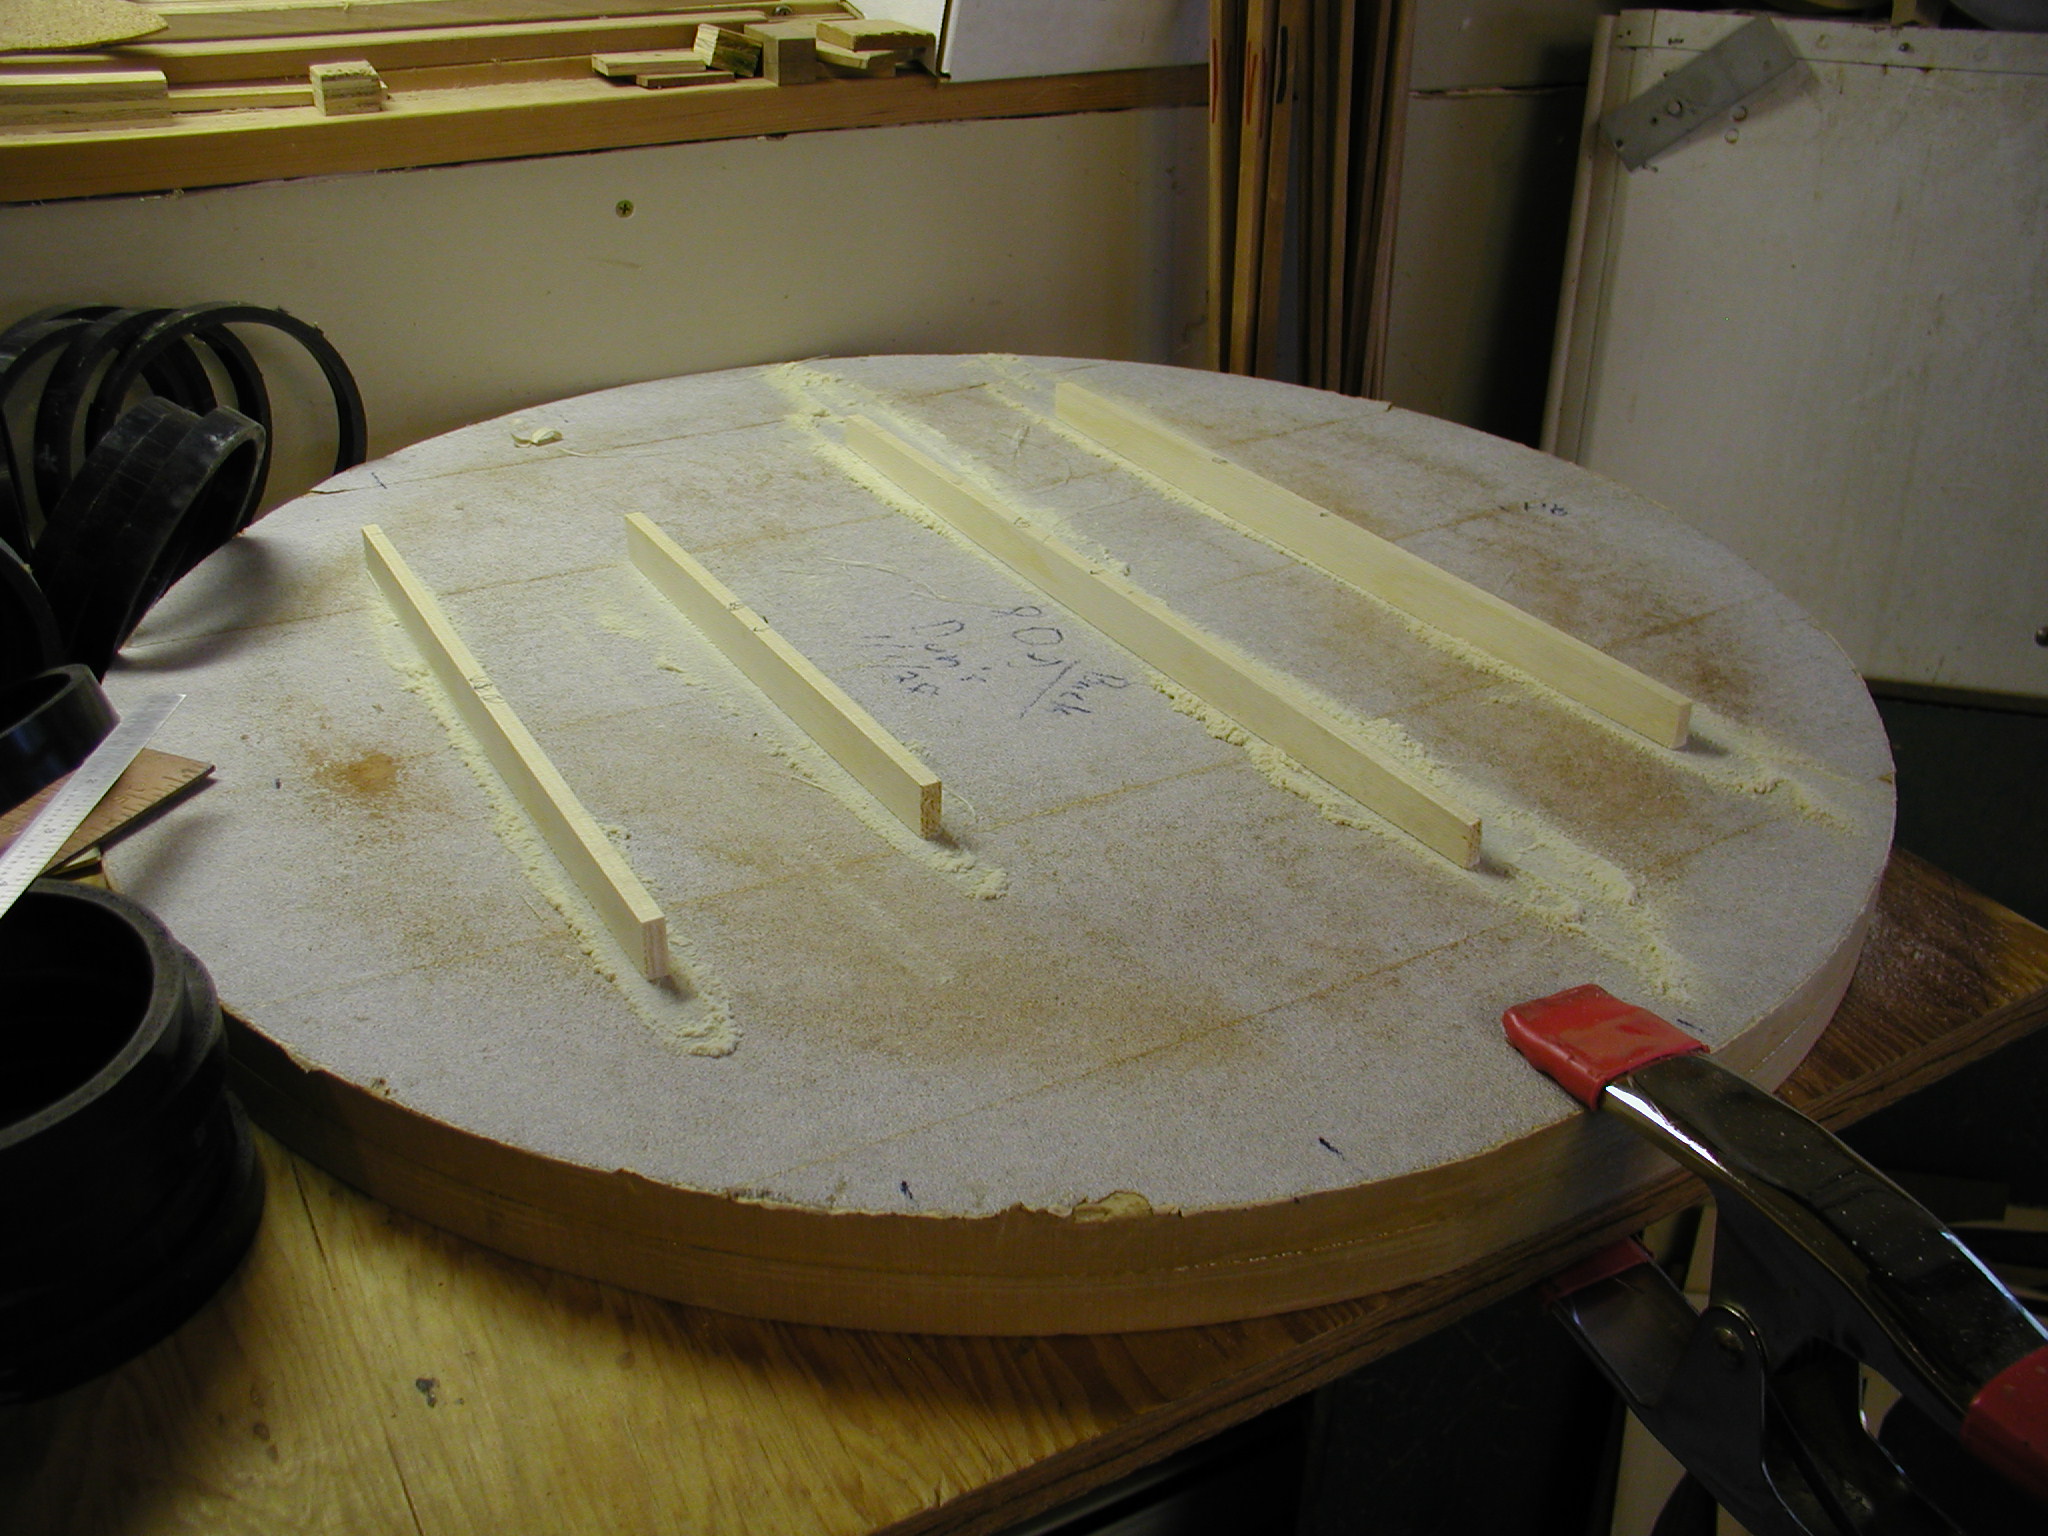
The bracing happens in a hollow form. These are just big disks of MDF (Medium Density Fiberboard) that have been "dished out" to a particular radius, one for the top and another for the back. I have coated these with sandpaper. The bridge patch gets sanded in this dish to match the radius of the top, that way you don't end up gluing a flat bridge plate to a curved top and get the corners "telegraphing" through the top. You see this sometimes as little bumps in the top finish. I then position straight edges where the X-brace will go to use as alignment tools and glue it down in the hollow form. The astute will note that this particular model has a greater than 90 degree angle on the X-brace. I am using go-bars of different diameters for various pressures.
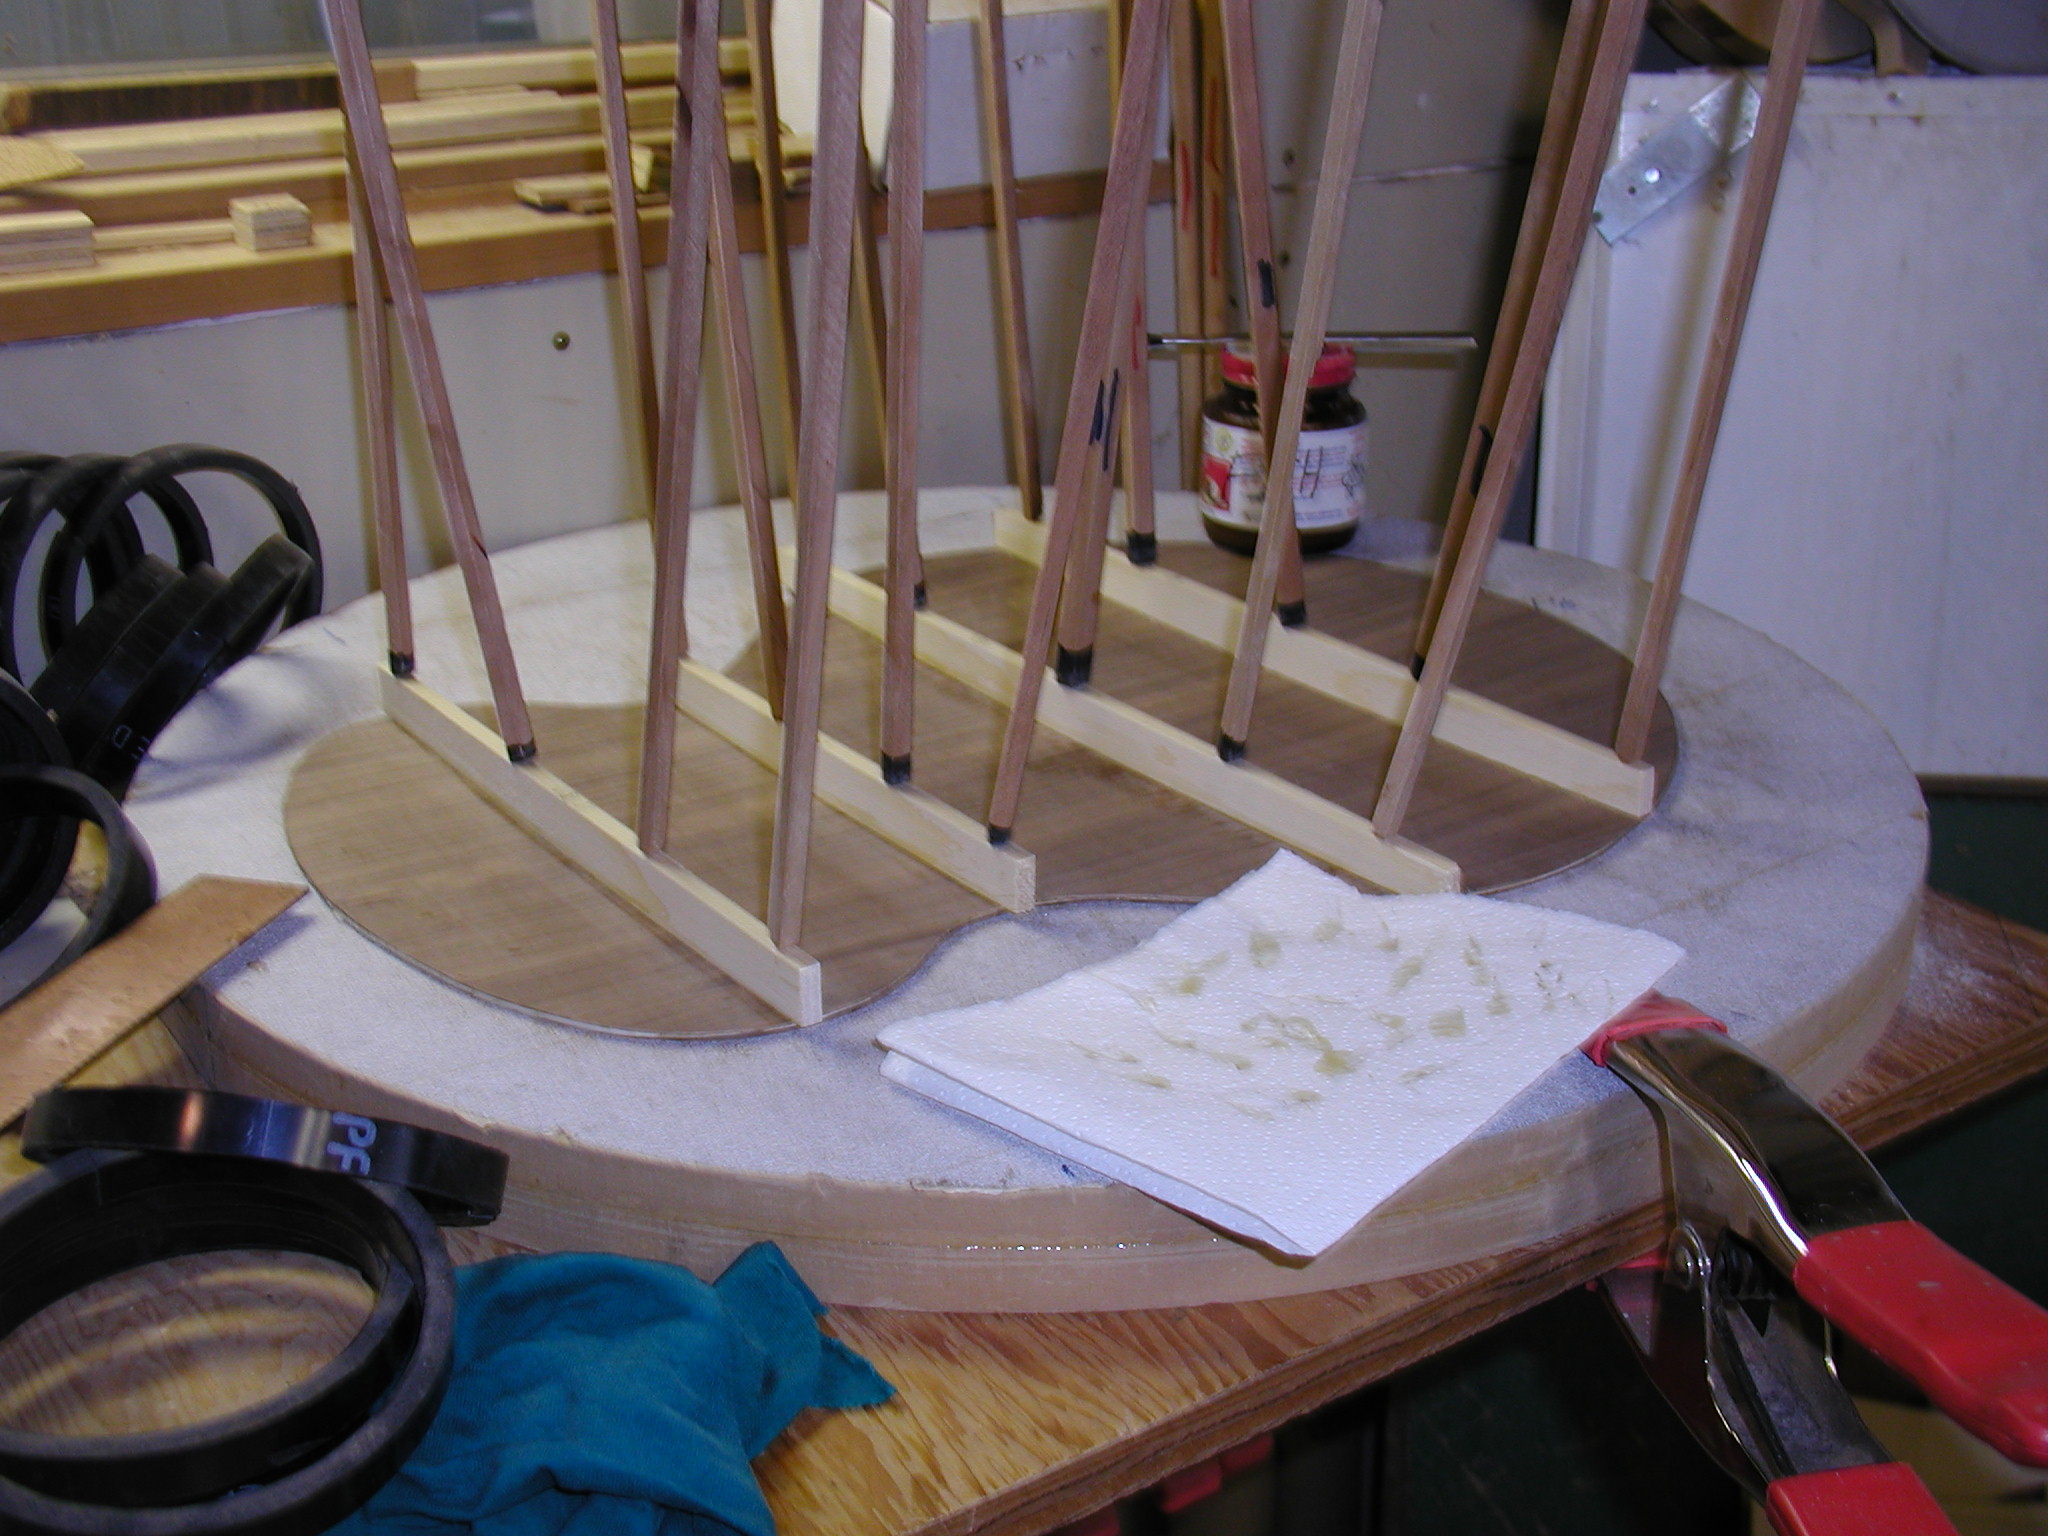
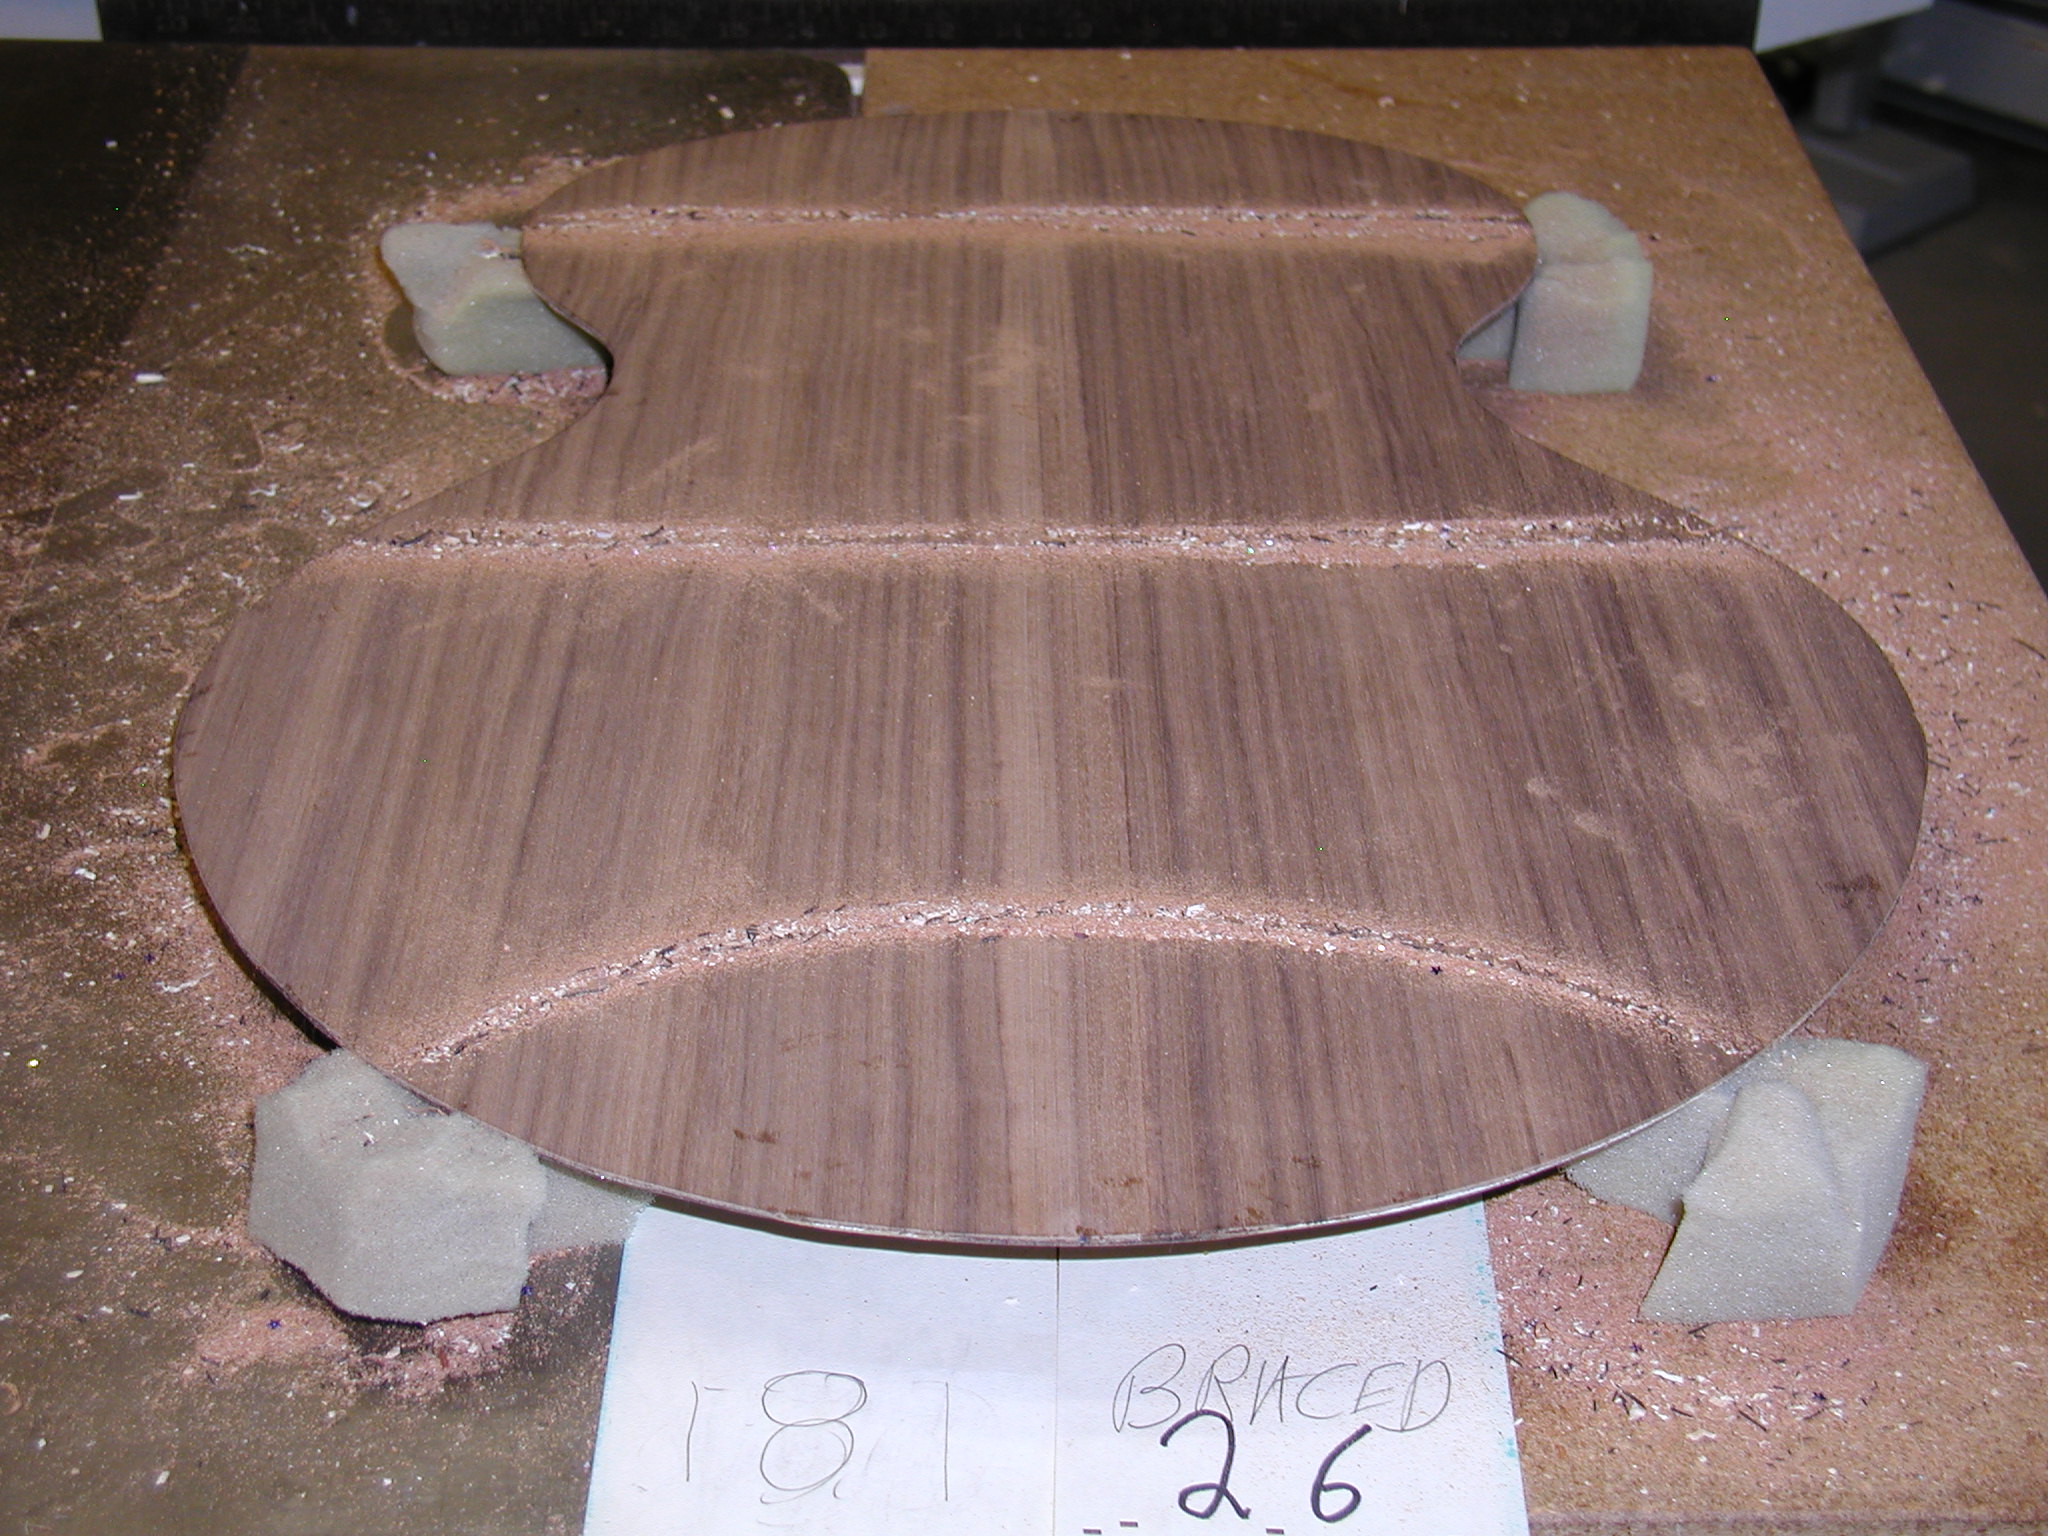
While the bridge patch is drying I can use the hollow form for the back and sand the braces and then glue them up in the same way. The disgusting glue-wipe paper shows all the squeeze-out that gets cleaned up neatly. No glue bits and dribbles allowed.
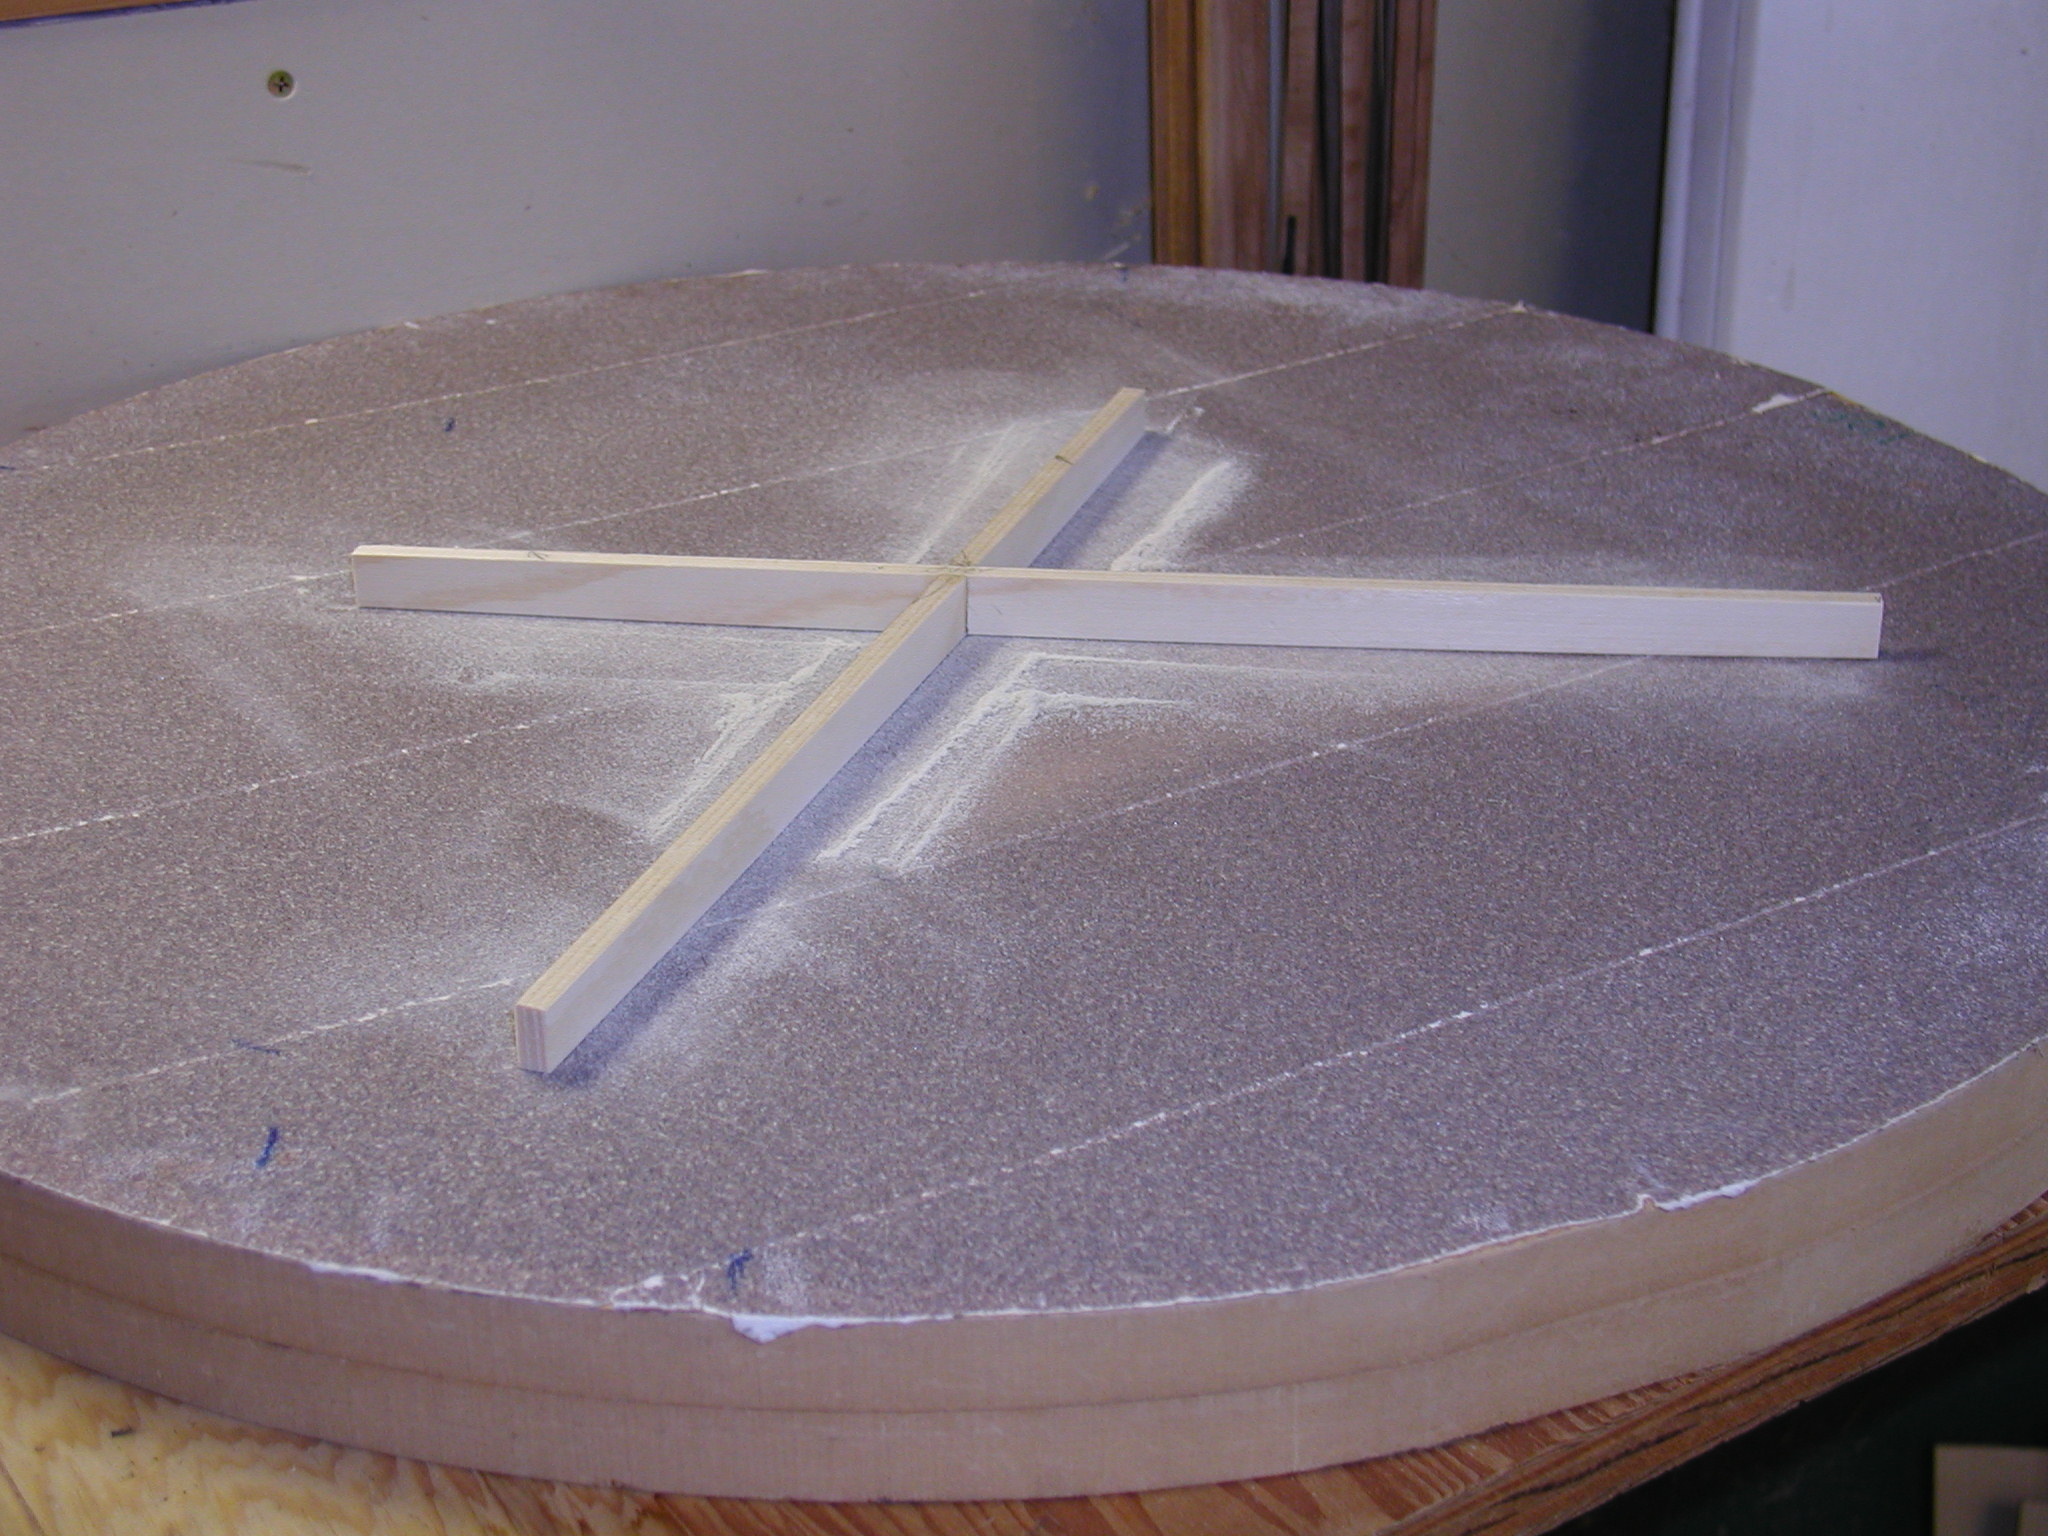
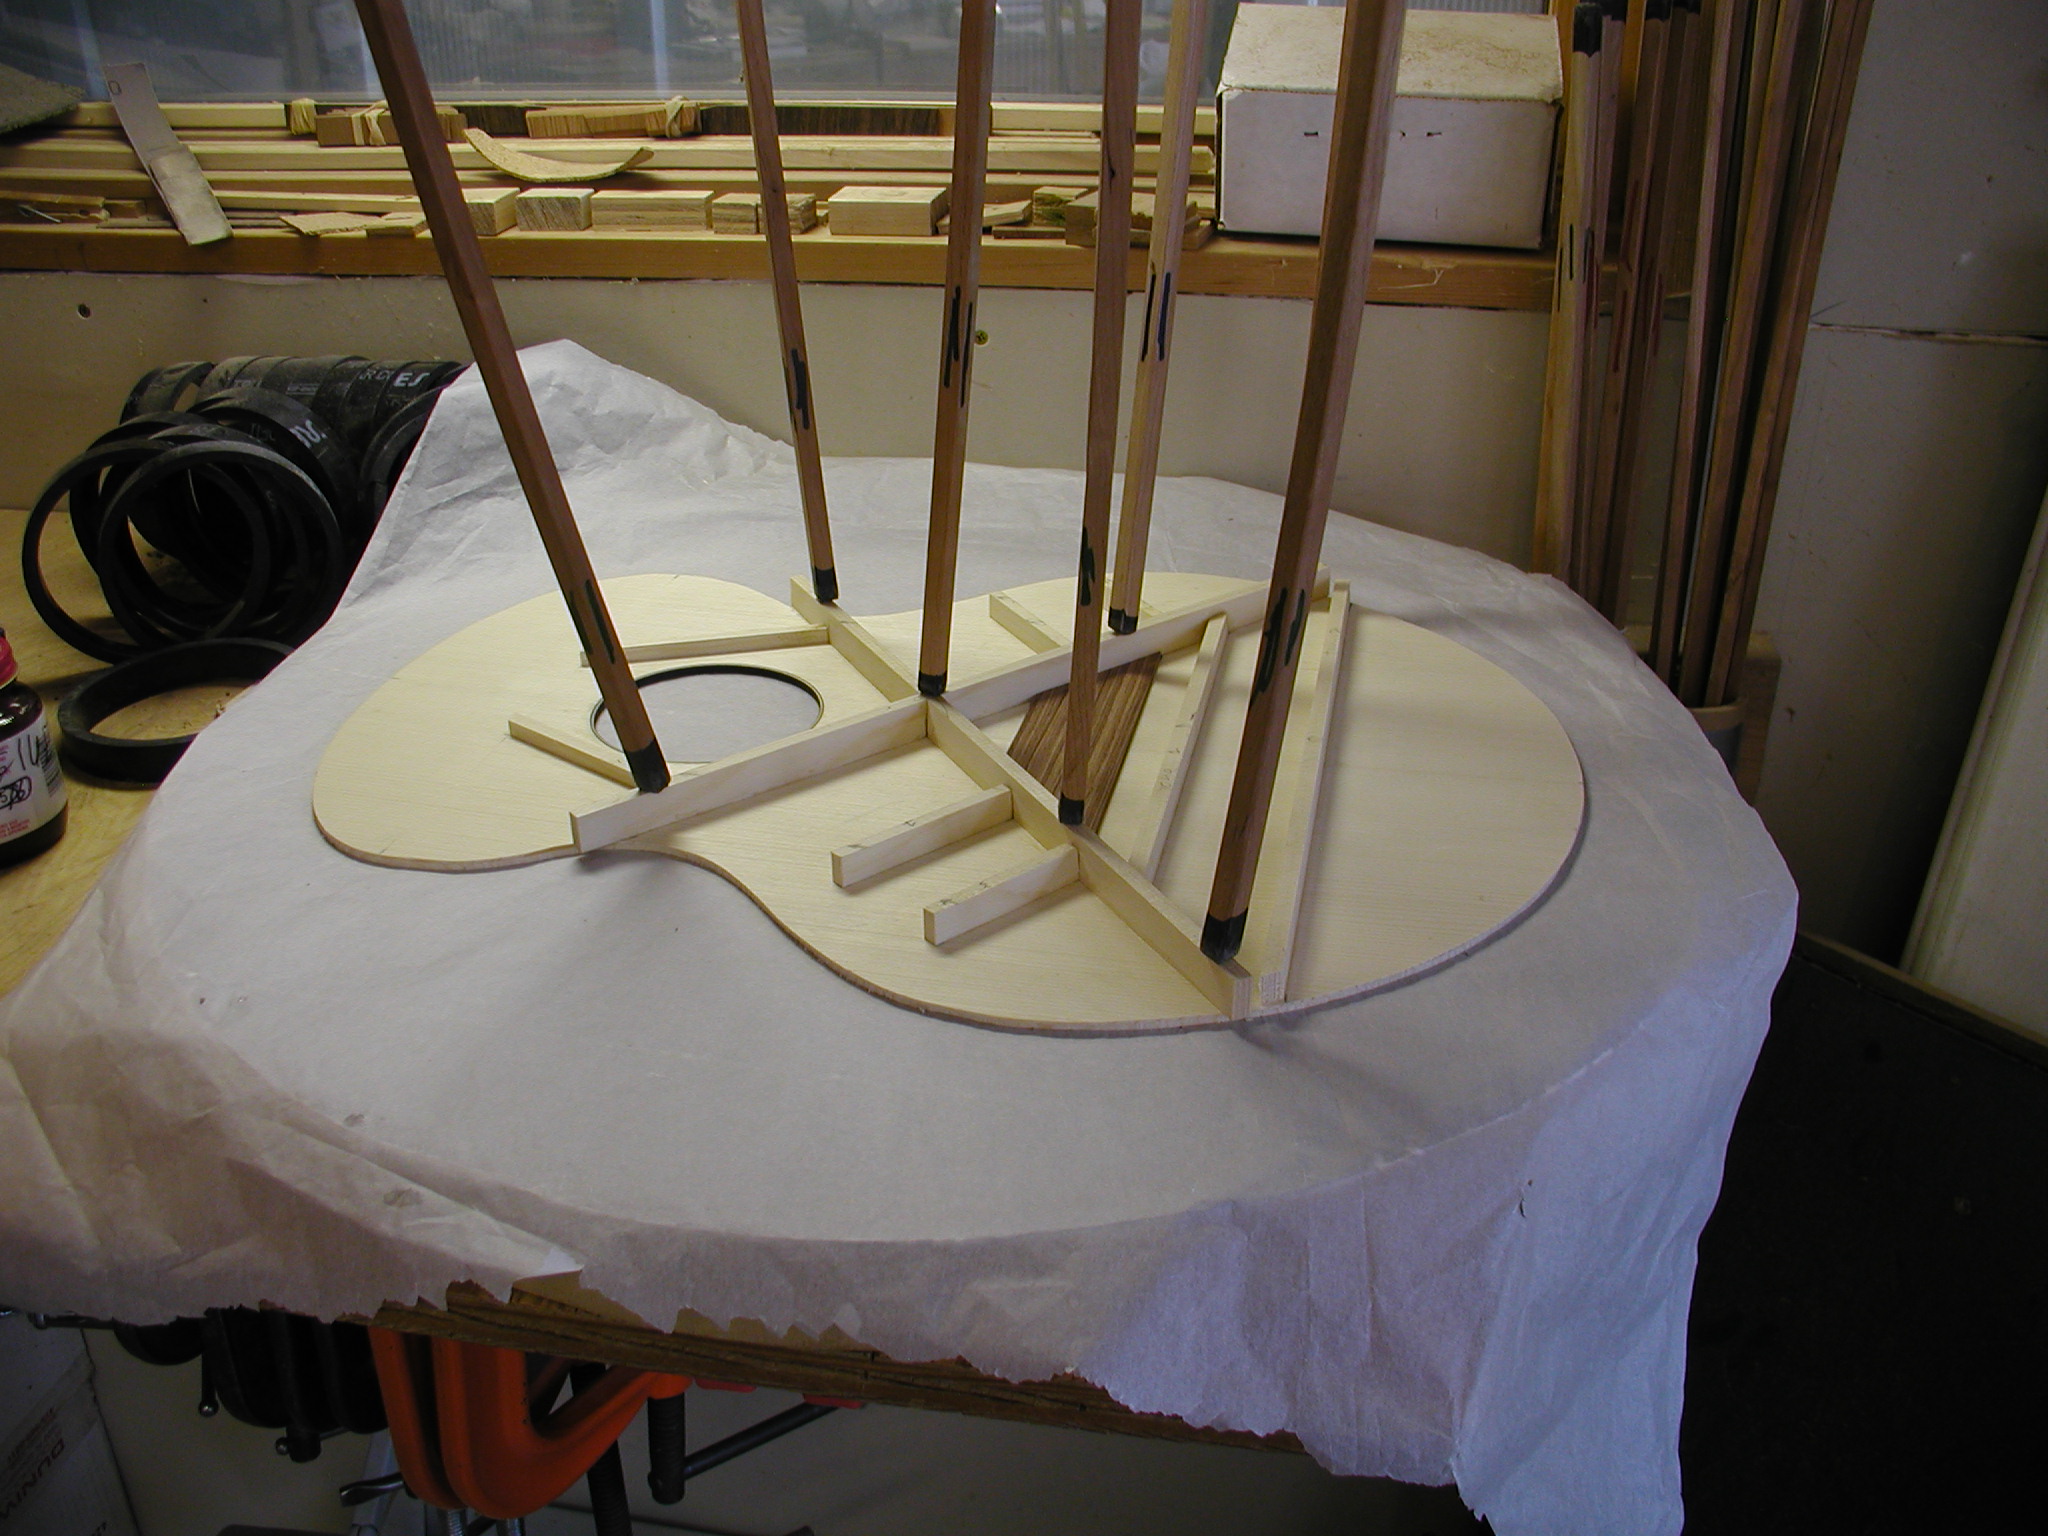
Back to the top, I notch and glue up the X-brace. I rough out the curvature on a belt sander and then finalize it with the hollow form sanding. Then all the little braces go on that will intersect the X and are trimmed so that the X goes in with a slight force fit. Then the X gets glued down and last of all the transverse bar across the top above the sound hole.
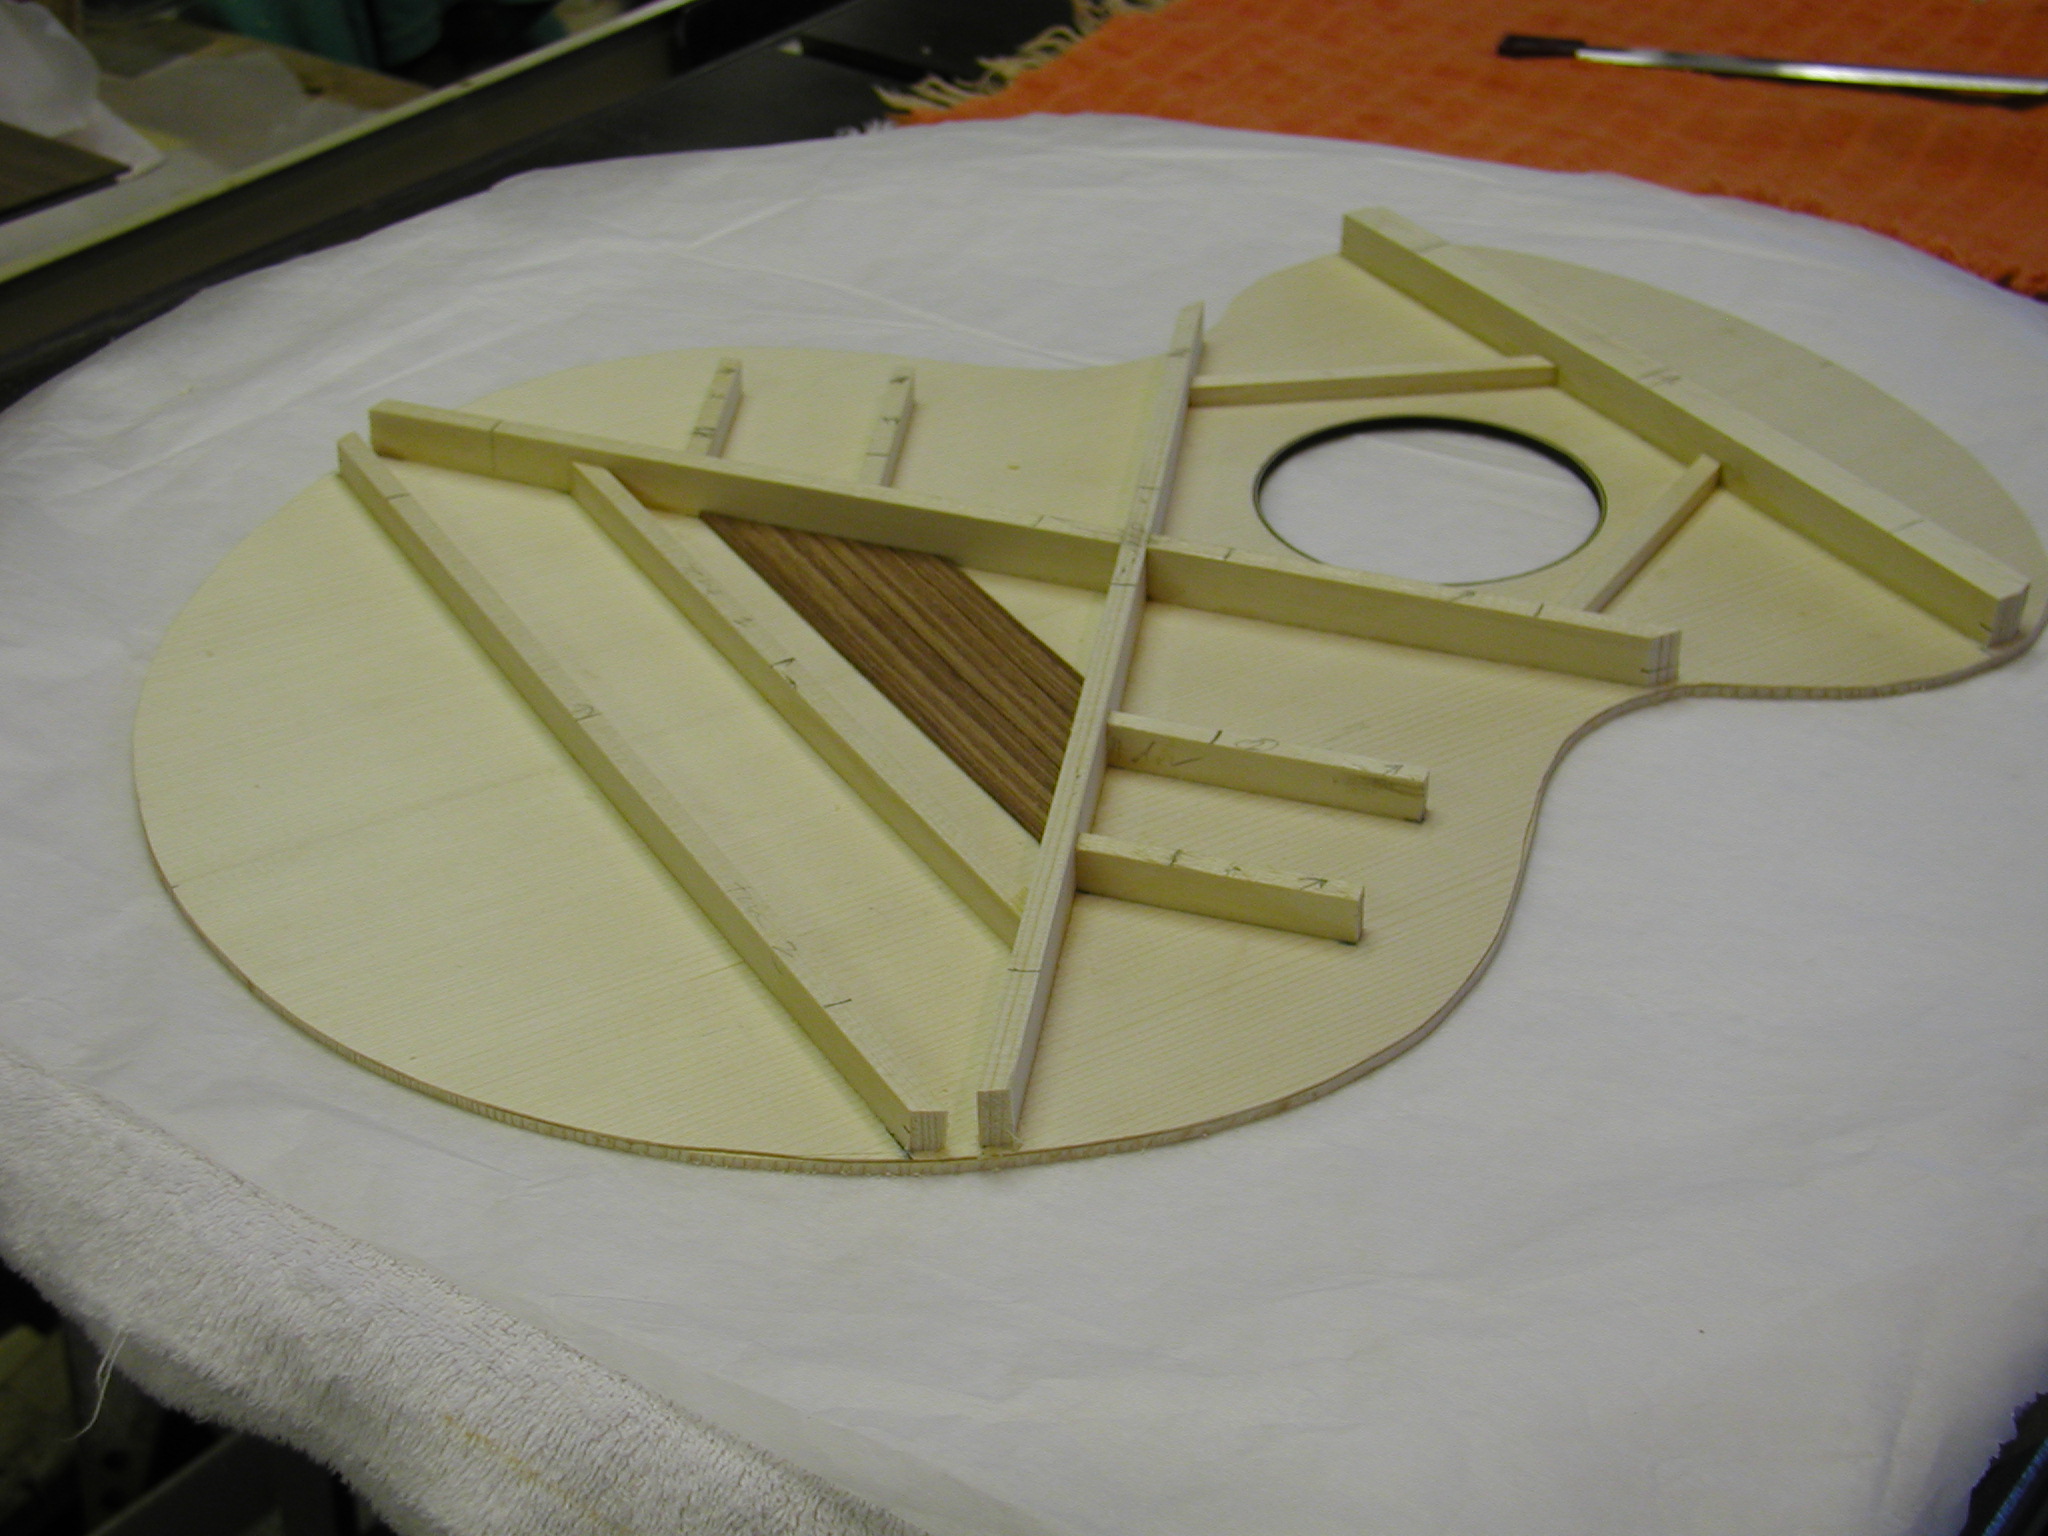
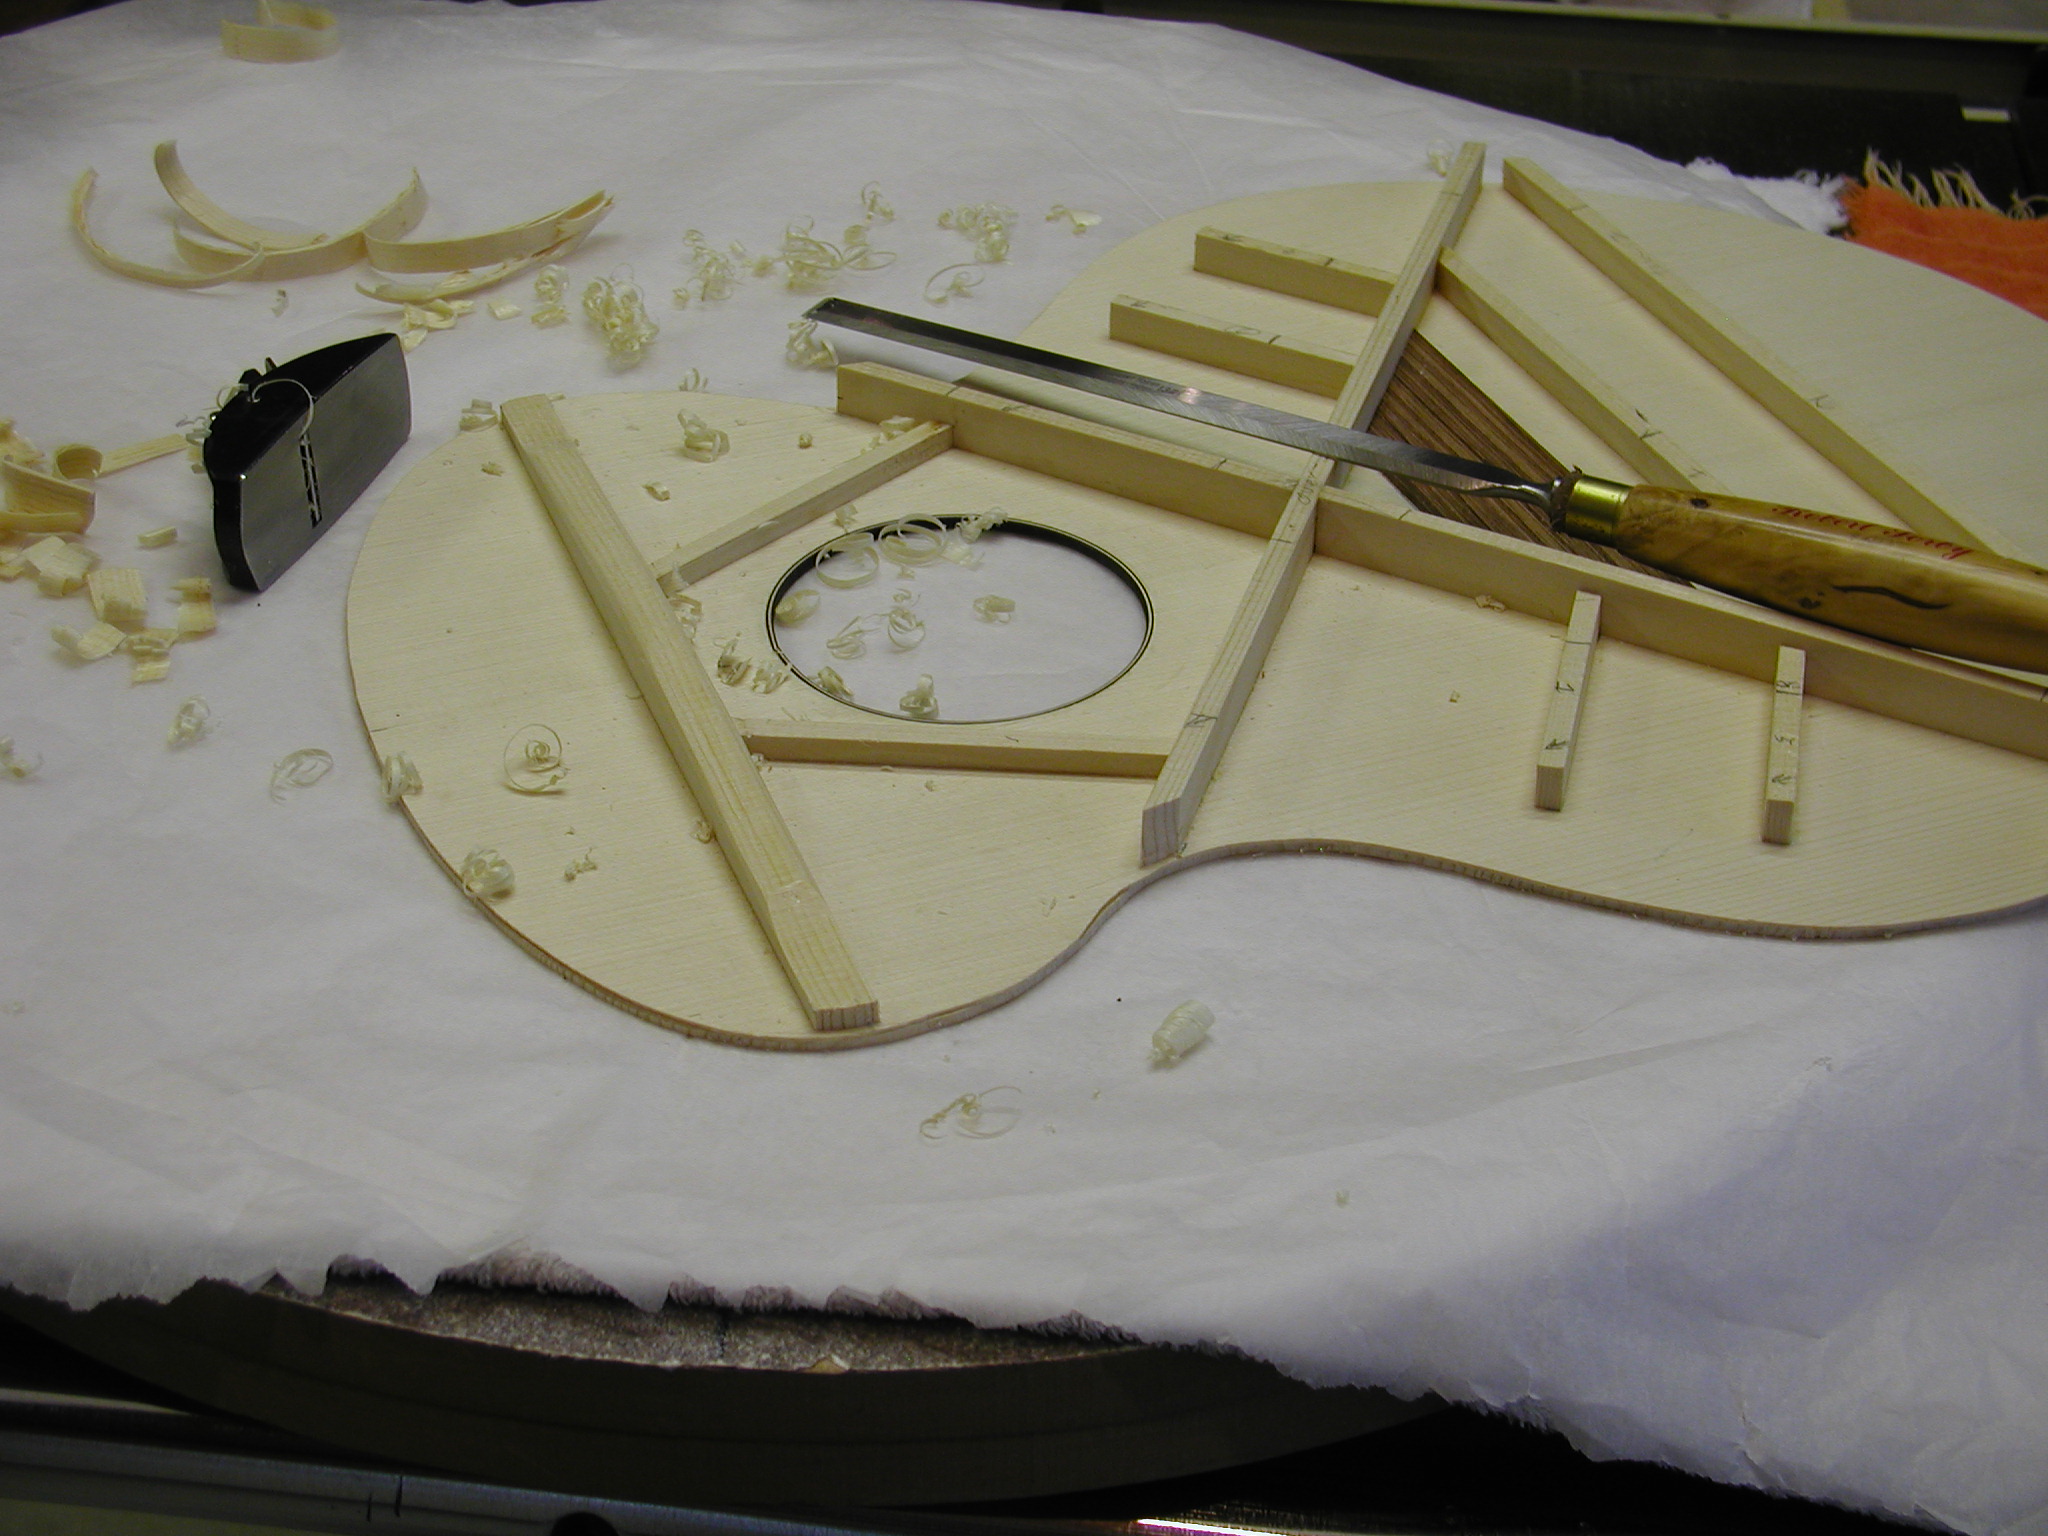
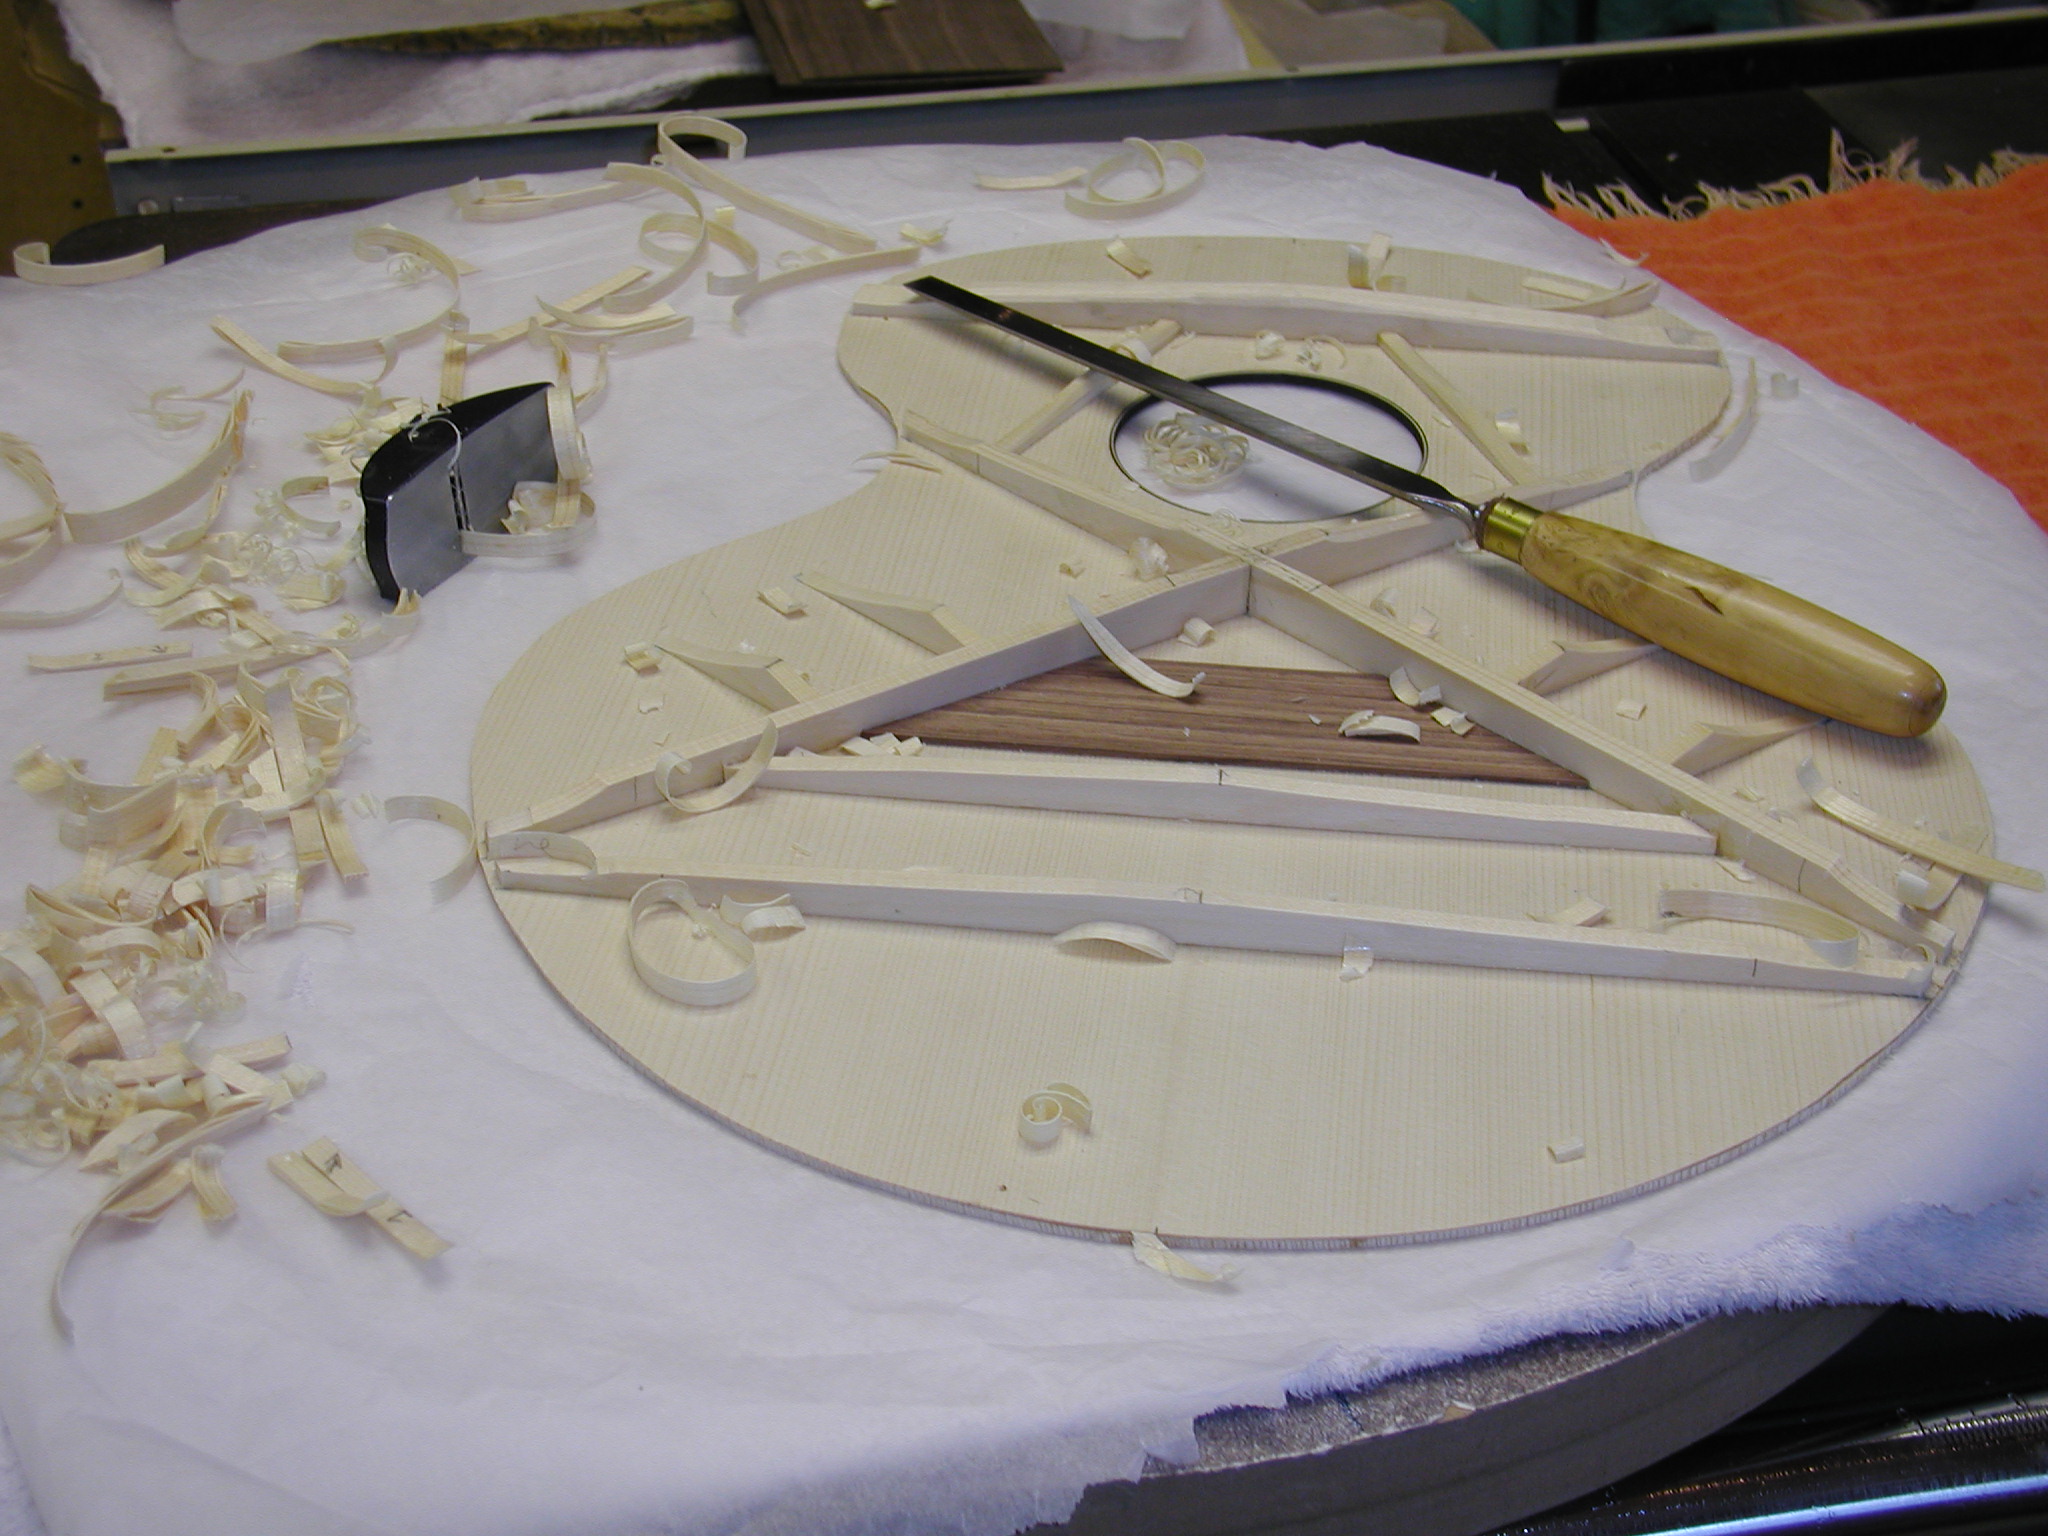
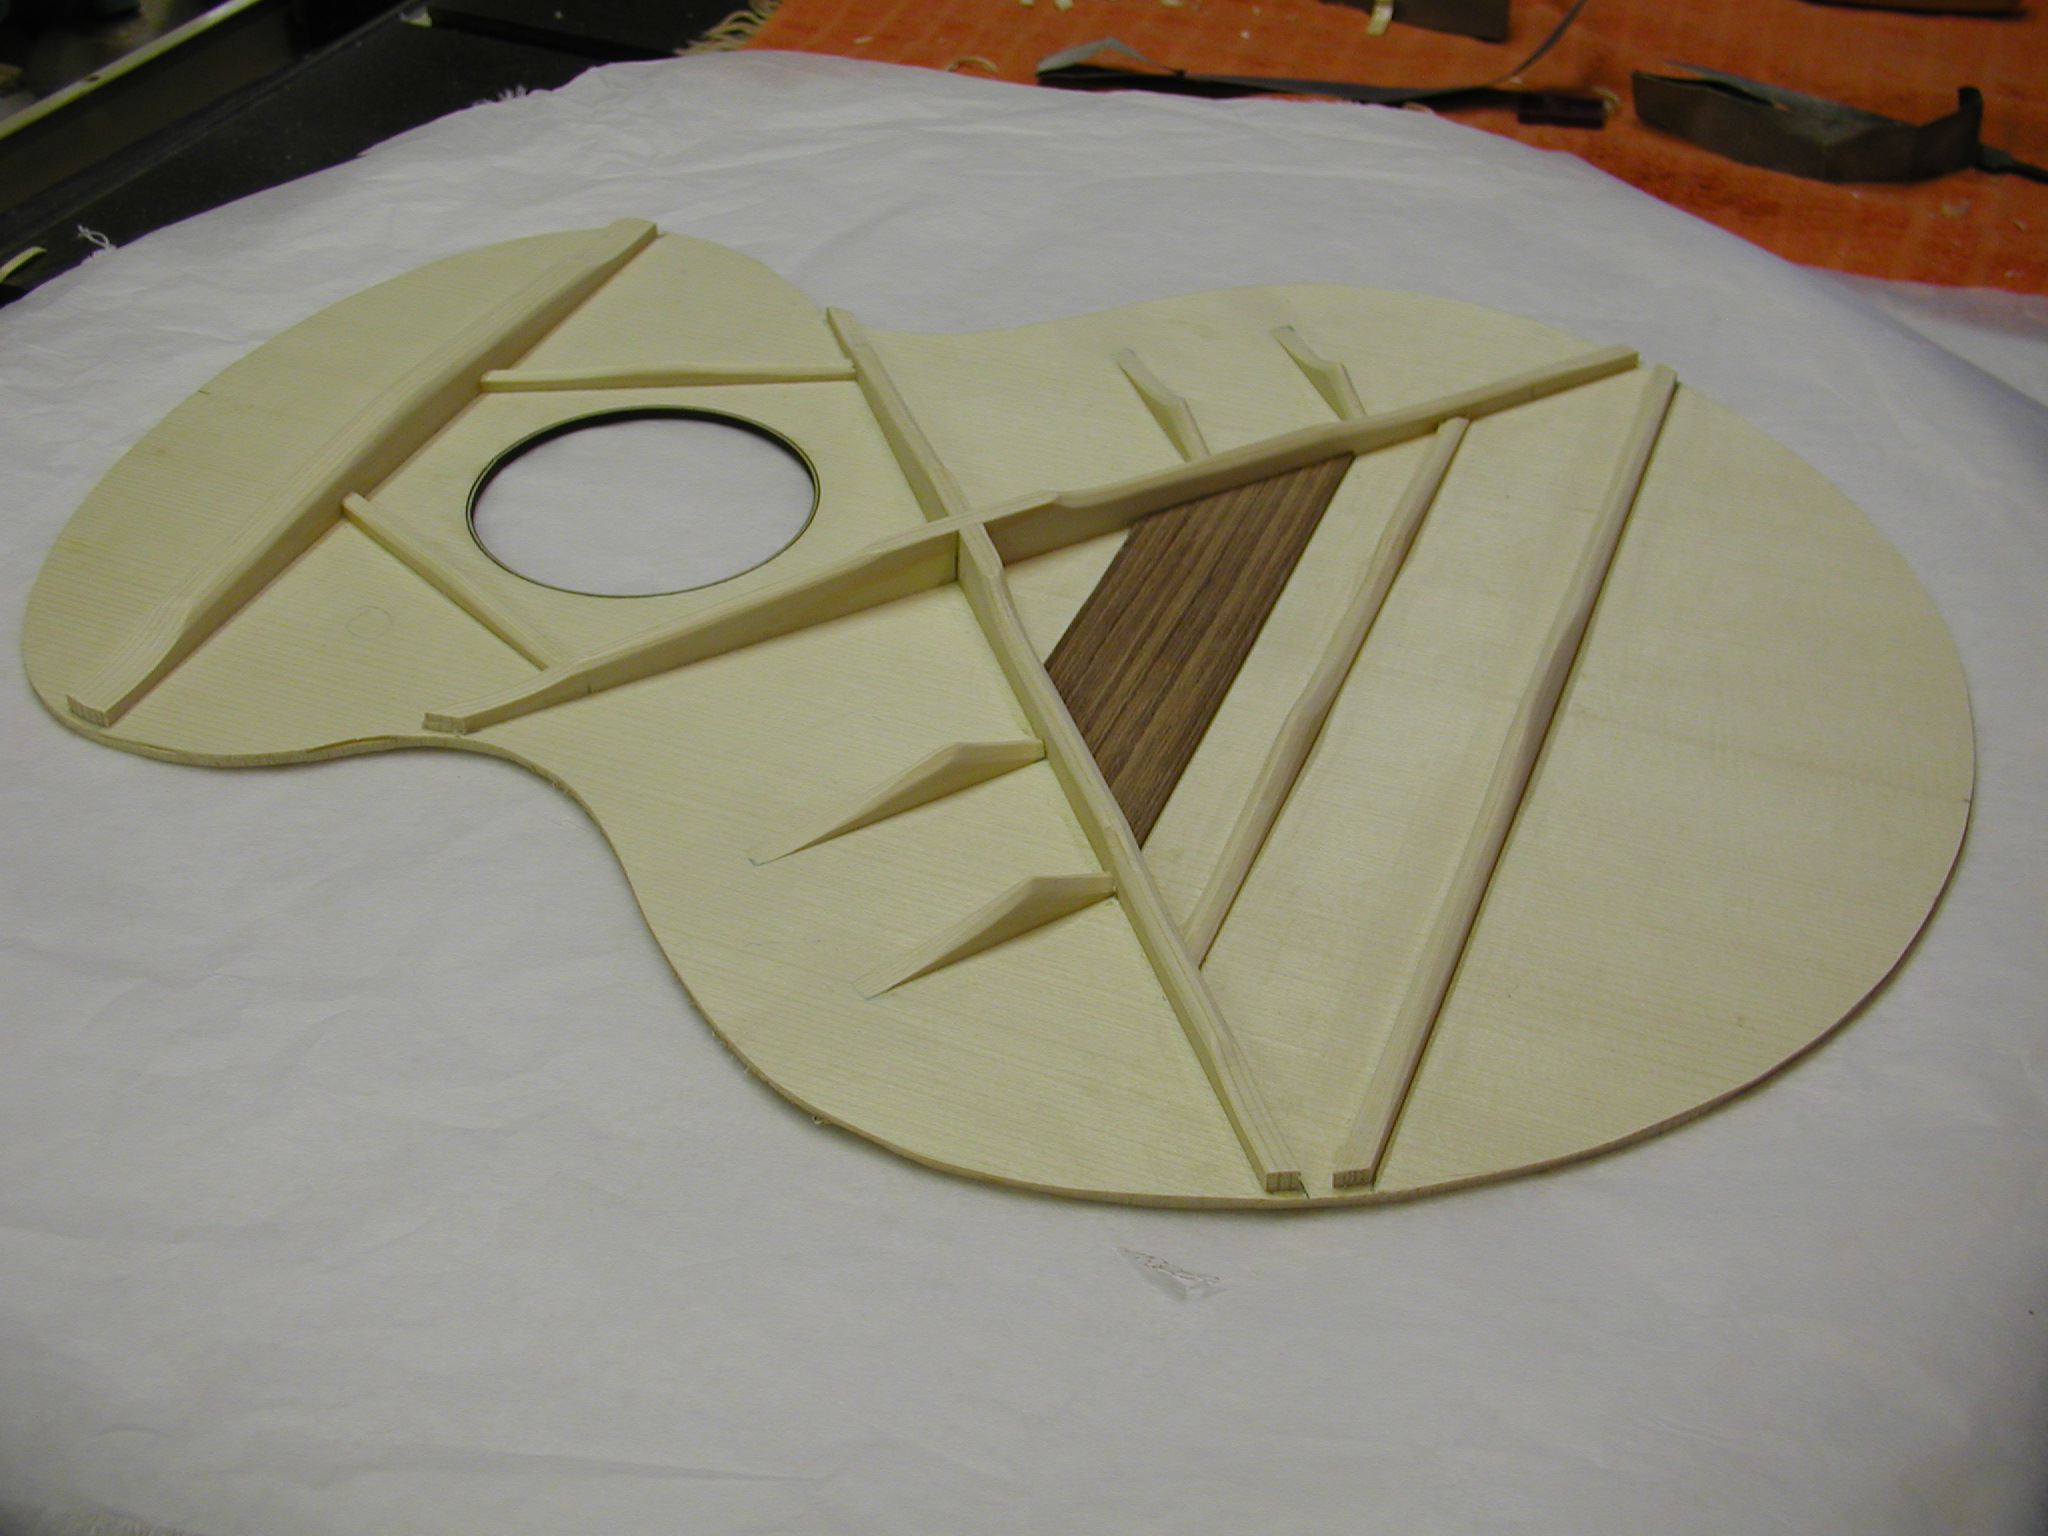
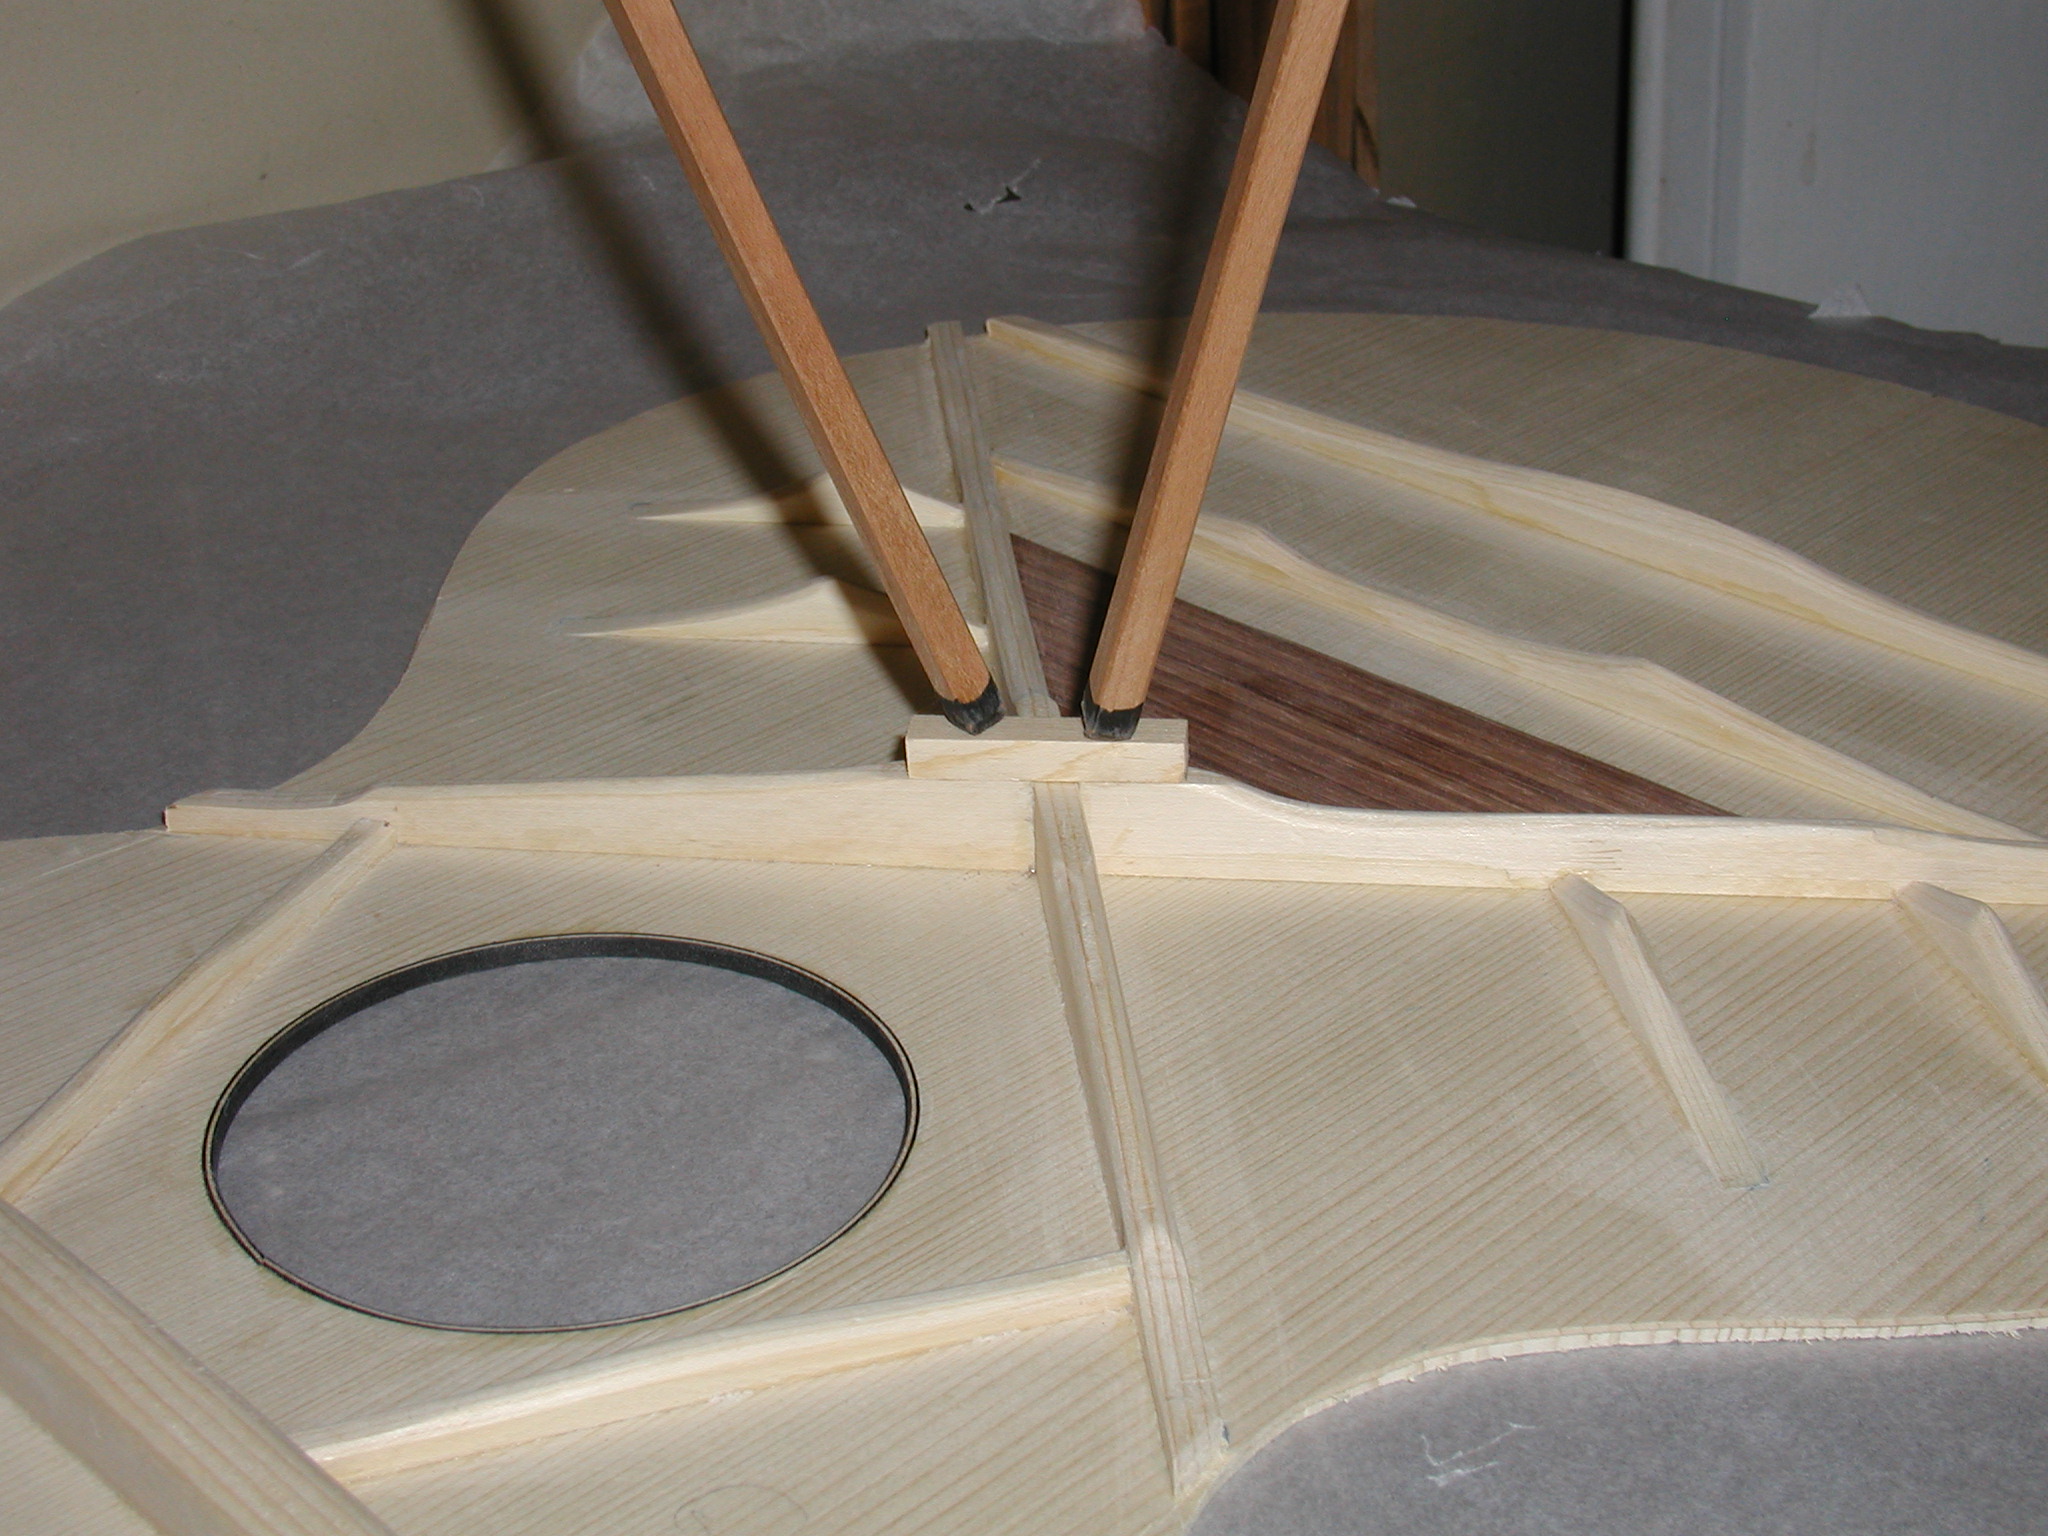
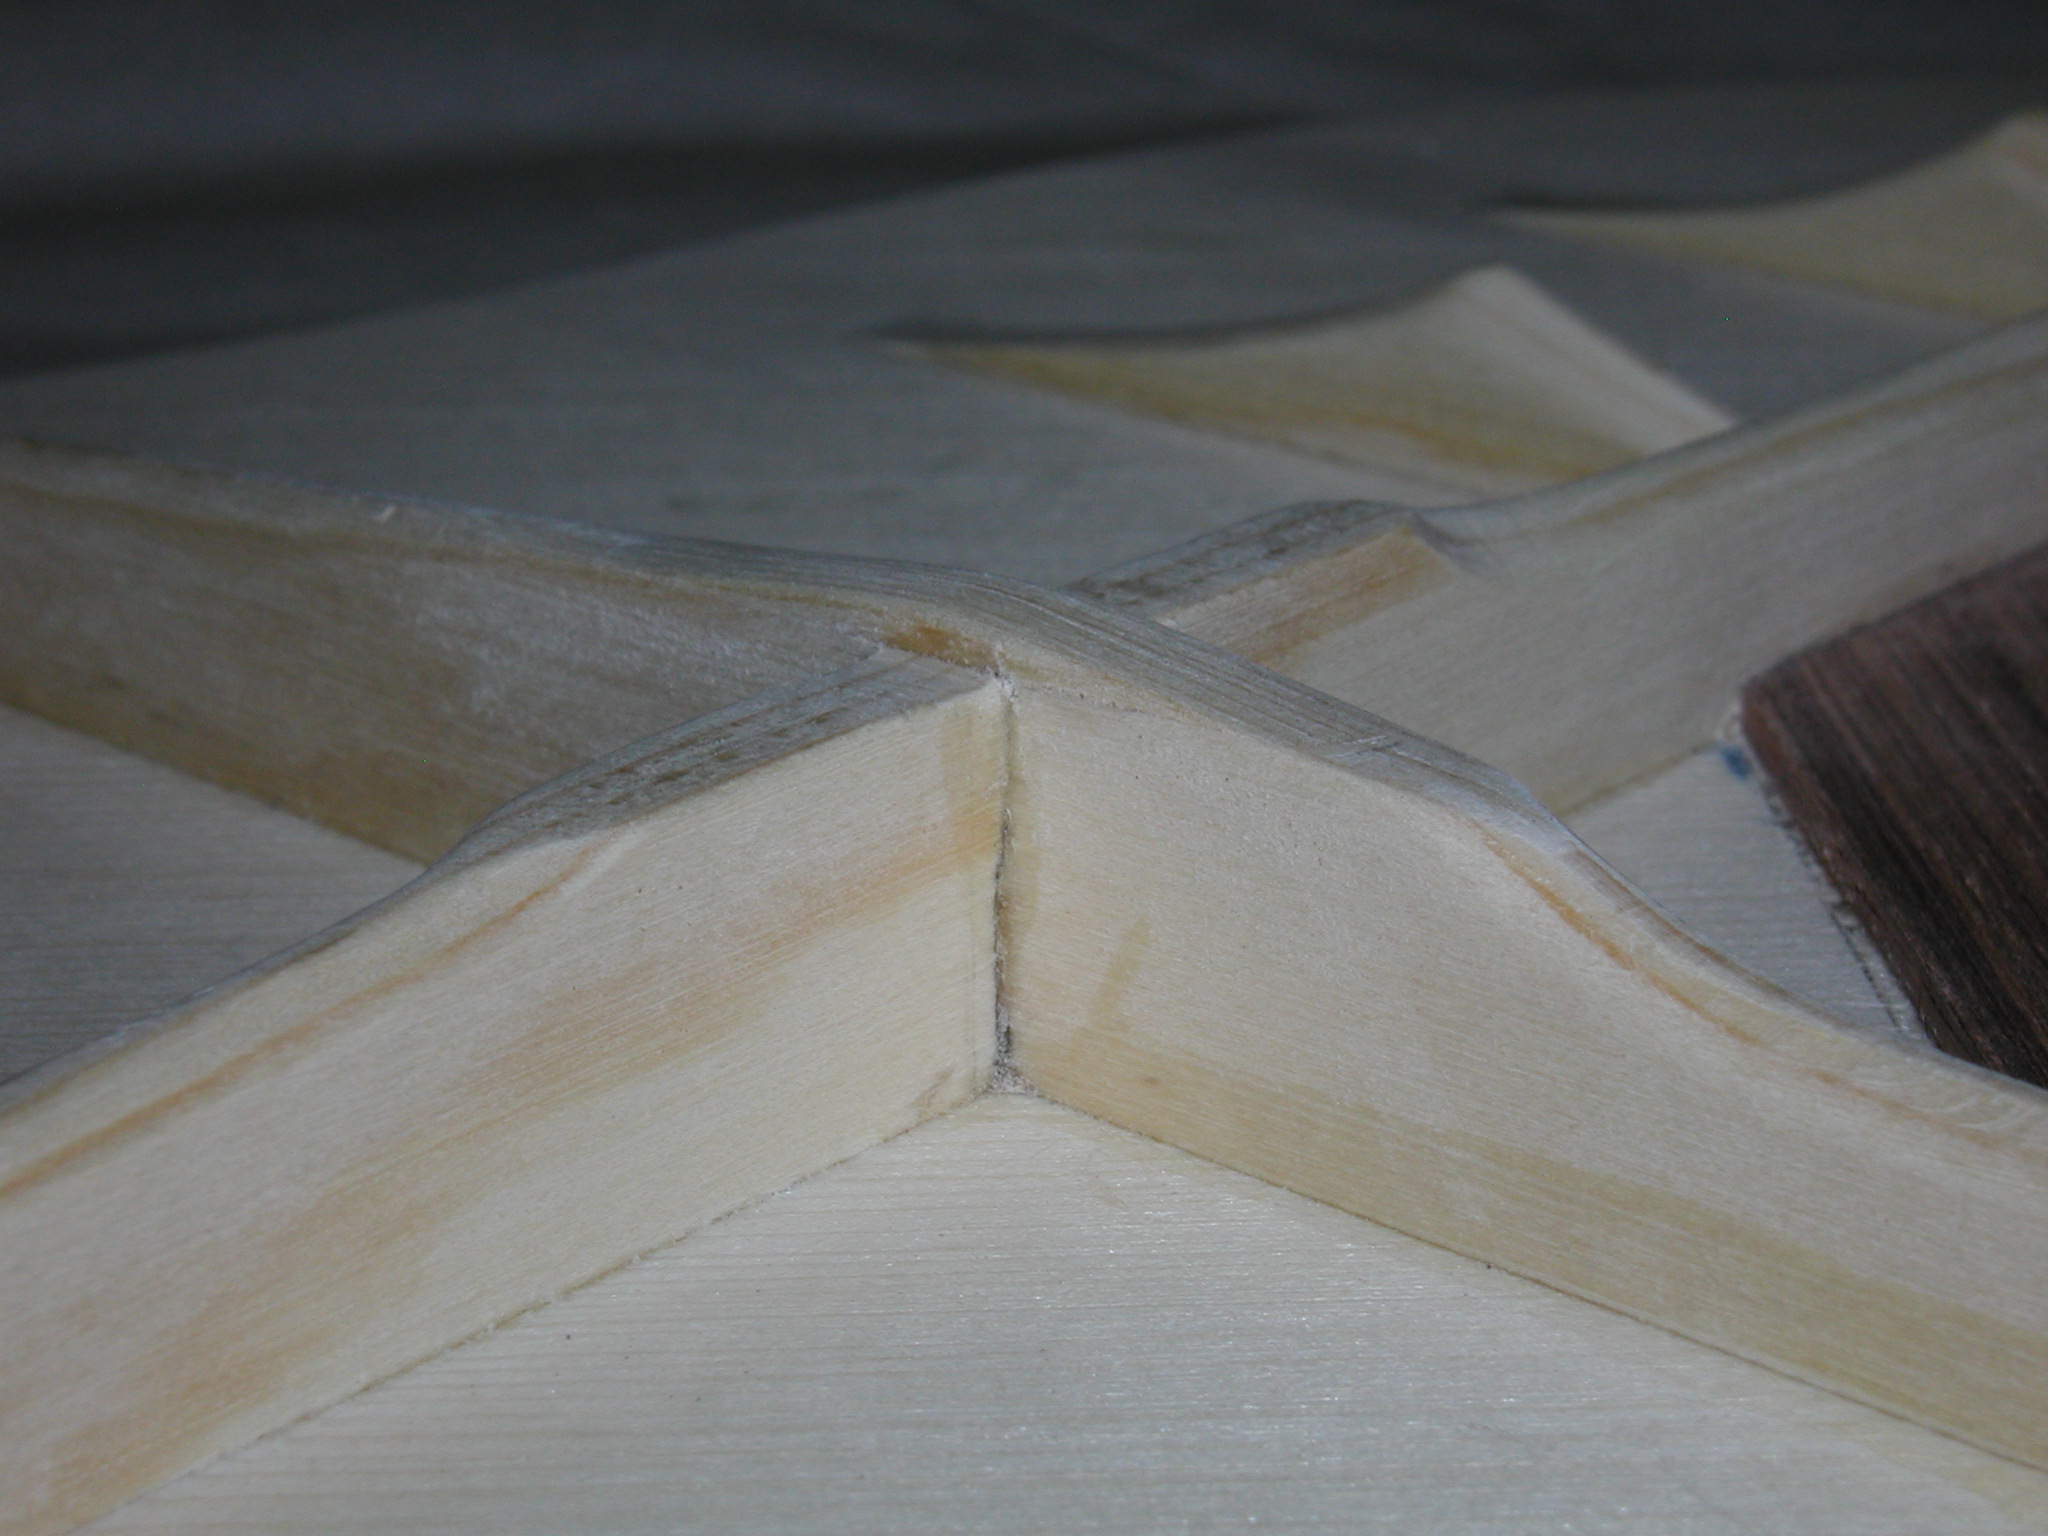
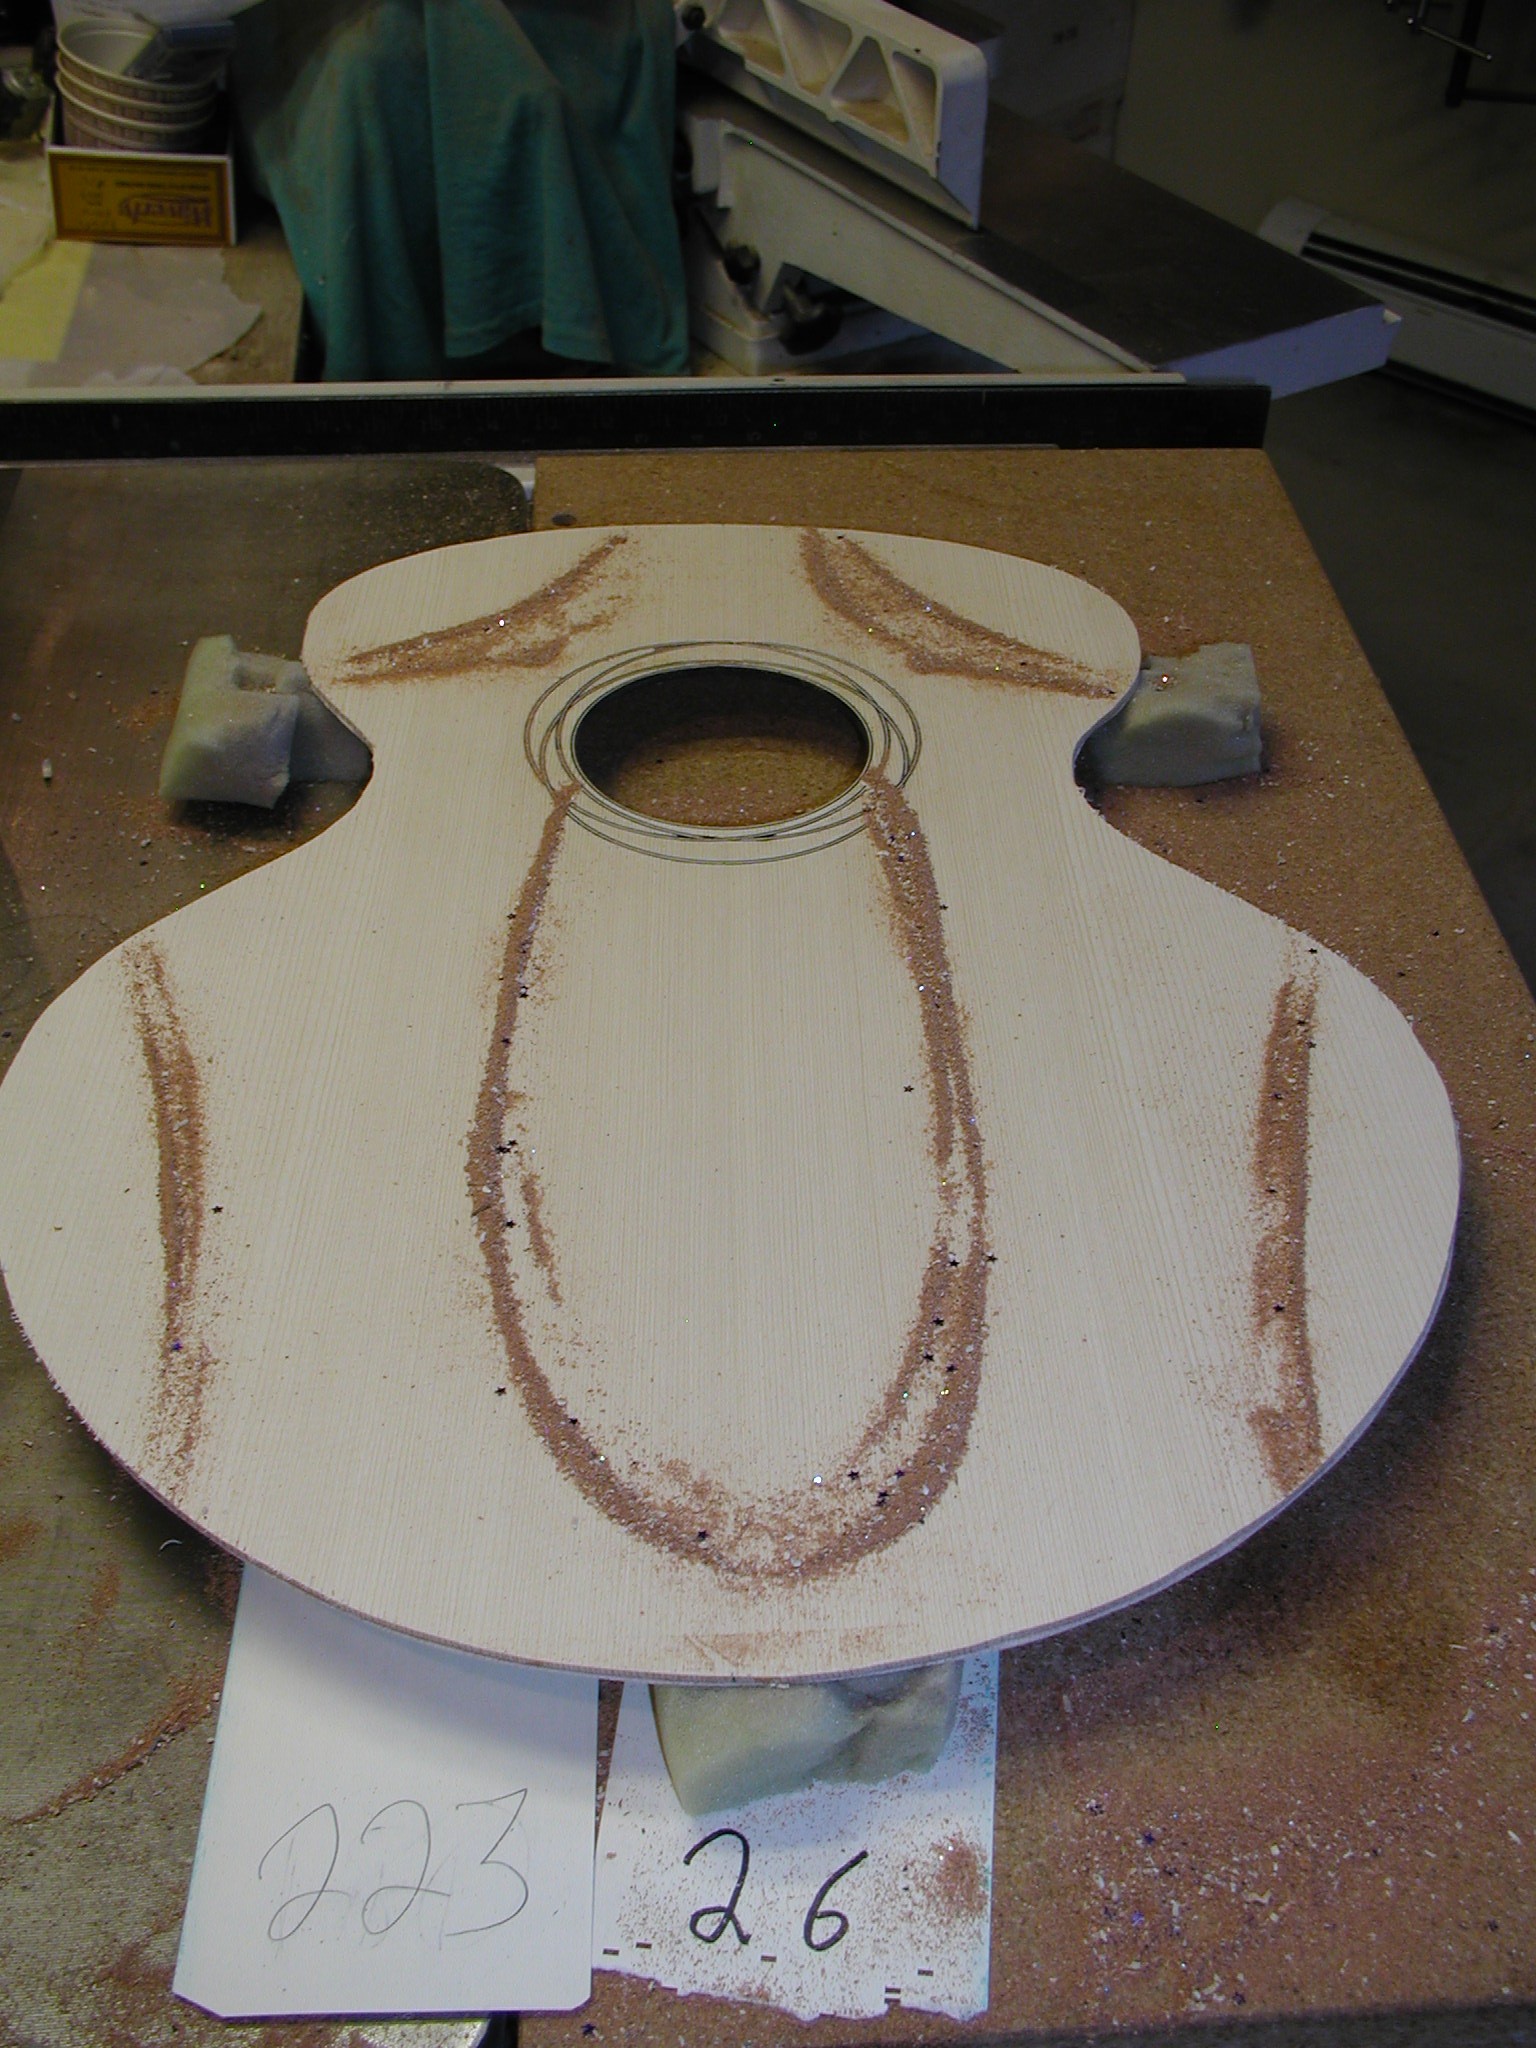
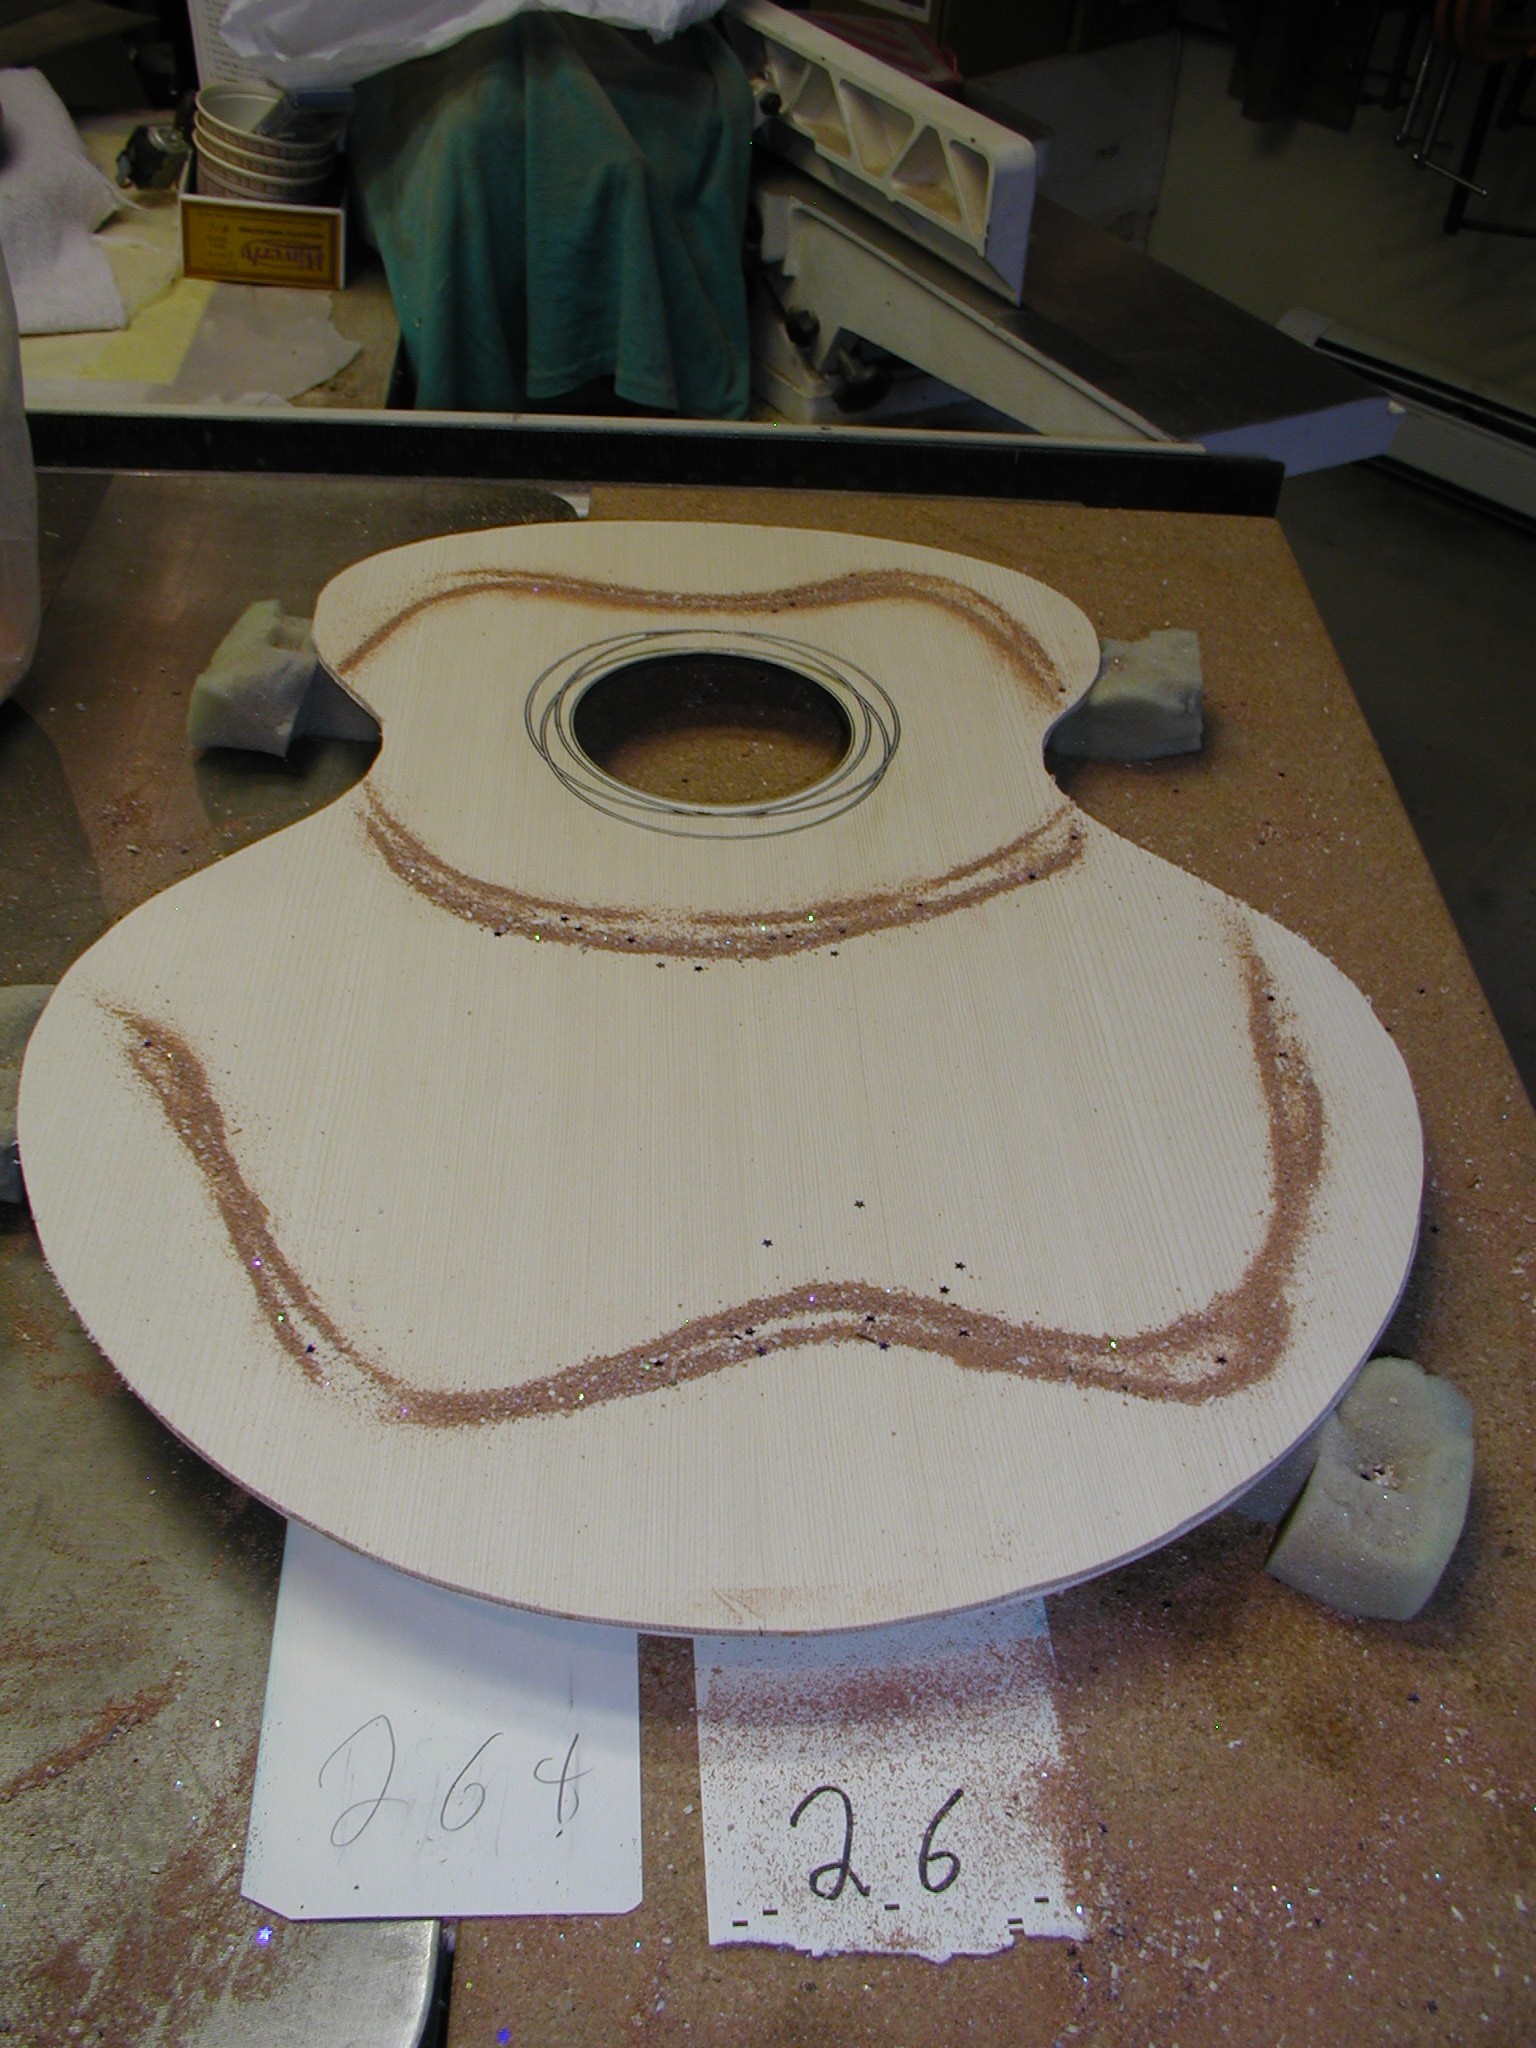
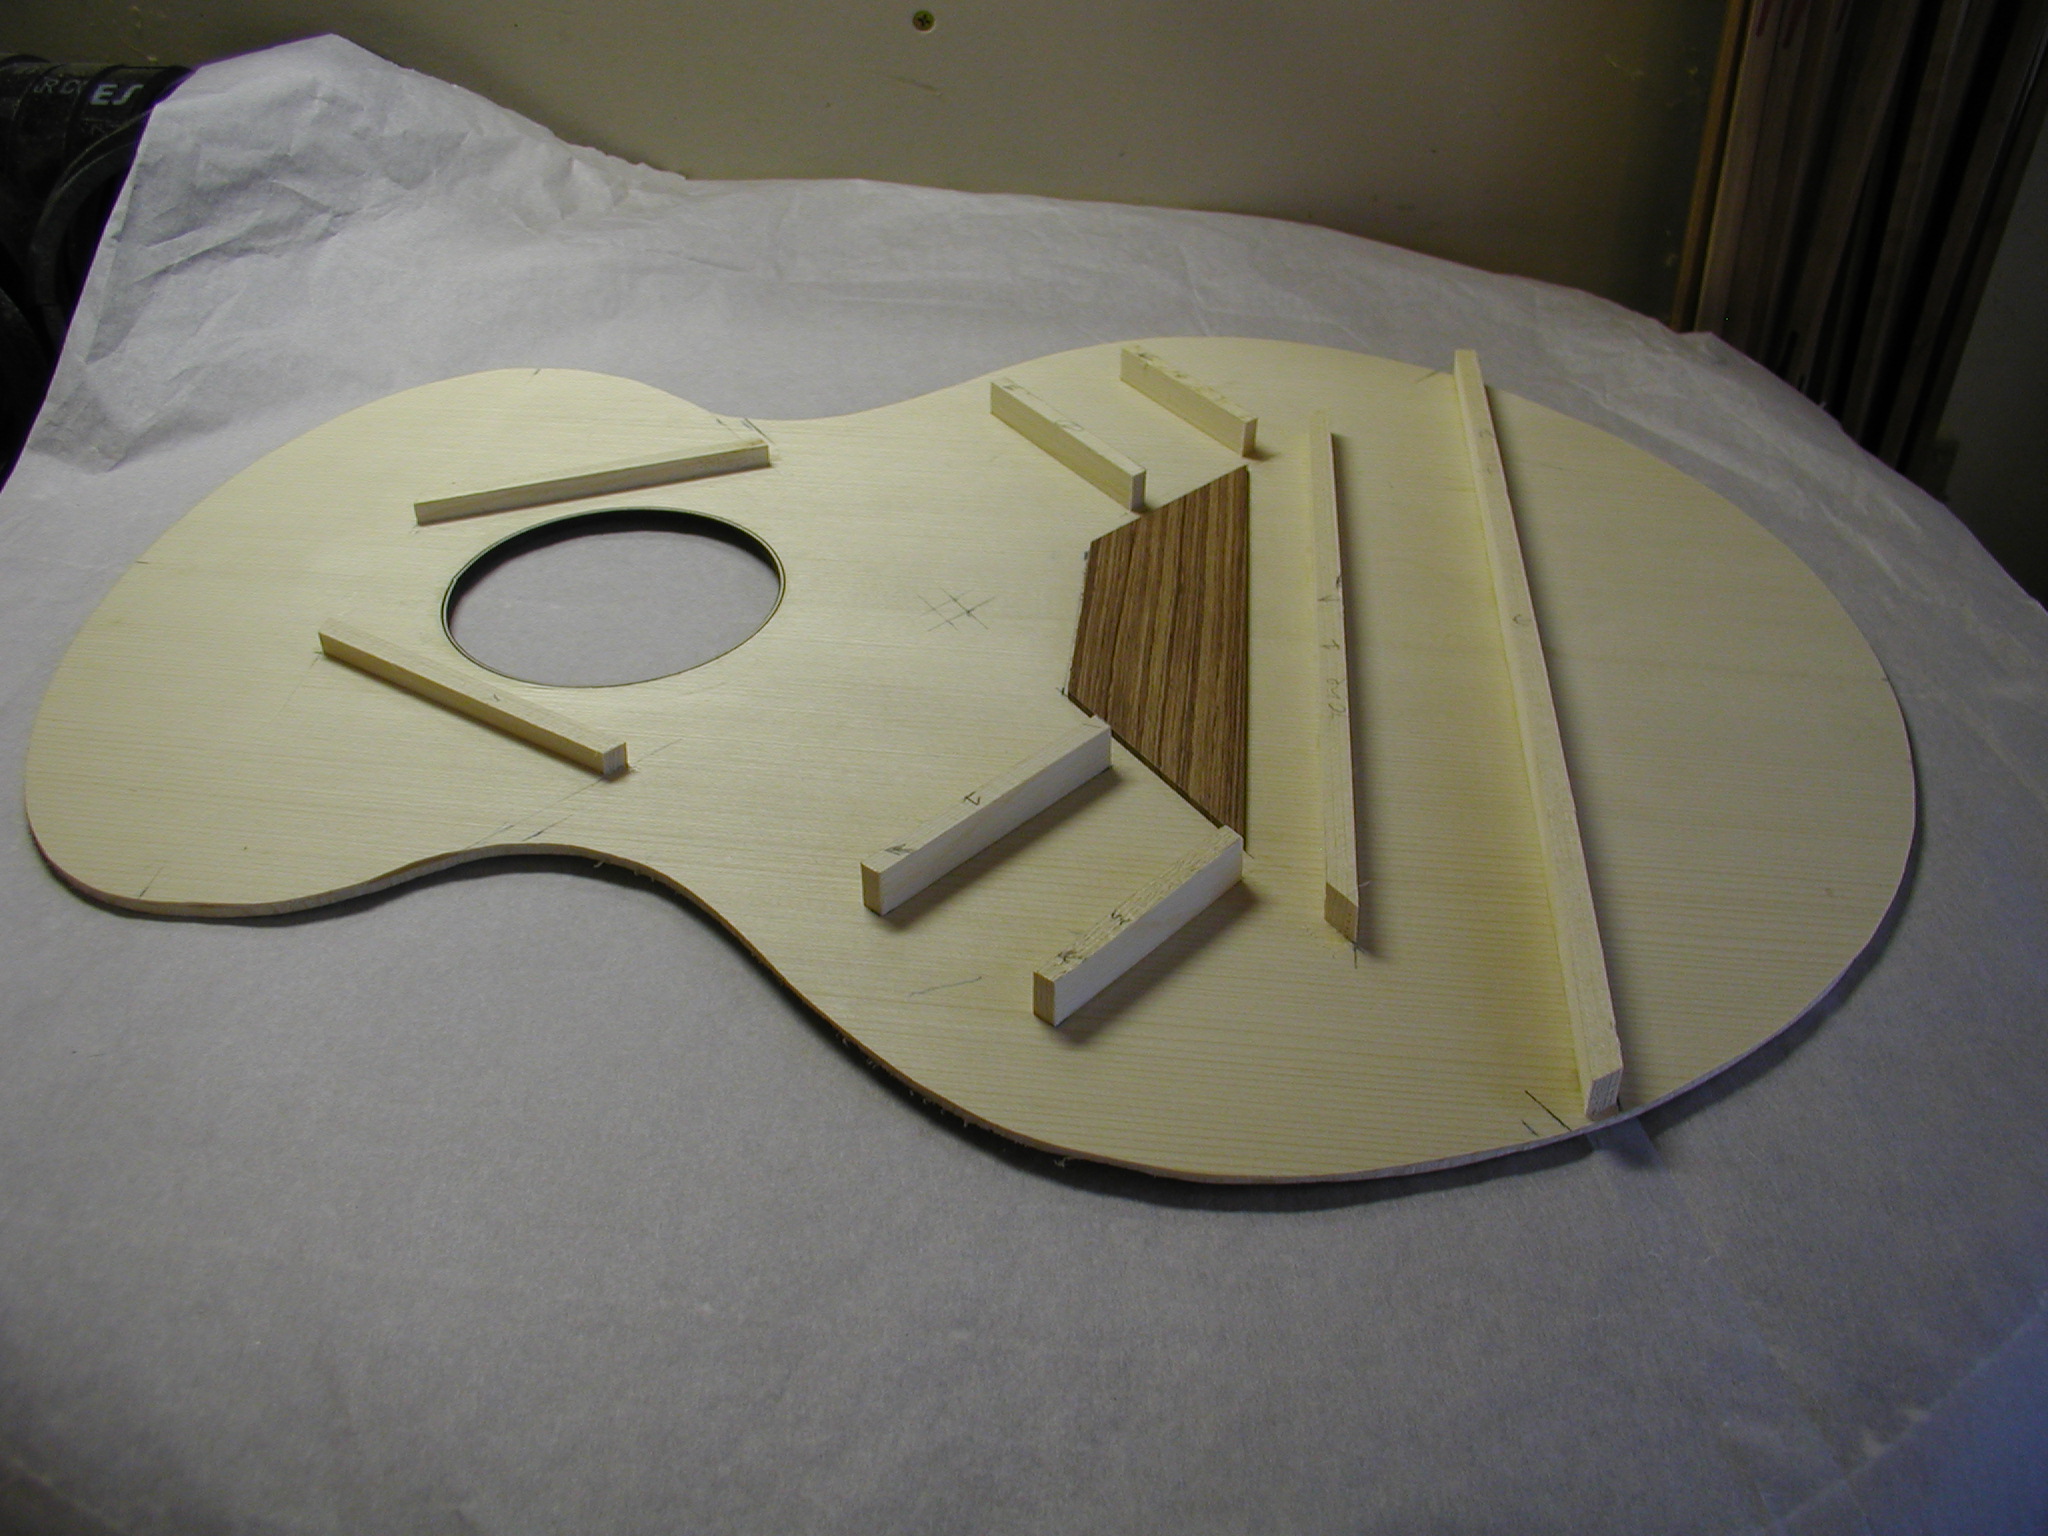
Carving time. This is one of the things that I truly enjoy about building, the carving and tuning of the plates. From experience I know for a particular model how to rough carve the braces. You can see in the first image where I mark out particular points in pencil. I then roughly approach them with the small plane and a pattern maker's chisel. I like the long reach of this tool and the great control you have using it two handed. As I get close I start tapping and listening to the various points on the top always holding in the same position. In the fourth and fifth images you can see a small pencil circle on the treble side of the sound hole to help grab it in the same place each time. I am listening not for a particular note or pitch, but for a multitude of notes and complexity of the sound envelope. This is something that needs to be learned with practice. Having someone show you the first time helps to know what to listen for. Last of all I glue a little cleat across the open side of the X-brace notch. This helps keep the joint tight particularly if the instrument takes a blow.
In a similar way the back braces are carved listening for sort of an arpeggio of notes at the center points of the braces. Here however I do make the note at the center of the third brace, the one that would be opposite the bridge on the top, ring to a note that is at least a half step away from the note at the bridge on the top. This helps avoids "wolf" notes.
Now we have the plates done and I run more Chladni modes and record them.